Foolproof Salmon and Scallops Recipe

I ruined more scallops than I’d like to admit before I got this salmon and scallops recipe right. The first batch turned rubbery in under two minutes because the pan wasn’t hot enough. The second batch stuck so badly to the skillet that half the crust stayed behind. It happened twice more before I figured out the real issue.
The problem wasn’t the recipe. It was moisture — on the scallops, in the pan, everywhere. Once I fixed that one thing, both proteins came out of the same skillet, at the same time, looking like they belonged on a restaurant plate.
I tested this exact method four times, changing only the pan temperature and how dry the scallops were going in. This version is the result: a garlic butter lemon sauce built in the same pan, ready in about 30 minutes, no second skillet required.
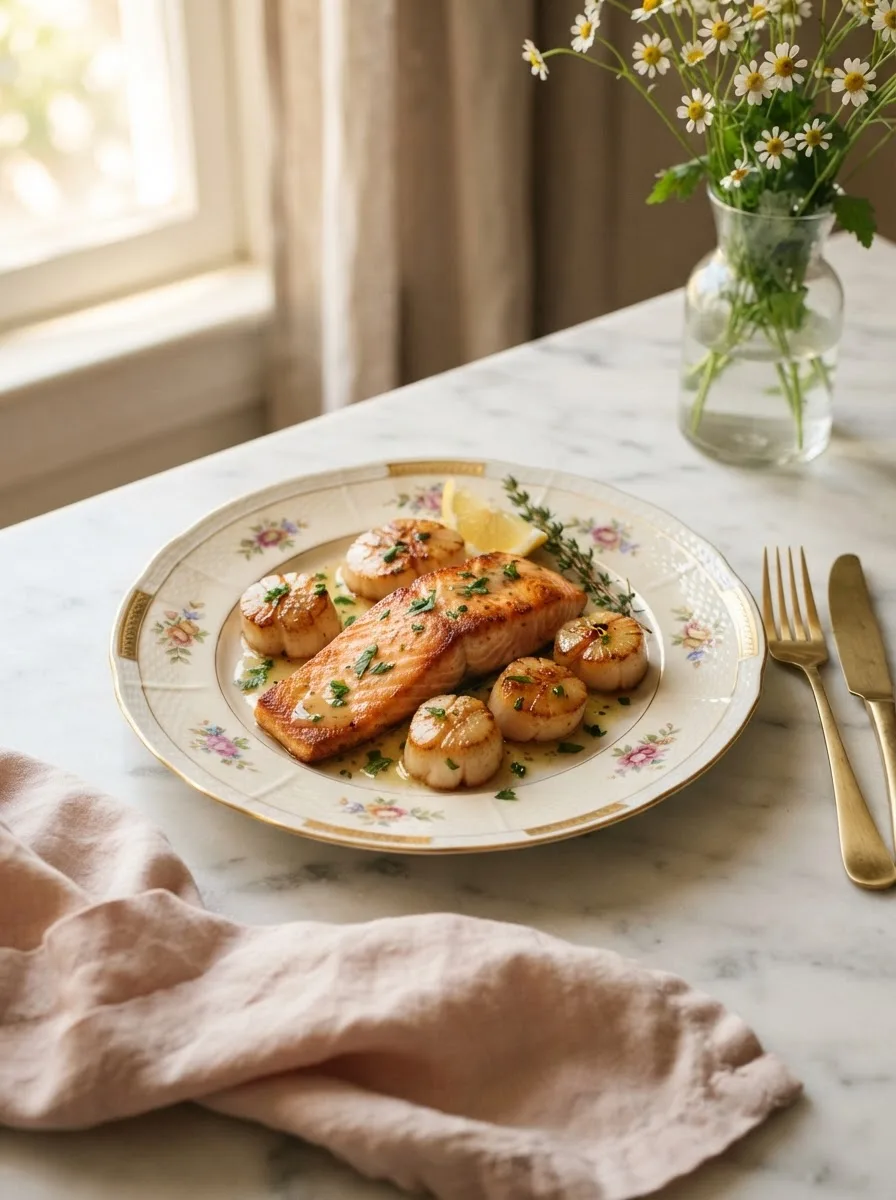
The salmon gets a deep golden crust without drying out in the center, and the scallops caramelize on both flat sides while staying tender in the middle — the way they do at a steakhouse, not the way they turn out at home most of the time. The whole dish comes together in one pan, which means one set of dishes and a sauce that’s already seasoned with everything that browned before it.
★★★★★ “I’ve been intimidated by scallops for years. Followed this exactly and got a real sear on the first try — no gray, rubbery mess. My husband thought I ordered from a restaurant.” — Dana M., recipe tester (pre-launch)
Why You’ll Love This Salmon and Scallops Recipe
- One pan, two proteins: The salmon and scallops cook in the same skillet in sequence, and the sauce is built from the same browned bits left behind — no extra dishes, no separate sauce pot.
- A real sear, guaranteed: The method is built around the one variable that ruins most home versions of this dish — moisture — so the crust actually forms instead of steaming off.
- Ready in 30 minutes: This isn’t a weeknight compromise dressed up as a date-night dish. It’s genuinely fast enough for a Tuesday and nice enough for company.
- Forgiving sauce, precise protein: The garlic butter lemon sauce has some wiggle room. The searing steps don’t — and I’ll tell you exactly where the line is.
Key Ingredients
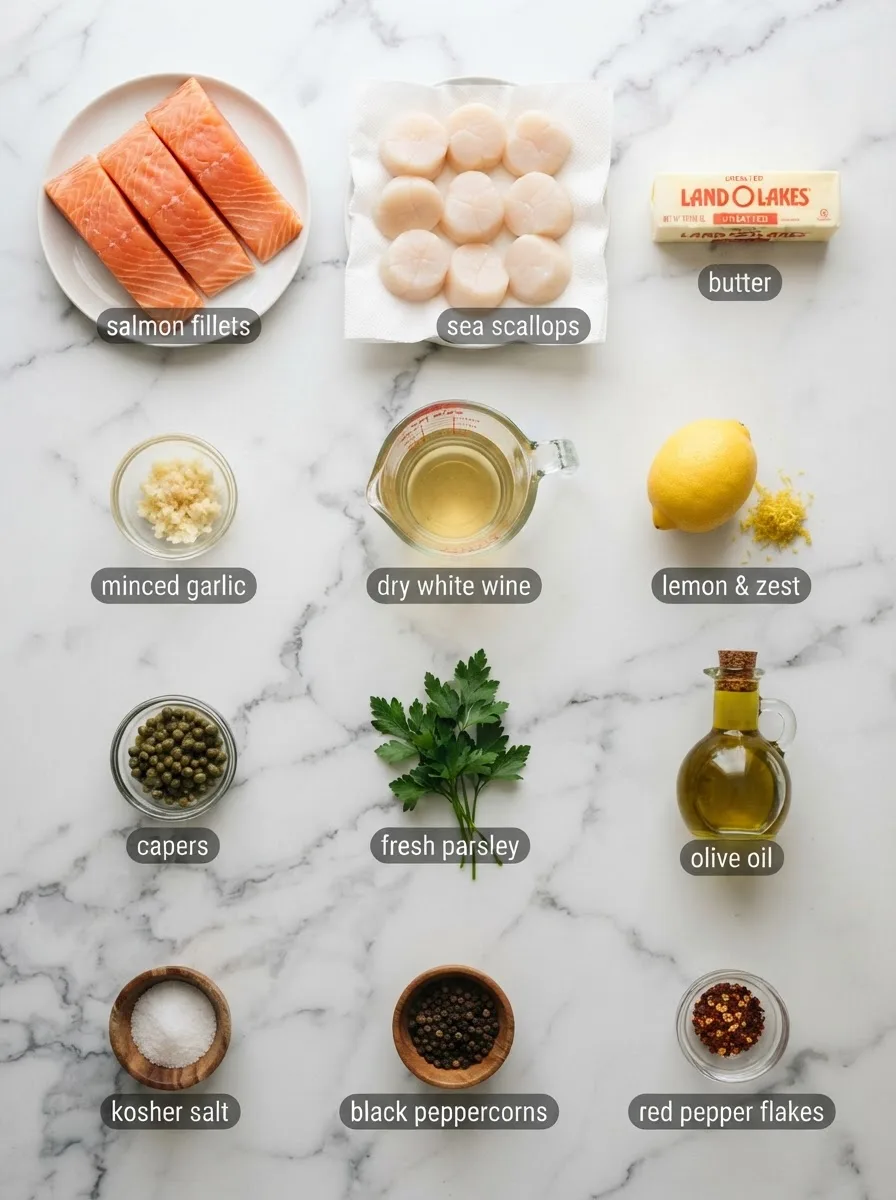
Sea scallops (1 lb / 450g, about 12–16 depending on size). Buy “dry-packed” scallops if the label offers it — this means they haven’t been treated with a phosphate solution that adds water weight and makes them nearly impossible to sear. Wet-packed scallops will steam instead of brown, no matter how hot your pan is.
Salmon fillets (4, about 6 oz / 170g each). Skin-on holds together better in the pan, but skinless works fine if that’s what you have — just expect a slightly shorter cook time on the first side. Look for fillets of even thickness so they finish cooking at the same rate.
Unsalted butter (4 tbsp / 56g, divided). Butter browns and burns faster than oil, which is exactly why it goes in during the sauce step, not the searing step. Using it too early is one of the most common reasons the crust turns bitter instead of golden.
Dry white wine (¼ cup / 60ml). This deglazes the pan and pulls up all the caramelized bits left behind by the salmon and scallops — that’s where most of the sauce’s flavor actually comes from. Low-sodium chicken broth works as a substitute; the sauce will taste slightly less bright but still good.
Lemon (1 large, zested and juiced). Both the zest and the juice go in — the zest carries most of the aromatic oil, and the juice balances the richness of the butter. Bottled lemon juice works in a pinch but skip the zest if that’s what you’re using.
Capers (2 tbsp, drained). Optional, but they add a briny pop that cuts through the butter. If you don’t have them or don’t like them, leave them out — the sauce won’t suffer for it.
Ingredient Note: Pat the scallops completely dry with paper towels right before they go in the pan — not five minutes before, right before. Any moisture on the surface turns to steam the second it hits hot oil, and steam is the enemy of a crust.
Equipment You’ll Need
- A 12-inch stainless steel or cast iron skillet — either works, but avoid nonstick here. Nonstick pans don’t get hot enough to sear well, and the fond (the browned bits) that makes the sauce won’t form the same way.
- A thin metal fish spatula — a rubber or plastic spatula will tear the salmon skin and drag the scallop crust right off the pan. If you don’t own one, a regular metal spatula is the next best option.
- Tongs — for flipping the scallops individually without disturbing the ones still searing.
- An instant-read thermometer (optional but helpful) — takes the guesswork out of knowing when the salmon is done without cutting into it.
Controlling the Sear: Pan Heat and Scallop Dryness (A Controlled Test)
The single biggest variable in this recipe isn’t a measurement — it’s how hot the pan is and how dry the scallops are before they touch it. I tested this four times, changing only those two things, because that’s where every one of my early failures traced back to.
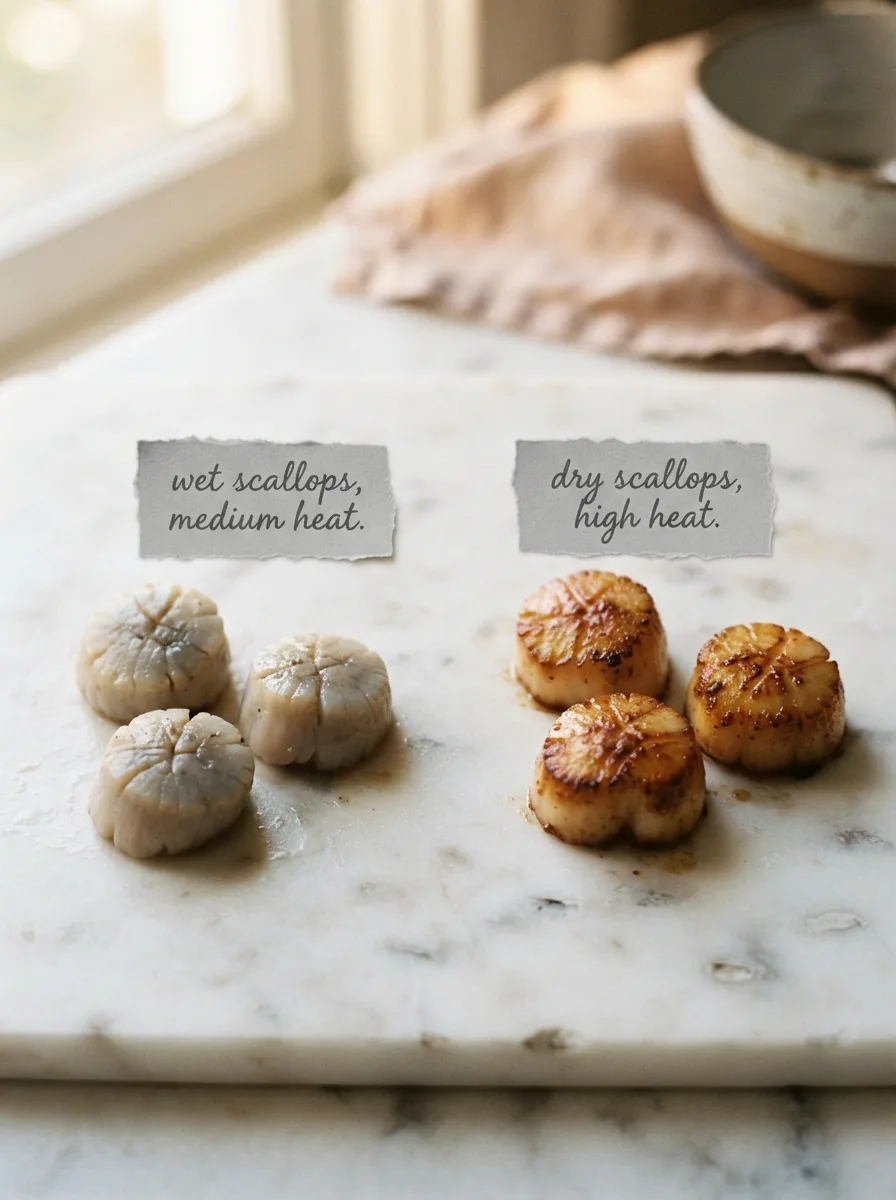
Test 1 — Wet scallops, medium heat: Pale gray exterior, no crust, released liquid into the pan. This is the batch that made me think scallops just weren’t for home cooking.
Test 2 — Dry scallops, medium heat: Slightly better, but the crust was patchy and took almost four minutes per side, which overcooked the centers.
Test 3 — Dry scallops, high heat, overcrowded pan: Good color on the scallops that had space, steamed and pale on the ones touching each other. Turns out crowding causes the same problem as skipping the pat-dry step.
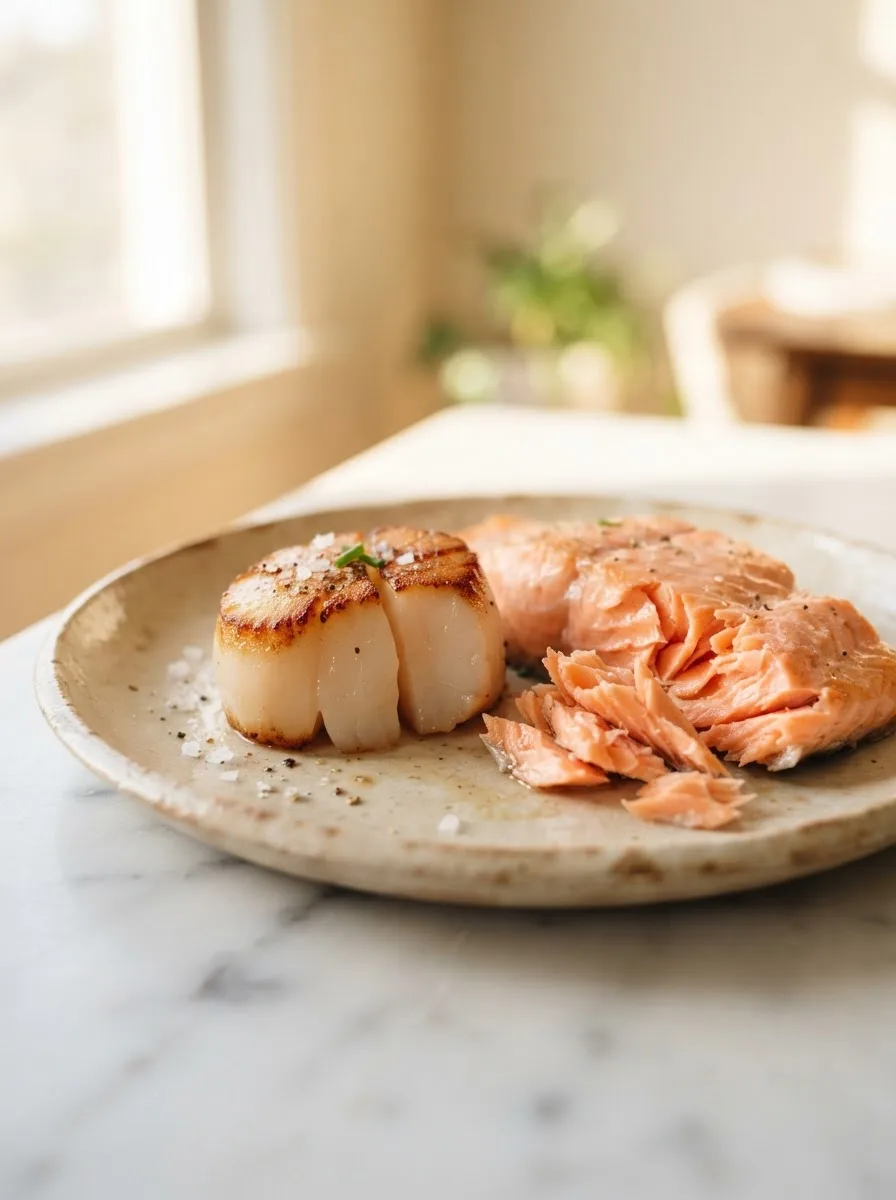
Test 4 — Dry scallops, high heat, spaced apart: Deep golden crust in 90 seconds per side, tender opaque center, no steaming. This is the method below.
The takeaway: dry scallops in a screaming-hot pan with room to breathe is the whole trick. Skip any one of those three things and you’re back to test 1 or 2.
How to Make Salmon and Scallops
Before you start: Pat the scallops completely dry and let both the salmon and scallops sit at room temperature for about 10 minutes. Cold proteins hitting a hot pan cool the pan down too fast for a good sear.
Step 1 — Pat dry and season
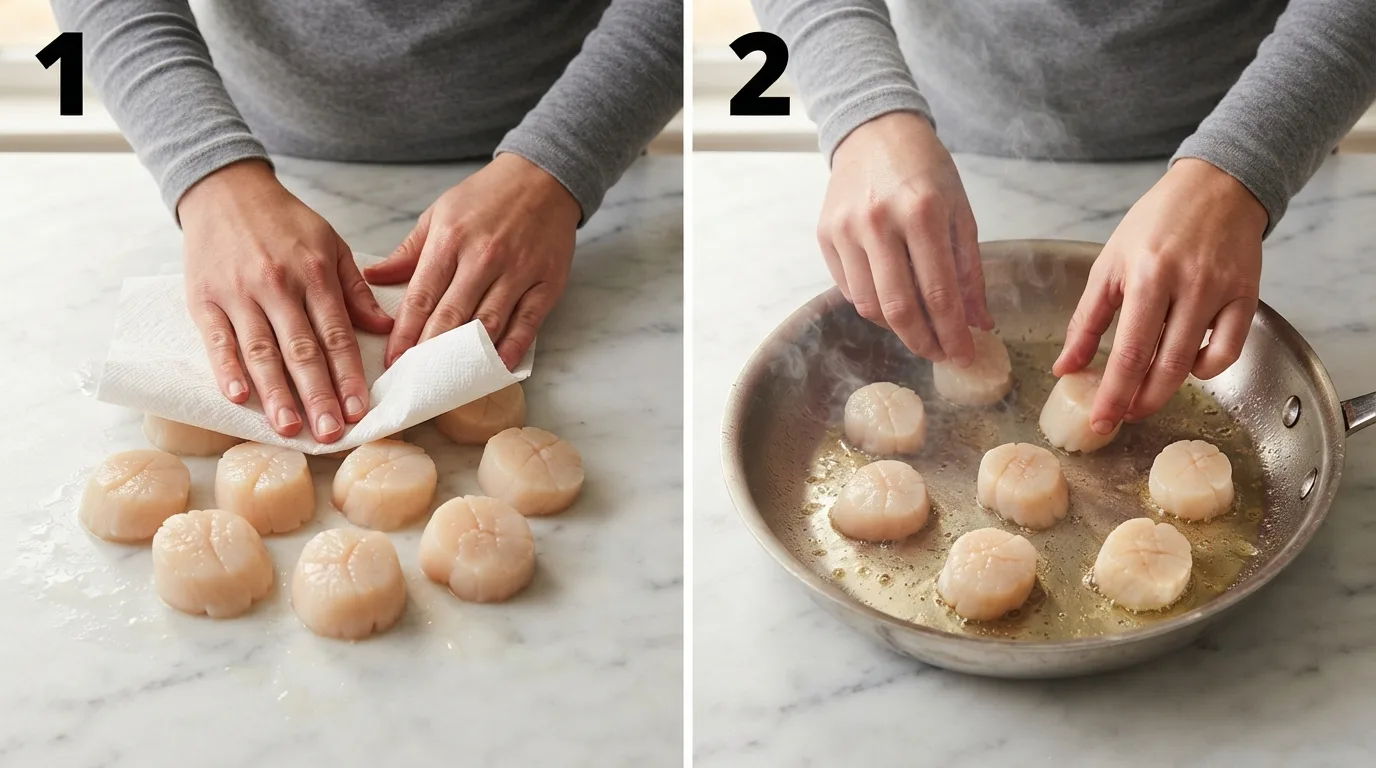
Lay the scallops on a double layer of paper towels and press another paper towel on top to pull out as much surface moisture as possible. Season both the scallops and the salmon fillets with salt and pepper on all sides right before cooking — salting too early draws out moisture you just worked to remove.
Step 2 — Sear the scallops, first side
Heat 2 tablespoons of olive oil in the skillet over high heat until it shimmers and just starts to look like it’s about to smoke. Add the scallops flat-side down, leaving space between each one — crowd them and they’ll steam instead of sear. Don’t touch them for 90 seconds.
Step 3 — Flip and finish the scallops
Flip each scallop with tongs and sear the second side for another 60 to 90 seconds, until it has the same deep golden crust and the sides look opaque all the way through with just a hint of translucence in the very center. Remove the scallops to a plate and tent loosely with foil — they’ll continue cooking slightly from residual heat, which is fine.
Step 4 — Sear the salmon
Add the remaining tablespoon of olive oil to the same skillet. Place the salmon fillets skin-side down (if skin-on) and press gently for the first 10 seconds so the skin makes full contact — this is what stops it from curling and sticking. Cook for 4 to 5 minutes undisturbed, until the skin is deeply golden and releases easily from the pan.
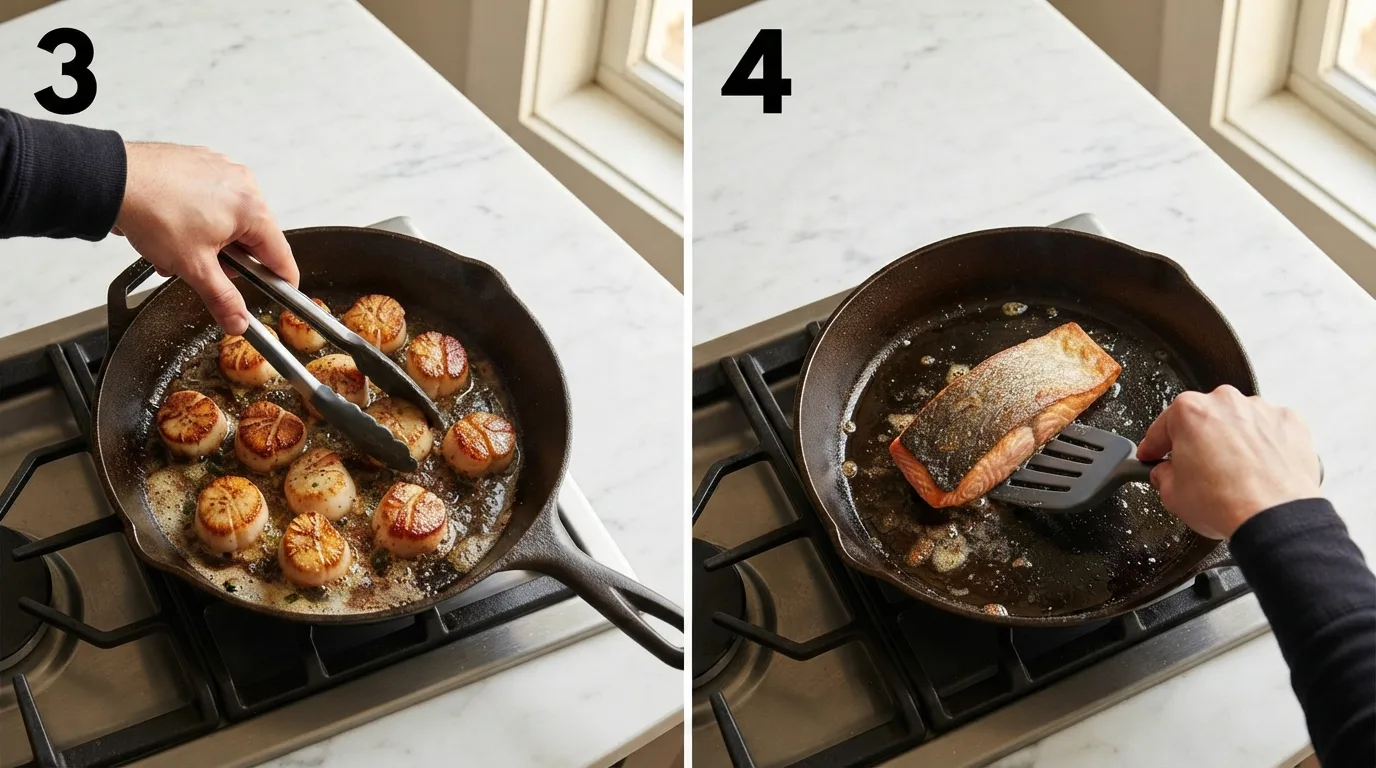
Step 5 — Flip the salmon and finish to temperature
Flip the salmon and cook for another 3 to 4 minutes, until it flakes easily with a fork and reaches 125°F for medium (it will climb a few more degrees as it rests) or 130°F if you prefer it more opaque throughout. Remove to the plate with the scallops.
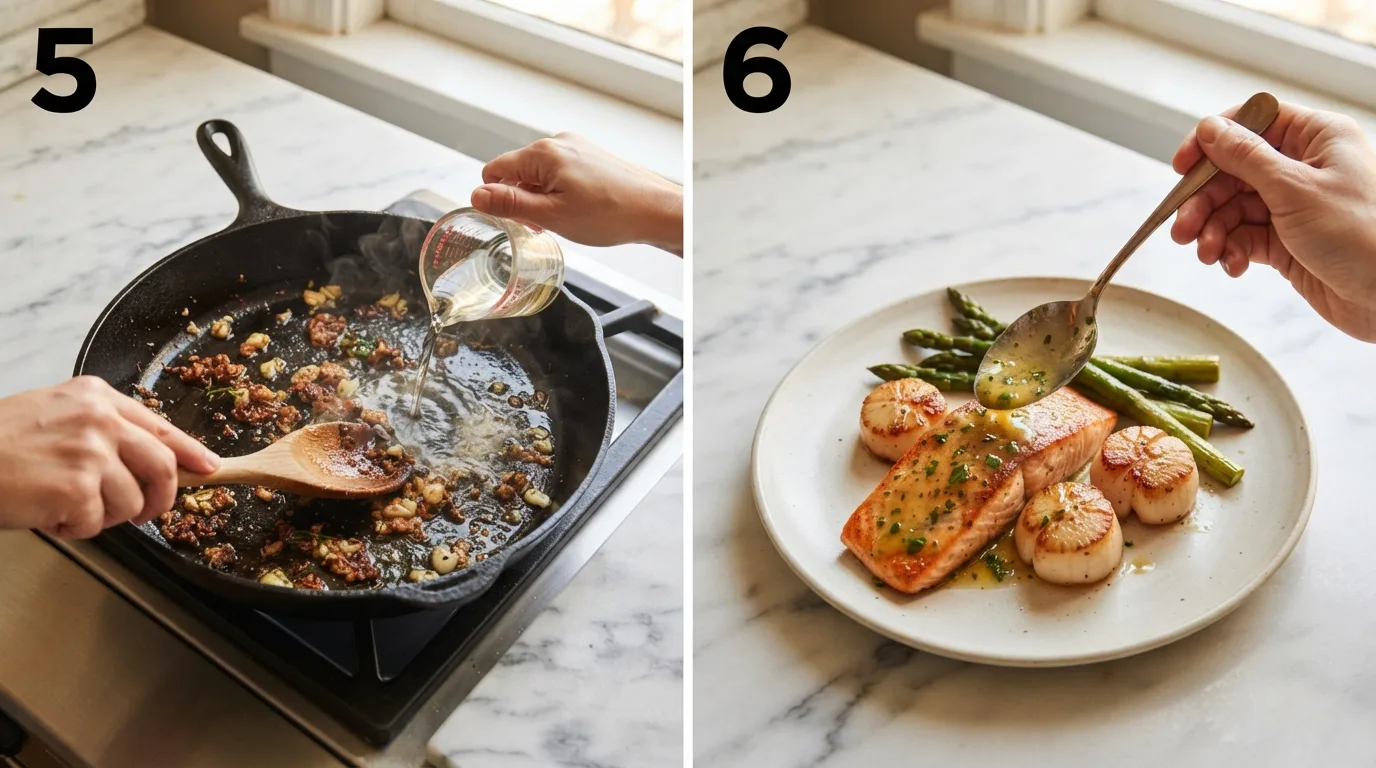
Step 6 — Build the sauce and combine
Lower the heat to medium and add the wine (or broth) to the same skillet, scraping up any browned bits with a wooden spoon — this is the flavor. Let it simmer for about a minute, then add the butter, garlic, lemon zest, lemon juice, and capers if using. Stir until the butter melts into a glossy sauce, about 2 minutes. Return the salmon and scallops to the pan just to coat, or spoon the sauce directly over the plated fish. Garnish with parsley.
Pro Tips for Perfect Salmon and Scallops
Tip 1: Don’t move the scallops once they’re in the pan. Every time you nudge or check them, you break the crust that’s trying to form and let steam escape unevenly. Set a timer and leave them alone.
Tip 2: Cook the scallops first, salmon second. Scallops take less time and hold their texture better sitting under foil for a few minutes. Salmon actually benefits from a short rest, so the order in the recipe isn’t arbitrary — it’s the sequence that keeps both proteins at their best by the time they hit the plate.
Tip 3: Use a pan you can get screaming hot. Enameled cast iron and thin aluminum pans struggle to hold the heat needed for a real sear. A heavy stainless or cast iron skillet retains temperature even after cold protein hits it.
Tip 4: Salt right before cooking, not while prepping. Salt draws out moisture over time. If you season the scallops 20 minutes ahead, you’ll have re-created the wet-scallop problem from Test 1 without meaning to.
Variations and Substitutions
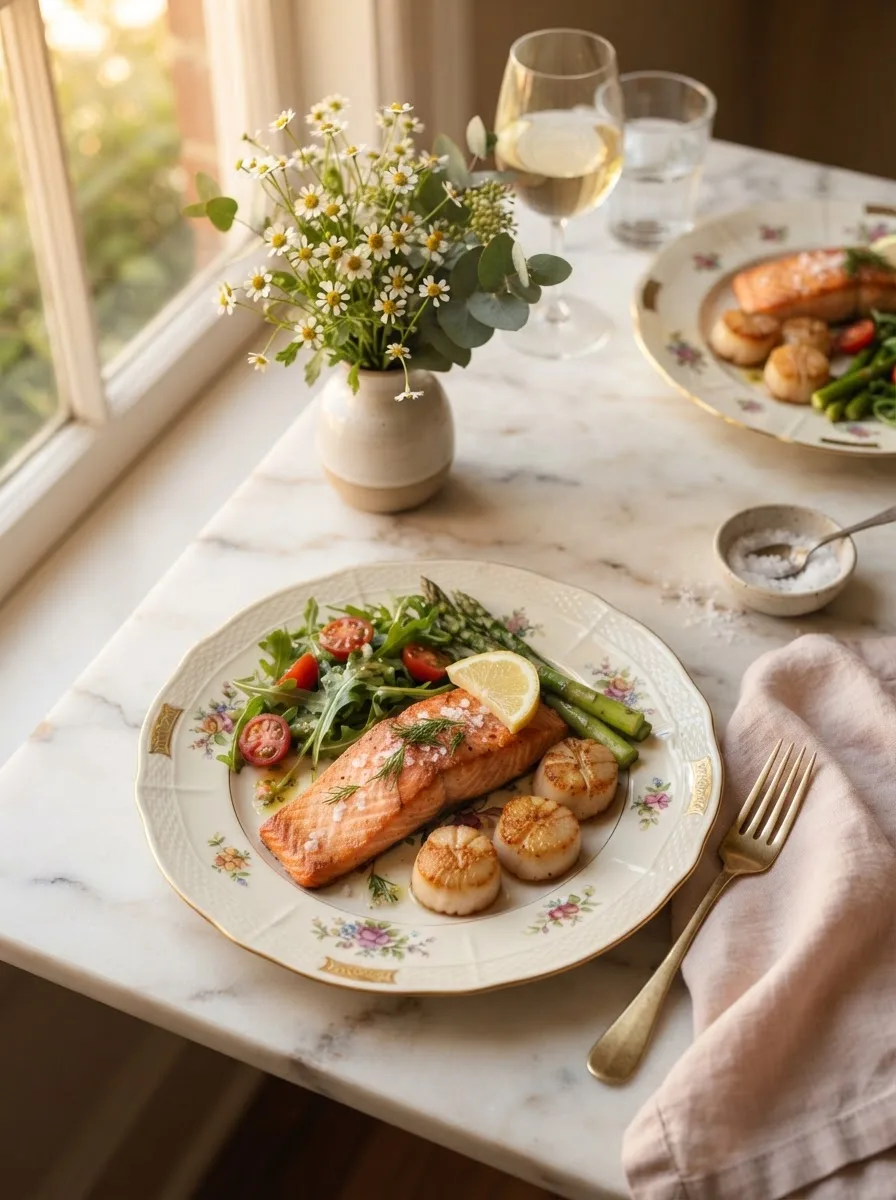
Dietary Variations:
- Dairy-free: Swap the butter for an equal amount of extra-virgin olive oil or a dairy-free butter alternative. The sauce won’t be quite as glossy, but the flavor holds up well.
- Lower-sodium: Skip the capers and use low-sodium broth instead of wine. Season with salt at the end to taste rather than during cooking.
Flavor Variations:
- Herb swap: Fresh dill or chives work beautifully in place of parsley for a slightly different, brighter finish.
- Spicy version: Increase the red pepper flakes to ½ teaspoon and add a pinch more right at the end for a sharper kick.
Ingredient Substitutions:
- No sea scallops? Large shrimp work with a similar sear method, though the timing drops to about 90 seconds total per side.
- No white wine? Low-sodium chicken broth with an extra squeeze of lemon gets you most of the way there.
Looking for a side to round out the plate? My fritar tomate is a quick pan-fried tomato dish that pairs surprisingly well with the richness of the butter sauce here — it adds acidity the plate needs.
Troubleshooting
Why did my scallops turn out rubbery instead of tender?
Rubbery scallops almost always mean they went past 90–120 seconds per side, or the pan wasn’t hot enough so they spent extra time cooking to get color. Scallops go from perfectly tender to tough in under a minute past done — pull them the moment the sides turn opaque with just a hint of translucence in the center.
My scallops won’t brown — what happened?
This is almost always moisture, an overcrowded pan, or a pan that wasn’t hot enough before the scallops went in. You should hear an aggressive sizzle the instant they touch the oil. If it’s a quiet sizzle, wait another minute before adding the scallops.
The salmon skin stuck to the pan — how do I avoid that?
Skin sticks when the pan isn’t hot enough or the fillet is moved too soon. Pat the skin completely dry before cooking, make sure the oil is shimmering, and leave the salmon completely undisturbed for the first 3 minutes — it releases on its own once the skin has fully crisped.
Storage and Make-Ahead
Counter: Not recommended beyond the 2-hour food safety window — seafood is best served immediately after cooking.
Refrigerator: Store leftovers in an airtight container for up to 2 days. The texture of both the salmon and scallops will soften slightly on reheating.
Freeze: Freezing isn’t recommended for this dish — both the sauce and the seared texture suffer significantly on thawing.
Reheating: Warm gently in a covered skillet over low heat for 3–4 minutes, or in a 275°F oven until just warmed through. Avoid the microwave, which turns the scallops rubbery.
Make-Ahead: The garlic butter lemon sauce base (minus the butter) can be made a day ahead and reheated gently before finishing with the butter. The salmon and scallops themselves are best seared just before serving.
Frequently Asked Questions
Q: Can I use frozen salmon and scallops for this recipe? A: Yes, as long as they’re fully thawed and patted very dry before cooking. Thaw overnight in the fridge, never at room temperature, and expect to spend an extra minute blotting away moisture that frozen seafood tends to release.
Q: What’s the difference between bay scallops and sea scallops here? A: Sea scallops are larger and hold up better to a hard sear, which is what this recipe is built around. Bay scallops are smaller, cook in under a minute, and can turn to rubber almost instantly — if that’s what you have, reduce the sear time to about 30 seconds per side.
Q: Do I really need dry-packed scallops? A: It makes a real difference. Wet-packed scallops release liquid into the pan and steam instead of sear, no matter how hot your skillet is. If dry-packed isn’t available, pat wet-packed scallops extra dry and expect a lighter crust.
Q: Can I make this salmon and scallops recipe dairy-free? A: Yes — substitute the butter with olive oil or a dairy-free butter alternative in the sauce. The flavor stays close; the sauce just won’t be quite as rich or glossy.
Q: What should I serve with salmon and scallops? A: Something with acidity works best against the richness of the butter sauce — my fritar tomate is a quick pan-fried option that does exactly that. For dessert, my naomi watts pavlova recipe is light enough to follow a rich seafood dinner without weighing the meal down.
Q: Can I use a different fish instead of salmon? A: Halibut or a firm white fish like cod both work well with this same searing method — just adjust the cook time down slightly for thinner fillets.
Q: How do I know when the salmon is done without a thermometer? A: Press gently with a fork at the thickest part — it should flake easily and look opaque with just a faint blush of pink in the very center. If it’s still translucent and resists flaking, give it another minute.
More Salmon and Scallops Recipes You’ll Love
- Smithfield’s Brunswick stew recipe — a completely different direction, but a great make-ahead option for the same week you’re serving something quick like this
- Naomi Watts pavlova recipe — the light, fruit-topped dessert I’d pick to follow this dinner
- Fritar tomate — the pan-fried tomato side dish I mentioned above, ready in about 15 minutes
- Big Hunk recipe — if you want something sweet and chewy to have on hand for later in the week
Foolproof Salmon and Scallops Recipe
Ingredients
For the salmon and scallops:
- 4 salmon fillets (6 oz / 170g each), skin-on or skinless
- 1 lb large sea scallops, dry-packed if available
- Kosher salt, to taste
- Black pepper, to taste
- 3 tbsp (45ml) olive oil, divided
For the garlic butter lemon sauce:
- 1/4 cup (60ml) dry white wine (or low-sodium chicken broth)
- 4 tbsp unsalted butter
- 4 clove garlic, minced
- 1 large lemon, zested and juiced
- 2 tbsp capers, drained (optional)
- 2 tbsp fresh parsley, chopped
- 1/4 tsp red pepper flakes (optional)
Instructions
- Pat the scallops completely dry with paper towels. Let the salmon and scallops sit at room temperature for 10 minutes, then season both with salt and pepper.
- Heat 2 tablespoons of olive oil in a large skillet over high heat until shimmering. Add the scallops flat-side down, spaced apart, and sear undisturbed for 90 seconds.
- Flip the scallops and sear the second side for 60–90 seconds, until deeply golden and just opaque throughout. Remove to a plate and tent with foil.
- Add the remaining tablespoon of olive oil to the same skillet. Place the salmon skin-side down (if applicable) and press gently for 10 seconds. Cook undisturbed for 4–5 minutes, until the skin is golden and releases easily.
- Flip the salmon and cook for another 3–4 minutes, until it reaches 125–130°F internally and flakes easily. Remove to the plate with the scallops.
- Lower the heat to medium. Add the wine to the skillet, scraping up any browned bits. Simmer 1 minute, then add the butter, garlic, lemon zest, lemon juice, and capers. Stir until the butter melts into a glossy sauce, about 2 minutes.
- Return the salmon and scallops to the pan to coat in the sauce, or spoon the sauce over the plated fish. Garnish with parsley and serve immediately.
Notes
- Dry scallops are non-negotiable here — pat them completely dry right before cooking, not earlier, or they'll steam instead of sear.
- Don't move the scallops or salmon while they're searing; disturbing them breaks the crust before it fully forms.
- This recipe scales up easily — sear proteins in batches rather than crowding a larger pan, since overcrowding causes steaming.
- Leftovers keep in an airtight container in the fridge for up to 2 days; reheat gently in a covered skillet, not the microwave.
- Freezing is not recommended — both the seared texture and the sauce lose quality on thawing.
- If using bay scallops instead of sea scallops, reduce the sear time to about 30 seconds per side.
- The sauce base can be made a day ahead through the wine reduction step; add the butter fresh when reheating.
- An instant-read thermometer takes the guesswork out of the salmon — pull it at 125°F for medium.