Foolproof Jamaican Roti Recipe

If you’ve ever ordered curry chicken from a Jamaican spot and torn off a piece of roti so soft and flaky it practically shreds into layers, you already know what a good jamaican roti recipe is supposed to deliver. My first four attempts at home did not deliver that. They came out chewy, flat, and a little sad — more tortilla than flatbread.
The fix turned out to be one step almost every recipe glosses over: how the dough gets folded before it rests, not just how long it rests. Once I nailed that, the layers showed up every single time.
This is the recipe for jamaican roti I make now whenever curry night happens — and it works with a rolling pin and a skillet, no special equipment required.
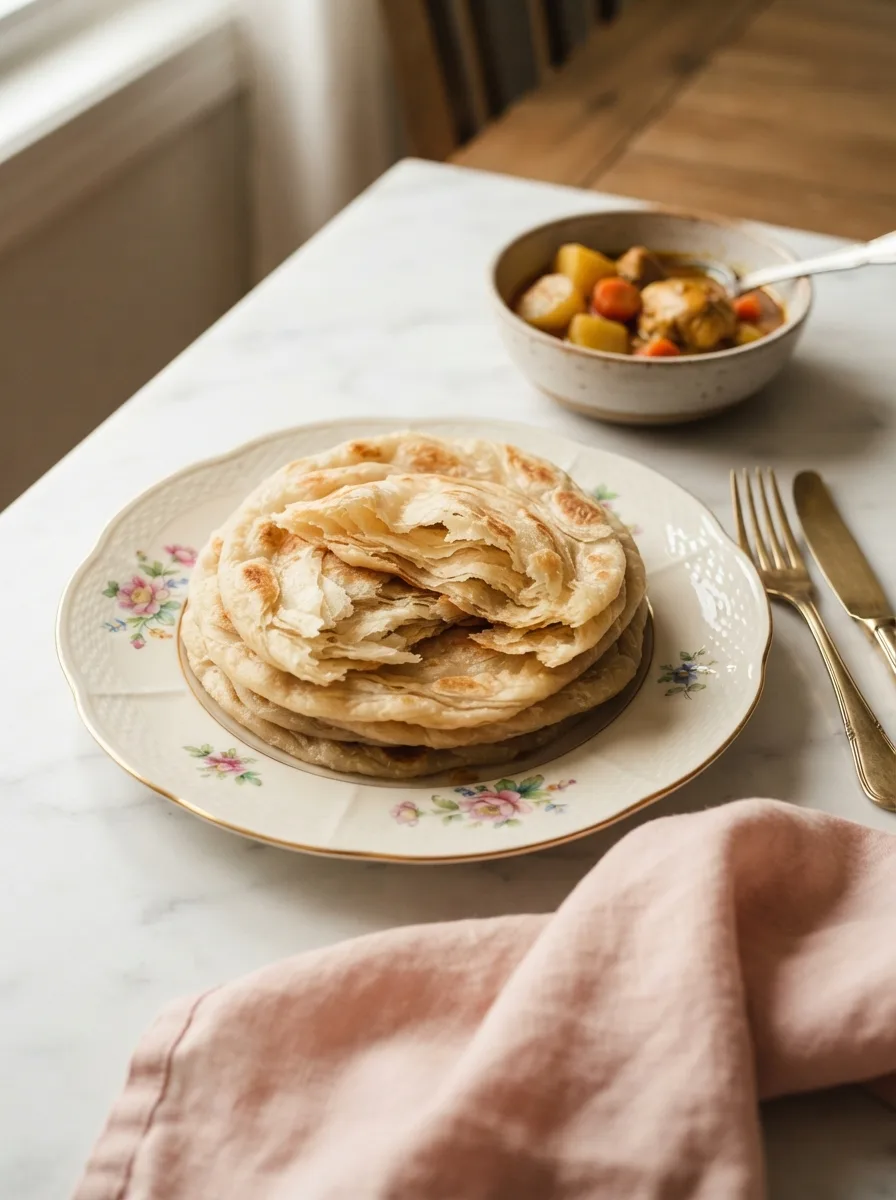
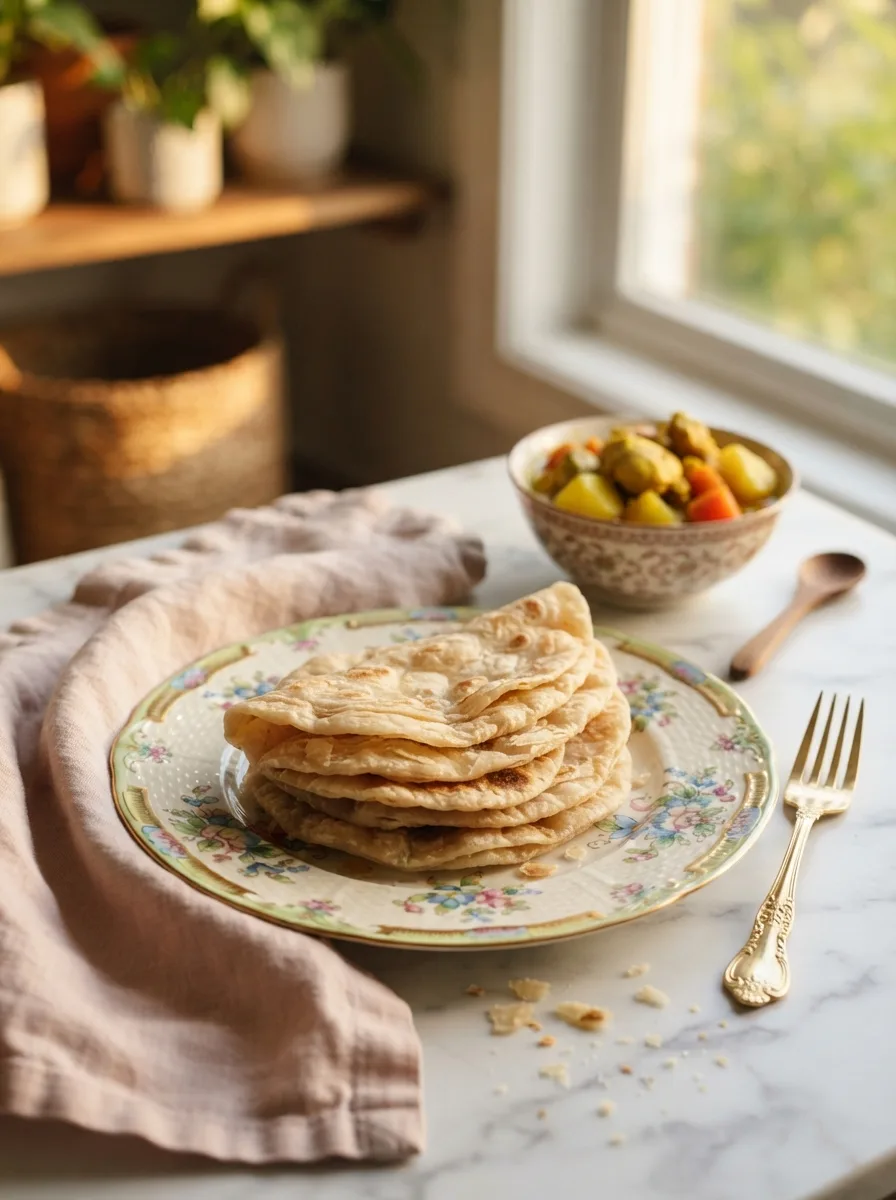
The result is a roti that puffs, blisters, and separates into paper-thin layers when you press it between your palms — the “buss up” clap that Jamaican cooks are famous for. It’s soft enough to wrap around curry, sturdy enough to scoop up stew, and it holds its texture even after it cools a little on the table.
★★★★★ “I’ve tried three other roti recipes online and always ended up with something closer to a thick pancake. This one actually flakes apart in layers. My husband asked if I bought it from the Jamaican bakery down the street.” — Denise R., recipe tester (pre-launch)
Why You’ll Love This Jamaican Roti
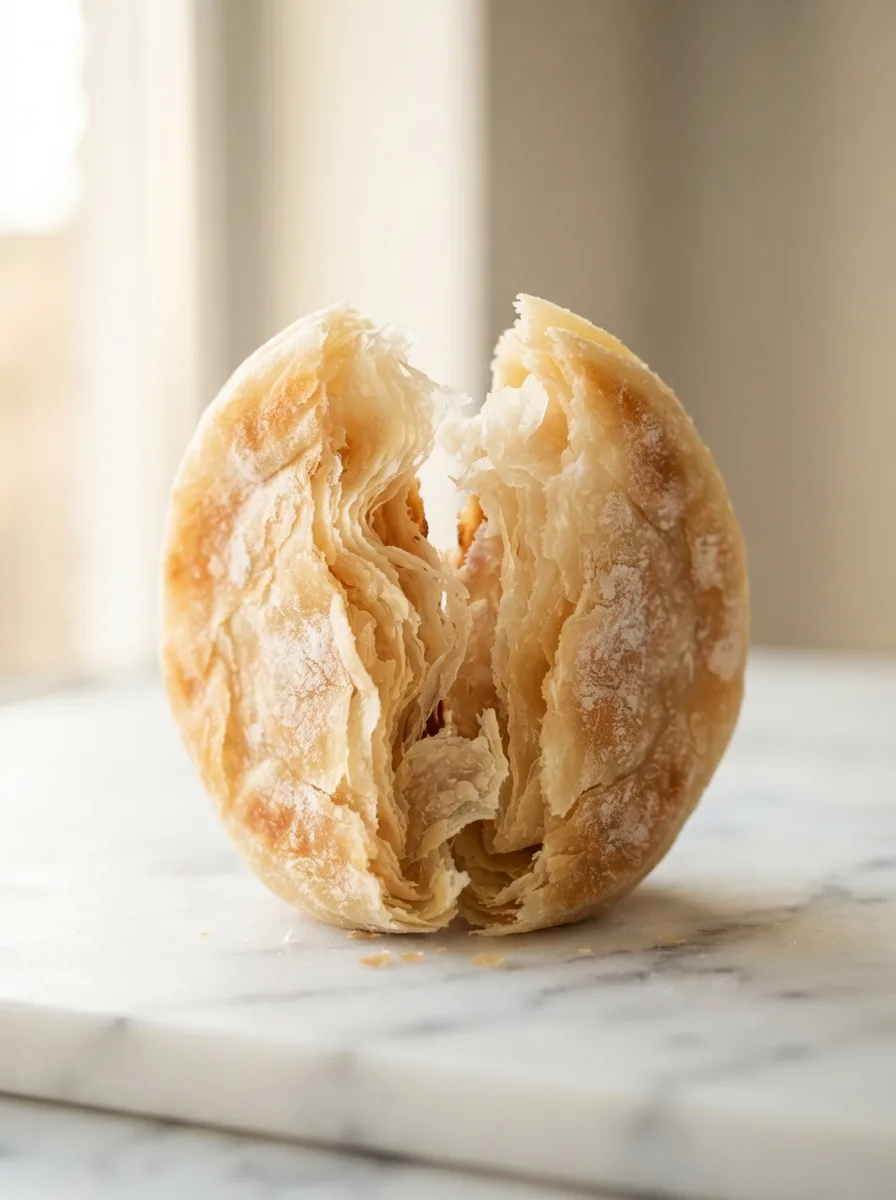
- Real, visible layers: This isn’t a one-note flatbread. The fold-and-rest method builds actual sheets of dough that separate when you clap the roti, the same way it happens at a Jamaican bakery.
- No special flour or equipment: Just all-purpose flour, a rolling pin, and a heavy skillet. No tawa required, though one works great if you have it.
- Tested for the exact fold count: I tested this four times, changing only the number of folds before the final rest. Three folds is the sweet spot — fewer and the layers disappear, more and the dough gets tough.
- Freezer-friendly for busy weeks: The dough balls freeze beautifully, so you can roll and cook fresh roti any night curry is on the menu.
Key Ingredients for Jamaican Flatbread
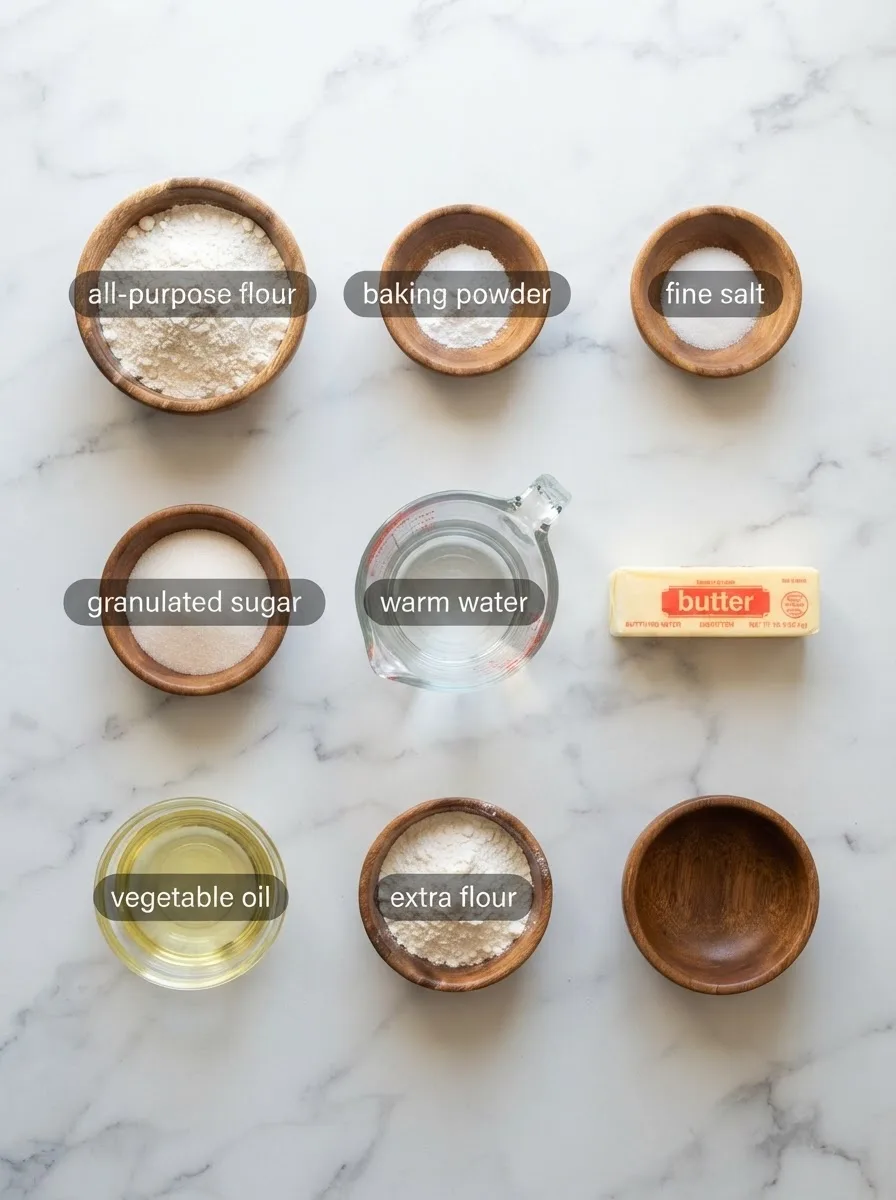
All-purpose flour (3 cups / 375g). No need for bread flour or specialty roti flour here — regular all-purpose has enough structure to hold the layers without turning tough.
Baking powder (1 tablespoon). This is what gives the roti its slight puff and softness as it cooks, instead of turning into a flat, dense disc. Don’t skip it — it’s the difference between “flatbread” and “cracker.”
Salt and sugar (1 teaspoon each). A small amount of sugar rounds out the flavor without making the roti sweet, and it helps the surface brown a little faster in the skillet.
Warm water (about 1 cup / 240ml). Warm, not hot — hot water can start activating the baking powder too early. The dough should feel soft and slightly tacky, not stiff.
Butter, melted (¼ cup / 55g), plus vegetable oil for cooking. The melted butter gets brushed between the folds — this is what actually creates the layers. Vegetable oil, ghee, or ghee-style clarified butter all work; I tested with regular butter and it browns beautifully.
Ingredient Note: If you can only find self-rising flour, skip the added baking powder and salt — it’s already in there. Just add the sugar and proceed as written.
Equipment You’ll Need
- Rolling pin — a straight French-style pin works best for even, thin rounds. A tapered pin also works fine.
- Heavy skillet or cast iron griddle — this holds heat evenly, which matters more than you’d think for even browning. A nonstick skillet works if that’s what you have.
- Pastry brush — for brushing butter between the folds. A spoon works in a pinch, just use less.
- Damp kitchen towel — for covering the dough balls while they rest, so they don’t dry out and crack when you roll them.
Controlling the Flake: A Controlled Test
The internet is full of jamaican roti recipes that say “fold the dough” without explaining how many folds actually matter. So I tested it directly: I made the same dough four separate times, changing only the number of folds before the final rest — one fold, two folds, three folds, and five folds.
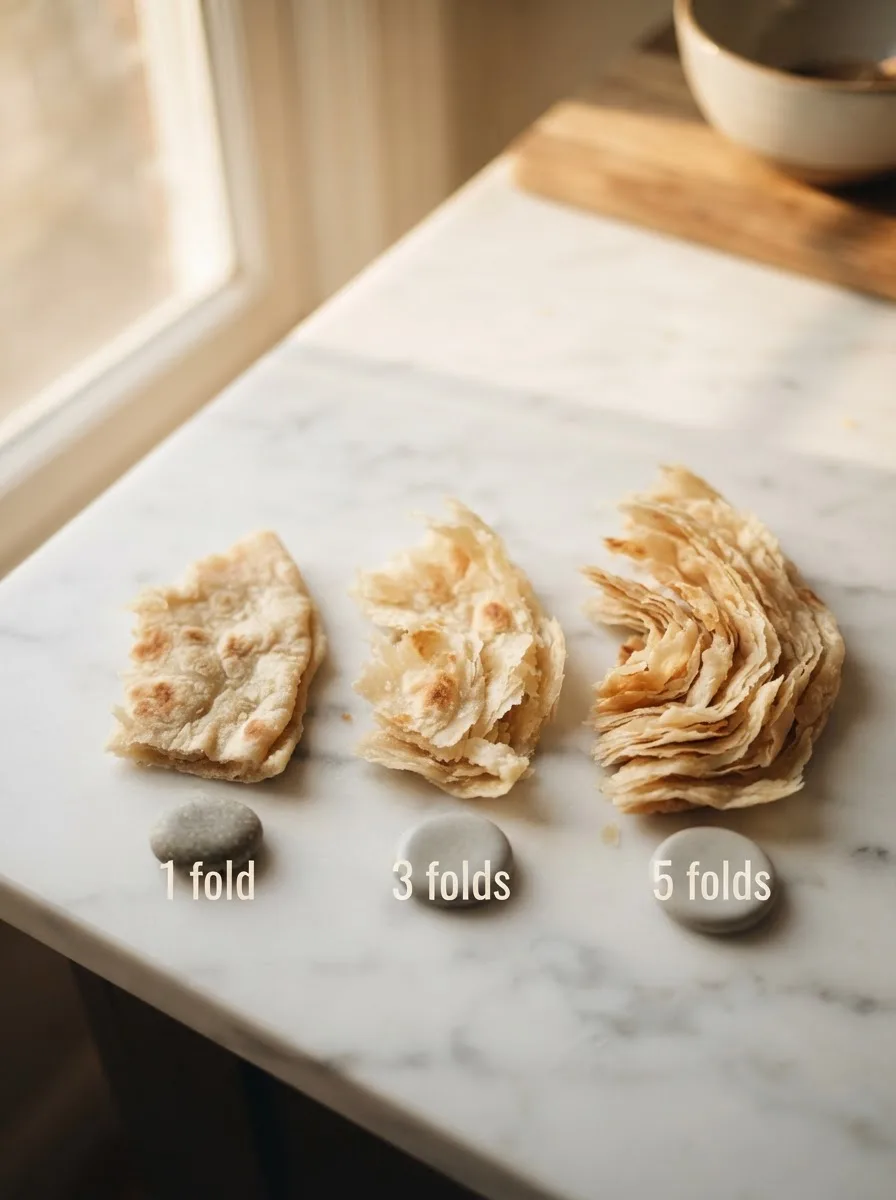
One fold: Barely any layering. The roti puffed slightly but tore like a regular tortilla — soft, but no flake.
Three folds: This is the winner. Clear, visible sheets when torn, and the roti still cooked through evenly without any raw, doughy center.
Five folds: Too many. The extra folds trapped too much butter between too many thin layers, so the middle stayed gummy even after extending the cook time by two full minutes.
The takeaway: three folds, brushed with butter between each one, is the number that builds real layers without sacrificing an even cook. That’s the fold count in the recipe below.
How to Make Jamaican Roti
Before you start: Have your butter melted and your water warm (not hot) before you begin mixing. Set out a clean, floured surface — you’ll need a bit of room to roll.
Step 1 — Mix the dough
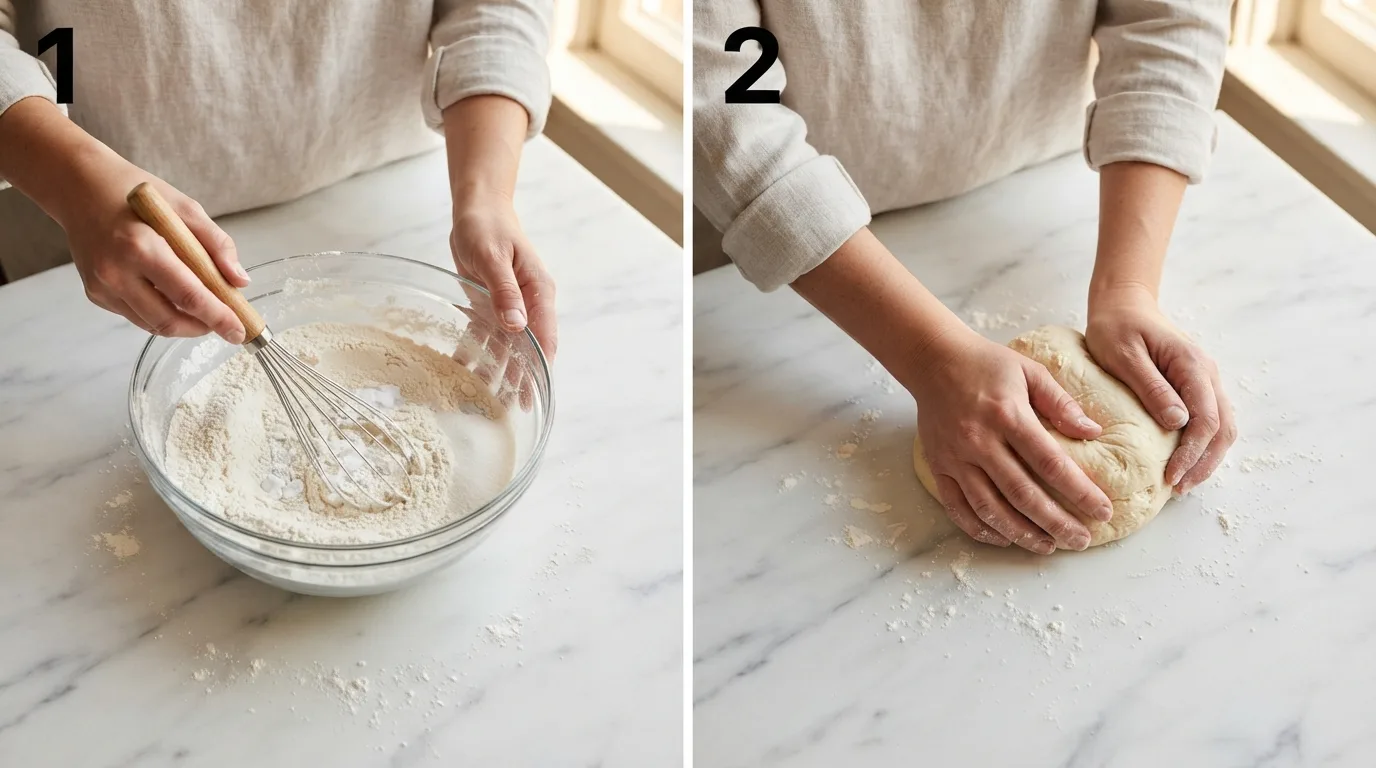
In a large bowl, whisk together the flour, baking powder, salt, and sugar. Pour in the warm water gradually, mixing with your hand or a wooden spoon until a rough dough forms. It should look shaggy at first — that’s normal.
Step 2 — Knead and rest
Turn the dough out onto a lightly floured surface and knead for about 5 minutes, until it’s smooth and elastic and springs back slowly when you press it. Cover with a damp towel and let it rest for 20 minutes. This rest relaxes the gluten so the dough won’t fight you when you roll it later.
Step 3 — Divide, fold, and rest again
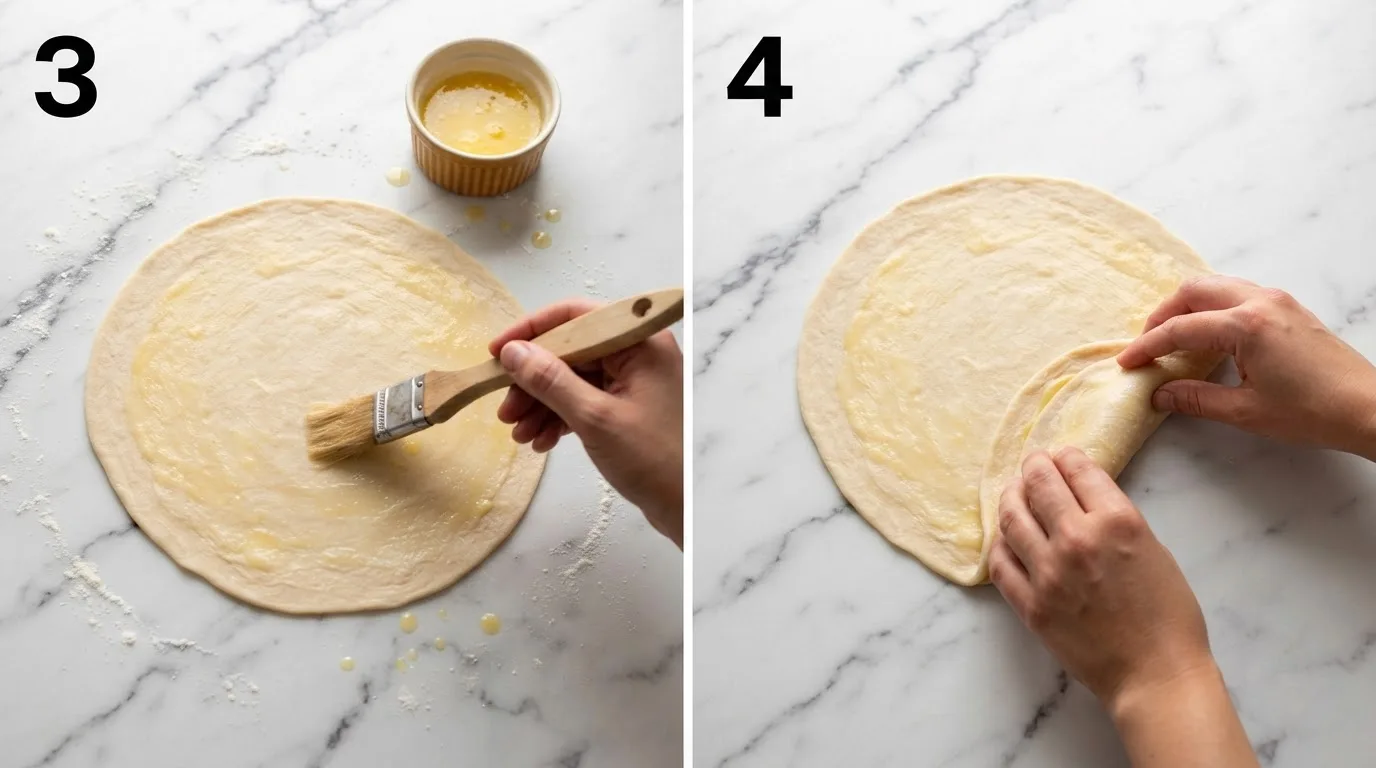
Divide the dough into 6 equal pieces and roll each into a ball. Working with one at a time, roll it into a thin round, brush generously with melted butter, then fold it into thirds like a letter, and fold again into thirds the other direction — that’s your three folds from the test above. Tuck the folded dough back into a ball, cover, and rest for another 15 minutes.
Step 4 — Roll the final round
After the second rest, roll each folded ball out into a round about ¼ inch thick and roughly 8 inches across. Try to roll evenly from the center outward, so the edges aren’t thinner than the middle — an uneven roll cooks unevenly.
Step 5 — Cook on a hot skillet
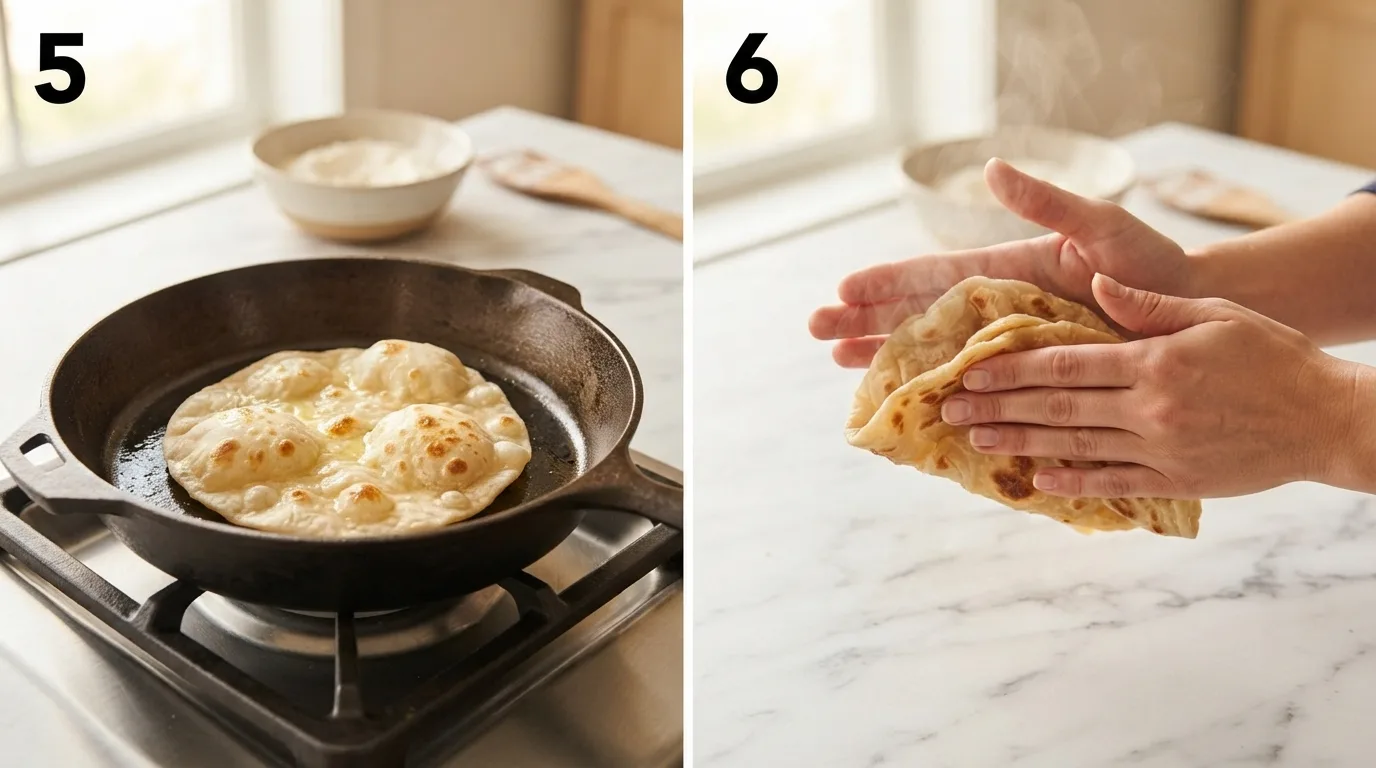
Heat a heavy skillet over medium-high heat with a thin layer of oil or ghee. Cook the roti for about 90 seconds per side, until it puffs slightly and develops golden-brown blistered spots. Brush a little extra oil on top just before flipping.
Step 6 — Clap and serve
As soon as each roti comes off the skillet, clap it between your palms a few times (carefully — it’s hot). This is the traditional “buss up” move that separates the layers you built with the folding. Stack the finished roti under a clean towel to keep them soft while you cook the rest.
Pro Tips for Perfect Jamaican Roti
Tip 1: Rest the dough for the full time, even if you’re in a hurry. Skipping the rests is the single biggest reason roti turns out tough. The gluten needs that relaxation time to let you roll thin without it snapping back.
Tip 2: Keep unused dough balls covered. Exposed dough dries out fast and cracks around the edges when you roll it, which stops the layers from separating cleanly.
Tip 3: Don’t crowd the skillet. Cook one roti at a time so the heat stays consistent. A skillet that’s too full drops in temperature and you lose the blistered spots that signal a good cook.
Tip 4: Clap it while it’s hot. If the roti cools before you clap it, the layers set and won’t separate as easily. Do it the moment it comes off the heat.
Variations and Substitutions
Dietary Variations:
- Dairy-free: Swap the melted butter for an equal amount of vegetable oil. The layers still form, though the flavor is a touch more neutral without the butter’s richness.
- Whole wheat blend: Substitute up to half the all-purpose flour with whole wheat flour. The roti will be slightly denser and less flaky, so stick to two folds instead of three.
Flavor Variations:
- Coconut roti: Replace ¼ cup of the water with coconut milk for a subtly sweet, tropical note that pairs especially well with curry goat.
Ingredient Substitutions:
- Ghee in place of butter for a more traditional, slightly nutty flavor
- Bread flour in place of all-purpose for a slightly chewier bite, though you may need a bit more water
This jamaican flatbread recipe is built to go straight into a curry night lineup. If you haven’t made your own seasoning blend yet, my jamaican jerk seasoning is worth having on hand, and the jamaican stew pork recipe is one of my favorite things to wrap in a warm roti.
Troubleshooting
Why is my roti tough instead of soft?
This almost always comes down to skipped or shortened rest time. If the dough doesn’t get its full 20-minute rest after kneading, or the folded balls don’t get their 15-minute second rest, the gluten stays tight and the roti fights back when you roll it — and cooks up tough. Give it the full rest time next round.
My roti came out flat with no layers — what happened?
Most likely the butter wasn’t brushed evenly before folding, or the folds weren’t tight enough to trap it. Make sure you brush all the way to the edges and press the folds down firmly before the second rest.
The middle of my roti stayed doughy — why?
This usually means the skillet wasn’t hot enough, or too many folds trapped too much butter (see the Controlled Test above). Preheat your skillet for a full 2–3 minutes before the first roti goes in, and stick to three folds, not five.
Storage and Make-Ahead
Counter: Cooked roti stays soft for about 4 hours wrapped in a clean towel. After that, the layers start to firm up.
Refrigerator: Store cooled roti in an airtight container or zip-top bag for up to 4 days. Reheat before serving.
Freeze: Freeze the unrolled dough balls (after the first rest, before folding) for up to 2 months, wrapped individually in plastic. Thaw in the fridge overnight before rolling and folding as usual.
Reheating: Warm roti in a dry skillet over medium heat for about 30 seconds per side, or wrap in foil and heat in a 300°F oven for 8 minutes.
Make-Ahead: You can roll and fold the roti up to a day ahead, then keep them stacked between parchment in the fridge, covered, and cook them fresh right before serving.
Frequently Asked Questions
Q: What’s the difference between roti Jamaican-style and Indian roti? A: Jamaican roti is typically thicker, richer with butter or ghee between the layers, and meant to be torn and used to scoop up curry. Indian roti (especially chapati) is usually thinner and made without the layered folding technique.
Q: Is this jamaican flatbread recipe the same as buss-up-shut? A: Yes — the clapping step at the end is exactly what creates buss-up-shut (literally “busted up shirt”) roti. The torn, flaky texture is the whole point.
Q: Can I make this jamaican roti recipe without baking powder? A: You can, but the roti will be noticeably flatter and denser. Baking powder gives it the slight puff that makes the texture soft instead of cracker-like.
Q: Can I use a tortilla press instead of a rolling pin? A: A tortilla press tends to compress the dough too fast and can flatten out the folded layers before they cook. A rolling pin gives you more control over even thickness.
Q: How thin should I roll the dough? A: About ¼ inch thick is the sweet spot. Thinner and the layers can tear before cooking; thicker and the center may stay doughy.
Q: What do I serve jamaican roti with? A: Curry chicken, curry goat, or a hearty stew are the classic pairings. My jamaican stew pork recipe is a favorite in my house for roti night.
Q: Can I double this recipe for a crowd? A: Yes — the dough doubles cleanly. Just work in batches when cooking so the skillet stays hot and you don’t crowd the pan.
More Caribbean Recipes You’ll Love
- Jamaican Jerk Seasoning — the all-purpose spice blend I keep on hand for chicken, pork, and roasted vegetables
- Jamaican Stew Pork Recipe — a rich, slow-simmered pairing that’s made for scooping up with roti
- Tikka Paste — a versatile marinade base if you want to switch up your curry night rotation
- Parsnip and Leek Soup — a cozy, comforting soup for when you want something lighter

Foolproof Jamaican Roti Recipe
Ingredients
For the dough:
- 3 cup all-purpose flour
- 1 tablespoon baking powder
- 1 teaspoon salt
- 1 teaspoon granulated sugar
- 1 cup (240ml) warm water
For layering and cooking:
- 1/4 cup butter, melted
- 3 tablespoon vegetable oil, plus more for cooking
Instructions
- In a large bowl, whisk together the flour, baking powder, salt, and sugar. Gradually add the warm water, mixing until a rough, shaggy dough forms.
- Turn the dough out onto a lightly floured surface and knead for 5 minutes, until smooth and elastic. Cover with a damp towel and rest for 20 minutes.
- Divide the dough into 6 equal pieces and roll into balls. Roll one ball into a thin round, brush generously with melted butter, then fold into thirds, and fold again into thirds the other direction. Tuck into a ball, cover, and rest 15 minutes. Repeat with remaining dough.
- Roll each folded ball into a round about ¼ inch thick and 8 inches across, rolling evenly from the center outward.
- Heat a heavy skillet over medium-high heat with a thin layer of oil. Cook each roti about 90 seconds per side, brushing a little extra oil on top before flipping, until golden and blistered.
- As each roti comes off the skillet, clap it carefully between your palms a few times to separate the layers. Stack under a clean towel and serve warm.
Notes
- Rest times are not optional — skipping either rest is the most common cause of tough roti.
- Unrolled dough balls (after the first rest, before folding) freeze well for up to 2 months.
- Reheat leftover roti in a dry skillet for 30 seconds per side, or wrapped in foil in a 300°F oven for 8 minutes.
- Stick to three folds, not five — more folds trap too much butter and leave the center doughy.
- Dairy-free option: substitute the melted butter with an equal amount of vegetable oil.
- Whole wheat flour can replace up to half the all-purpose flour; reduce folds to two for a less dense result.
- A cast iron skillet gives the most even heat, but any heavy-bottomed nonstick skillet works.
- Roll evenly from the center outward to avoid thin edges that cook faster than the middle.
- Leftovers keep in an airtight container in the fridge for up to 4 days.