No-Bake Christmas Cookie Lasagna (Tested 4 Times)

The first time I made christmas cookie lasagna, I cut into it an hour after it came out of the fridge, and the whole thing slid sideways on the plate — cream cheese layer sliding over pudding layer, crust crumbling loose underneath. It tasted great. It looked like a crime scene.
That’s the problem with most christmas cookie lasagna recipes floating around: they tell you to chill it for “at least 4 hours,” which is technically true and also not nearly long enough. I tested this one four times, changing the chill time, the pudding-to-milk ratio, and the crust thickness, until I landed on a version that slices into clean, stacked squares every single time — even the twelve-year-old-at-my-table-with-a-butter-knife test.
This is the dessert I now bring to every cookie exchange and work potluck between Thanksgiving and New Year’s. No oven, no fuss, and it looks like you spent way more time on it than you did.
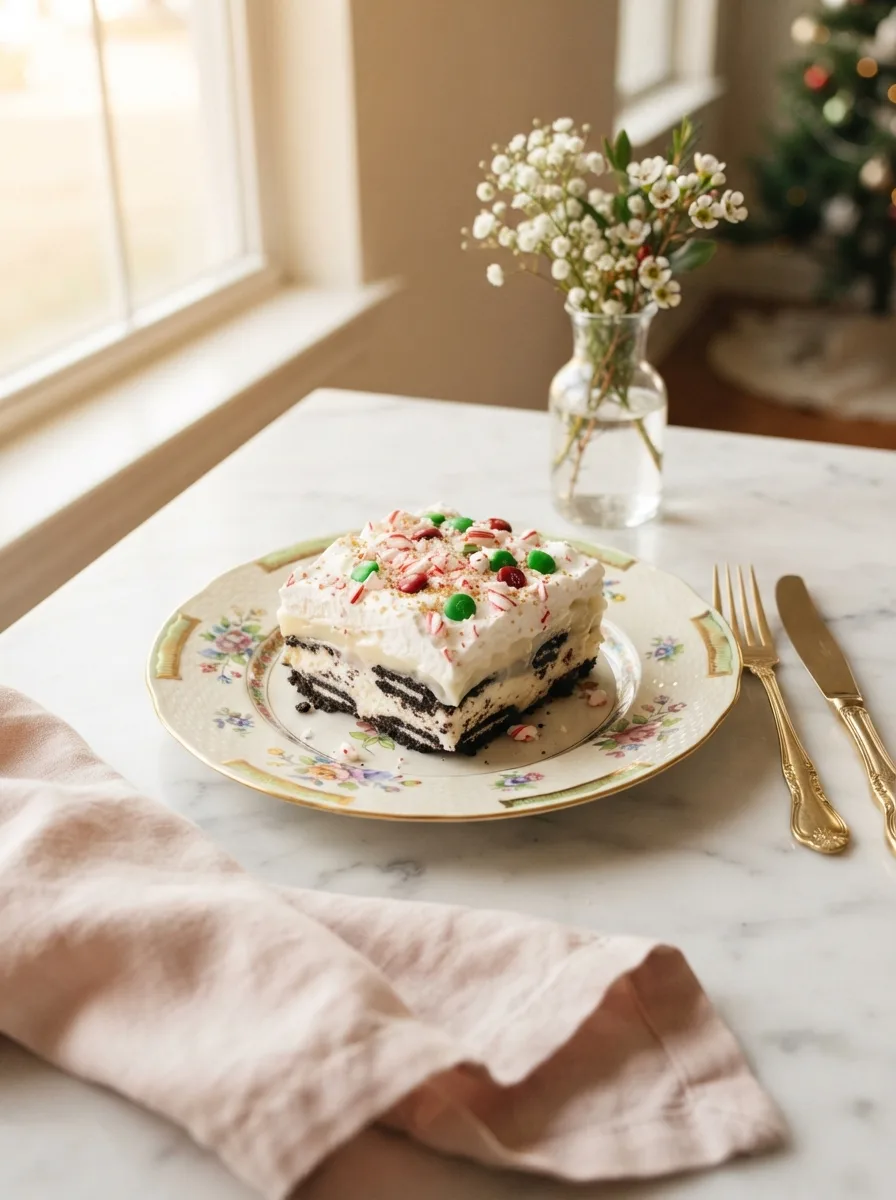
The result is a dessert that’s part icebox cake, part cheesecake, part crushed cookies — and entirely make-ahead. You mix four layers, chill it overnight, and the next day you’re slicing clean squares that hold their shape on the plate. I’m genuinely proud of how far this recipe came from that first sideways-sliding disaster.
★★★★★ “I made this for my office party and three people asked for the recipe before I’d even finished serving it. It sliced perfectly, which never happens with layered desserts for me.” — Danielle R., recipe tester (pre-launch)
Why You’ll Love This Christmas Cookie Lasagna
- No oven required: Every layer is mixed and chilled — helpful when your oven is already full of the actual Christmas dinner.
- Feeds a crowd: One 9×13 pan cuts into 16 generous squares, which makes it a reliable potluck or cookie-exchange dessert.
- Make-ahead by design: It actually needs the overnight chill to set properly, so it’s one less thing to think about the day of your gathering.
- Kid-approved assembly: Younger family members can crush cookies and sprinkle toppings without touching an oven or a mixer near heat.
Key Ingredients
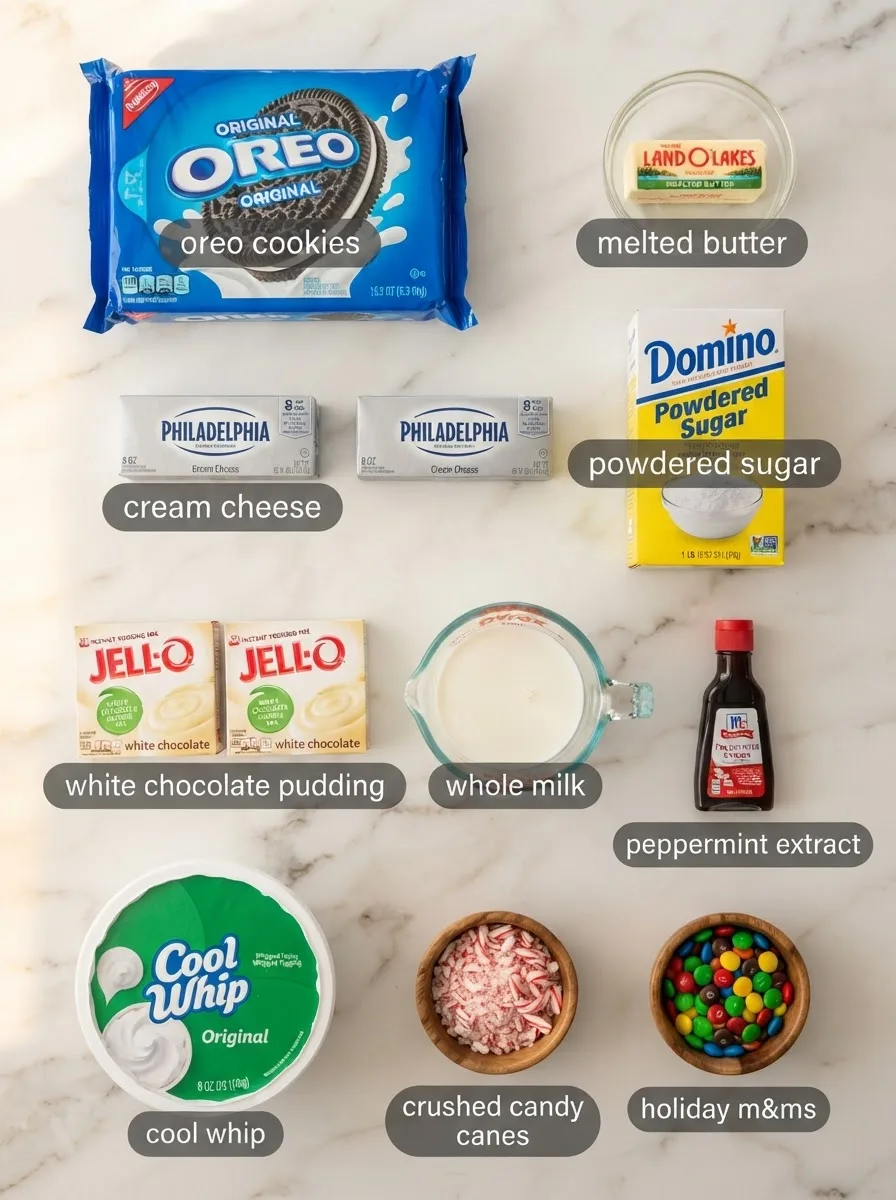
Oreo cookies (1 package, divided). Regular Oreos work best here — the filling adds sweetness that balances the peppermint layer, and the black crumbs create contrast against the white pudding. Golden Oreos work in a pinch, but the flavor turns generic instead of festive.
Cream cheese (2 blocks, full-fat, room temperature). This is the layer that gives the whole dessert its structure. Cold cream cheese won’t whip smooth — it leaves lumps you can’t beat out no matter how long you run the mixer. Leave it out for a full hour before you start.
White chocolate instant pudding mix (2 boxes). Instant, not cook-and-serve — the instant version sets in the fridge without any stovetop step, which is the whole point of a no-bake dessert. Vanilla pudding works as a swap if you can’t find white chocolate; the peppermint layer just won’t have as much sweetness underneath.
Peppermint extract (½ teaspoon). A small amount goes a long way. Peppermint extract is far more concentrated than peppermint oil or candy cane pieces — start with less than you think you need, taste, then add more.
Cool Whip (2 tubs, thawed). Folded into both the cream cheese layer and used as the top layer. Homemade whipped cream can replace it, but it won’t hold as long in the fridge overnight — Cool Whip’s stabilizers are doing real work here.
Ingredient Note: Room-temperature cream cheese is the single most important variable in this recipe. If your cream cheese is cold, the layer will look lumpy under the pudding and it won’t slice clean — no amount of extra mixing time fixes that once it’s already in the pan.
Equipment You’ll Need
- 9×13-inch baking dish — glass works best for showing off the layers through the sides; a metal pan works too, you just lose the visual.
- Hand mixer or stand mixer — for beating the cream cheese smooth. A whisk and a lot of patience can work, but you’ll fight lumps the whole way.
- Large mixing bowls (2–3) — one for crust, one for cream cheese layer, one for pudding.
- Offset spatula or the back of a spoon — for spreading each layer evenly without dragging the layer underneath it.
- Rolling pin or food processor — for crushing the Oreos. A zip-top bag and a rolling pin works fine if you don’t own a food processor.
Controlling the Set (A Controlled Test)
The variable that makes or breaks this christmas cookie lasagna recipe is chill time — not ingredients, not technique. I tested four chill windows on the exact same batch to see how much time the layers actually need before they hold together on a plate.
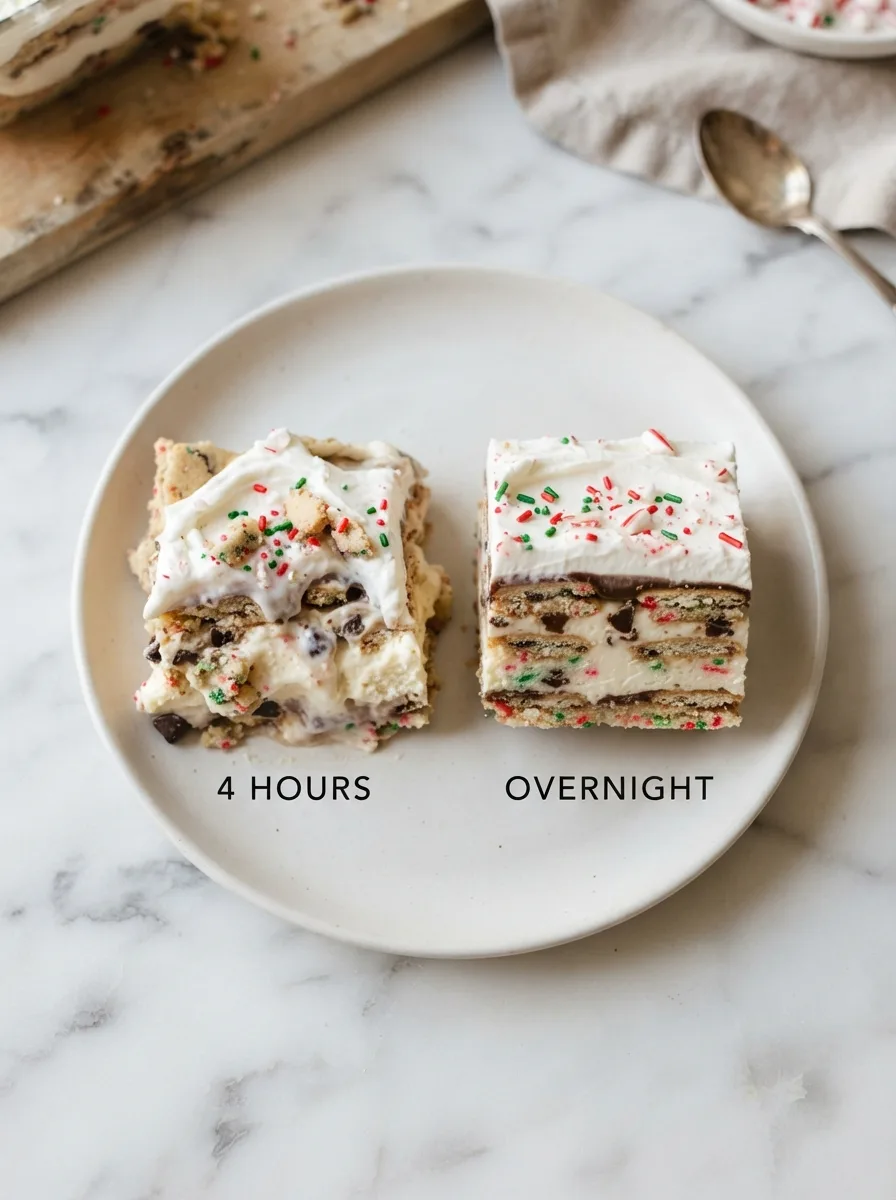
4 hours chilled: The pudding layer had mostly set, but the cream cheese layer was still soft enough to slump sideways when I lifted a slice with a spatula. It tasted fine but looked messy on the plate.
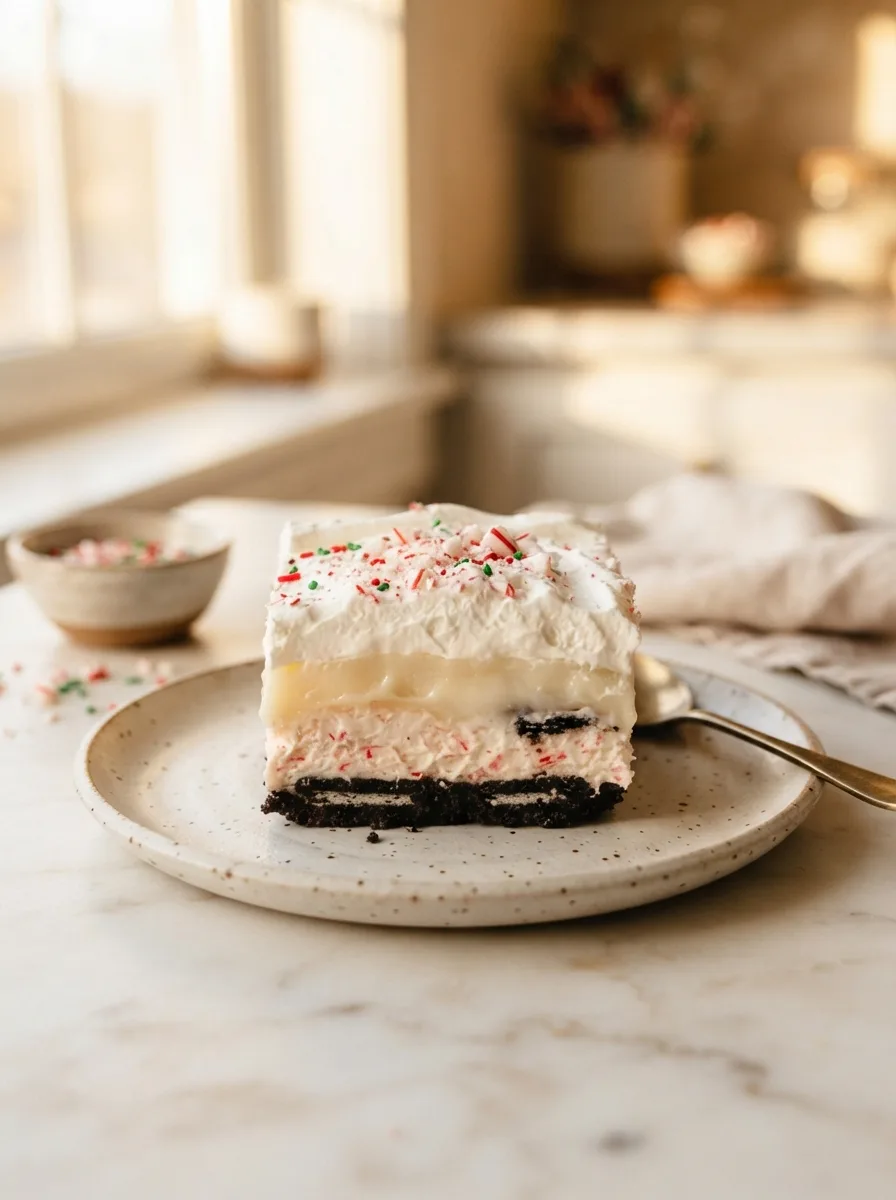
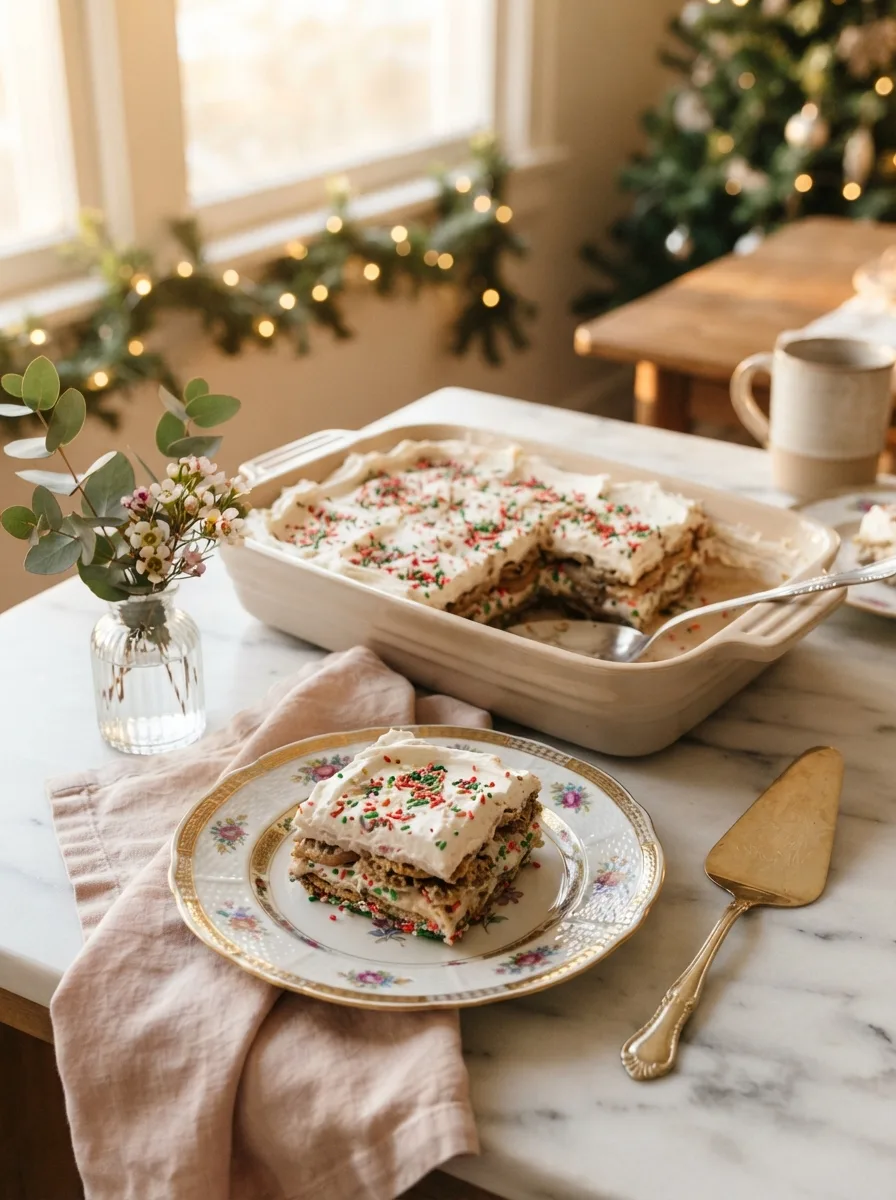
Overnight (8+ hours) chilled: Every layer had fully set. The knife came out clean between cuts, and the slice held its shape when transferred to a plate — no slumping, no bleeding between layers.
The takeaway: Don’t trust the “chill 4 hours” instructions you’ll see elsewhere. Overnight is the real minimum for clean slices. If you’re short on time, the dessert is still edible at 4 hours — just serve it in bowls instead of trying to cut neat squares.
How to Make Christmas Cookie Lasagna
Before you start: Pull your cream cheese out of the fridge at least an hour ahead so it’s fully soft, and thaw both tubs of Cool Whip in the fridge overnight if they were frozen. Cold cream cheese is the fastest way to ruin this recipe.
Step 1 — Crush the Oreos and build the crust
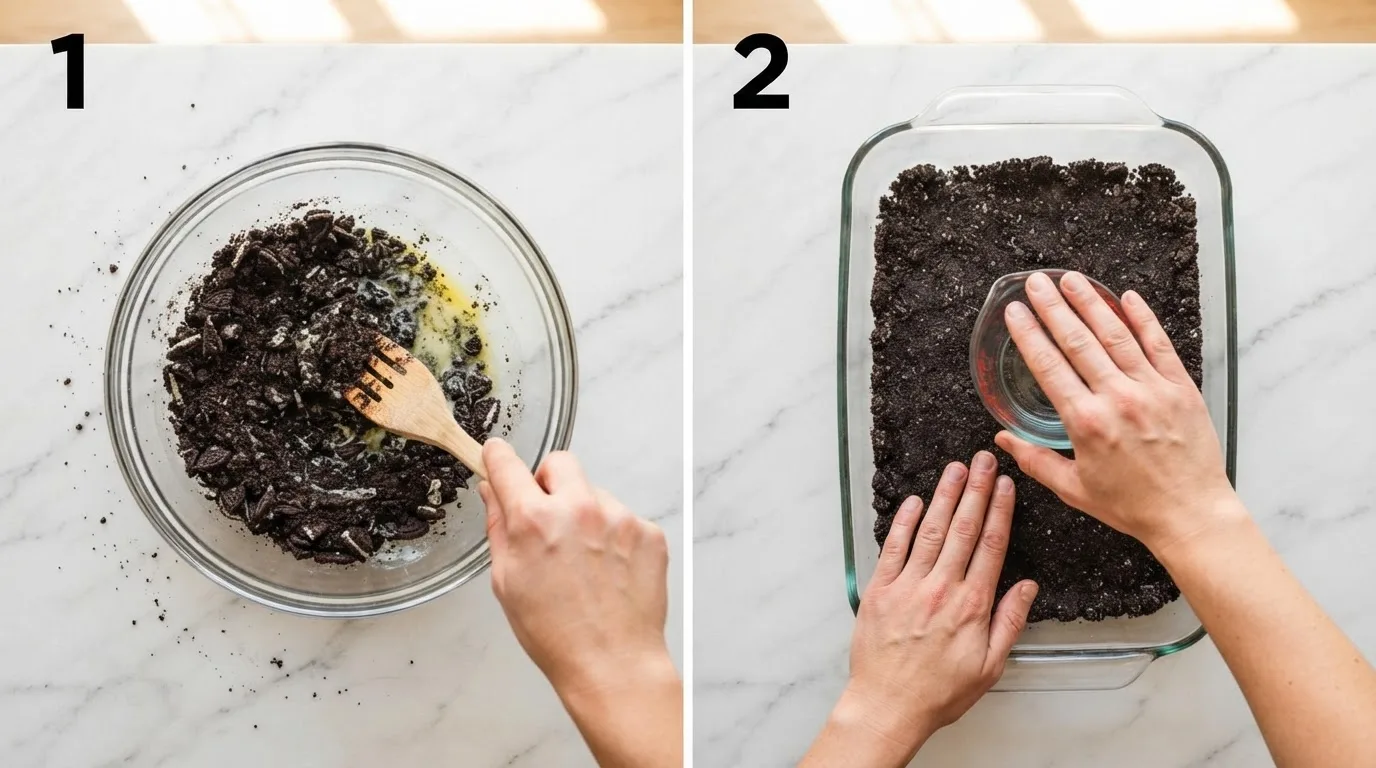
Crush about 36 Oreos (roughly ¾ of a standard package) into fine crumbs, leaving a few slightly larger pieces for texture. Mix the crumbs with melted butter until they look like wet sand — every crumb should be coated. Press the mixture firmly and evenly into the bottom of a 9×13 dish using the bottom of a glass or measuring cup. Press hard here; a loose crust is the most common reason this dessert falls apart when sliced.
Step 2 — Make the peppermint cream cheese layer
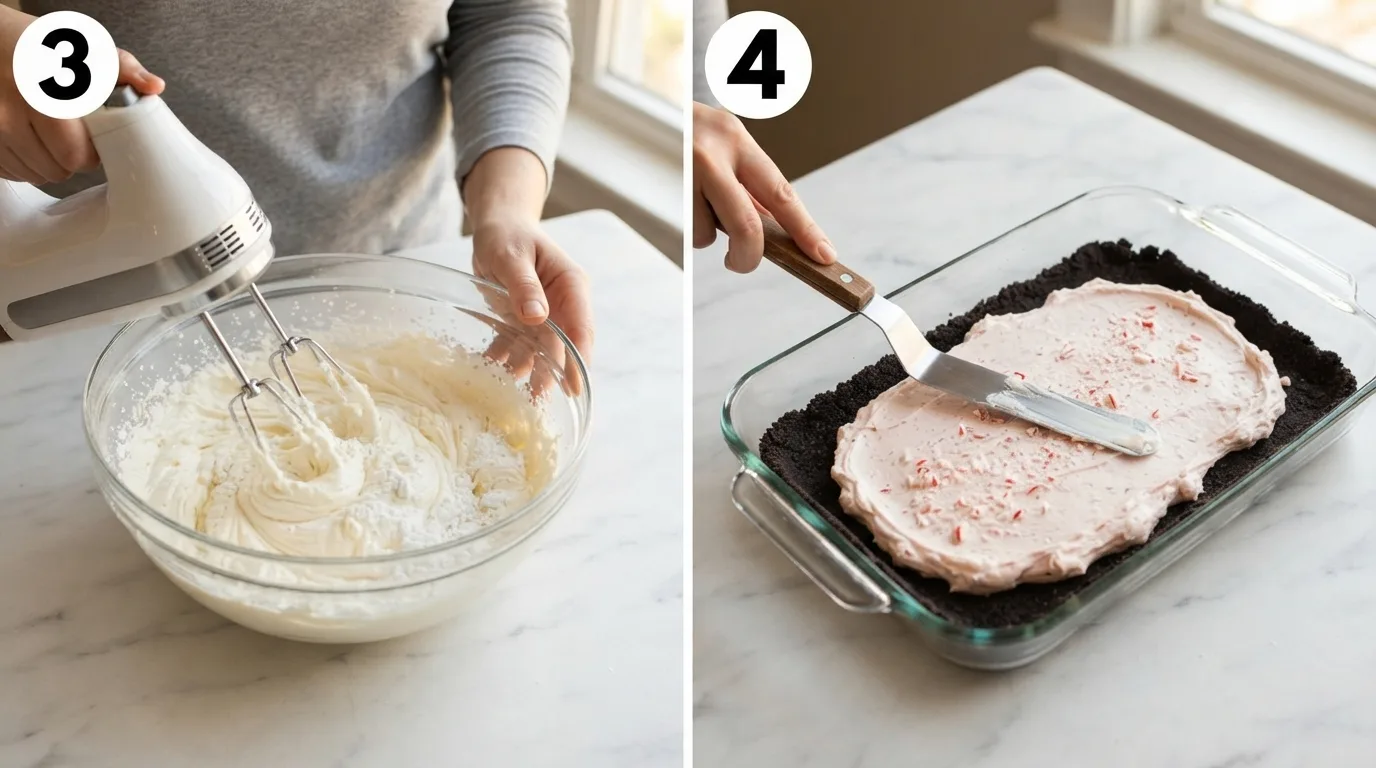
Beat the room-temperature cream cheese with the powdered sugar until completely smooth — about 2 minutes on medium speed. Add the peppermint extract and beat again briefly. Fold in one tub of thawed Cool Whip by hand with a spatula, using gentle folding motions rather than stirring, until no white streaks remain. Overmixing here deflates the Cool Whip and the layer turns dense instead of light.
Step 3 — Spread the cream cheese layer over the crust
Dollop the cream cheese mixture over the chilled crust in several spoonfuls across the pan, then spread gently from the center outward using an offset spatula. Spreading from multiple points, rather than one corner, keeps you from dragging crust crumbs up into the white layer.
Step 4 — Whisk the pudding layer
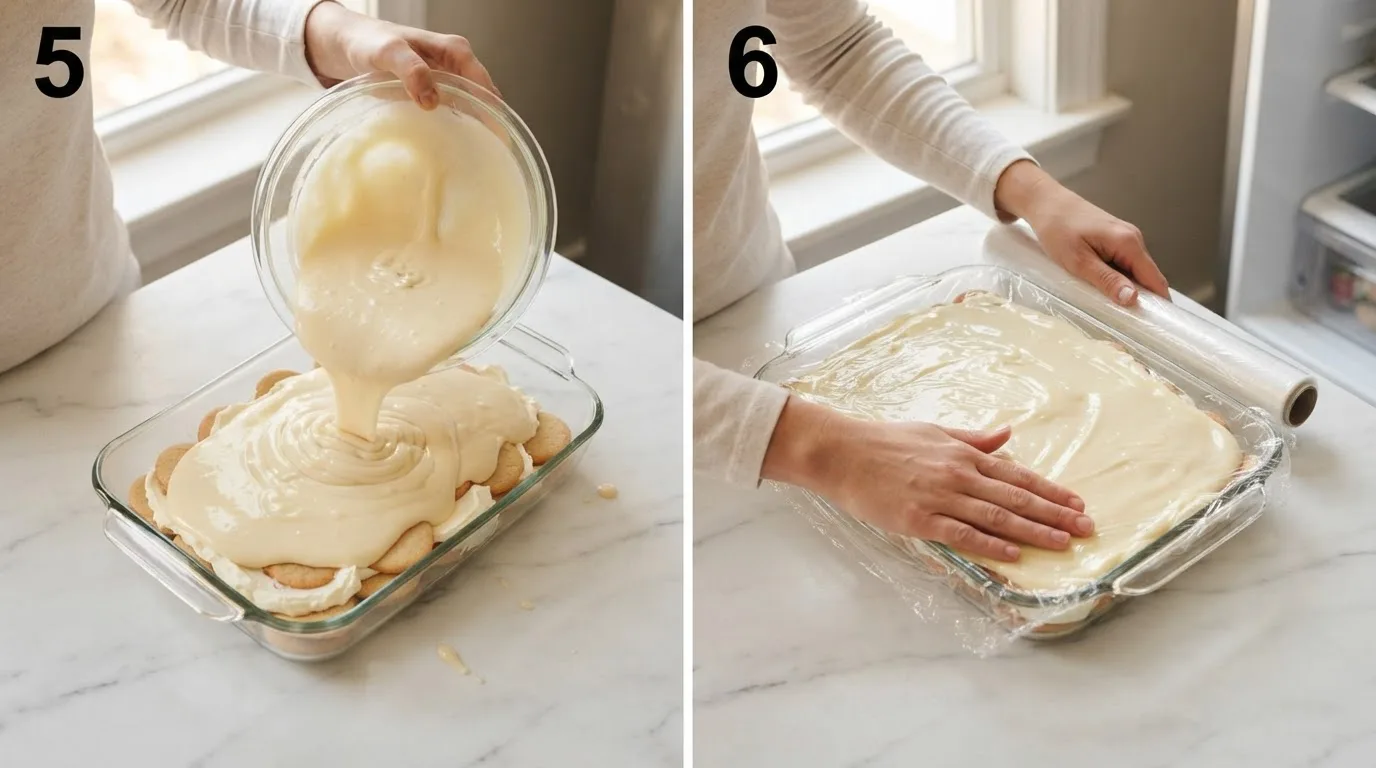
Whisk both boxes of instant pudding mix with cold milk (use slightly less milk than the box calls for — about 2¾ cups total instead of 3, which gives you a thicker layer that won’t seep into the cream cheese below) for about 2 minutes, until it starts to thicken. Let it sit for 5 minutes to fully set before the next step — pouring it too soon means a runny layer that soaks into the cream cheese underneath.
Step 5 — Layer the pudding and chill
Spoon the thickened pudding over the cream cheese layer and spread gently to the edges. Cover the pan tightly with plastic wrap, pressing it directly against the pudding surface to prevent a skin from forming, and refrigerate for at least 4 hours — overnight is what actually gives you clean slices, per the test above.
Step 6 — Top and garnish before serving
Just before serving, spread the second tub of Cool Whip over the fully chilled pudding layer. Sprinkle with crushed candy canes, holiday M&Ms, and any remaining Oreo crumbs. Adding the topping right before serving — not the night before — keeps it from weeping liquid into the pudding layer underneath.
Pro Tips for Perfect Christmas Cookie Lasagna
Tip 1: Room-temperature cream cheese, no exceptions. This is the single biggest predictor of whether your layers slice clean or slump. Give it a full hour on the counter — microwaving it unevenly softens some spots while leaving cold lumps in the middle.
Tip 2: Use slightly less milk than the pudding box calls for. A thicker pudding layer holds its shape against the cream cheese layer instead of seeping into it overnight. This one change fixed more slicing problems in my tests than any other adjustment.
Tip 3: Press the crust hard. A loose, crumbly crust is the most common reason the bottom layer falls apart when you lift out the first slice. Use the flat bottom of a glass and real pressure.
Tip 4: Chill it overnight, not just 4 hours. I know the box mixes promise a faster set. My side-by-side test showed overnight is what actually gives you photo-worthy squares instead of soft-serve consistency.
Variations and Substitutions
Dietary Variations:
- Gluten-free: Swap the regular Oreos for a gluten-free chocolate sandwich cookie — the texture and crush ratio are nearly identical, so no other adjustments are needed.
- Lower sugar: Use sugar-free instant pudding and a reduced-sugar whipped topping. The layers set slightly softer, so lean toward the overnight chill rather than the 4-hour minimum.
Flavor Variations:
- Gingerbread version: Swap the Oreos for crushed gingersnaps and use vanilla pudding instead of white chocolate — it shifts the whole dessert toward a spiced, molasses flavor that pairs well with the peppermint layer still in place.
- Chocolate peppermint: Use chocolate instant pudding instead of white chocolate for a deeper, more dessert-forward flavor under the peppermint cream cheese layer.
Ingredient Substitutions:
- Cool Whip → stabilized homemade whipped cream (add 1 tablespoon of instant pudding mix to your cream while whipping to help it hold overnight)
- Peppermint extract → ¼ cup finely crushed candy canes stirred into the cream cheese layer for a more textured peppermint flavor
If you like building layered, make-ahead desserts for a crowd, my cheesecake bread is another one that looks far more complicated than it actually is.
Troubleshooting
Why did my layers slide when I cut into it?
This almost always comes down to chill time. If the dessert had less than 8 hours in the fridge, the pudding and cream cheese layers haven’t fully firmed up yet. Chill it longer next time, and in the meantime, serve the current batch in bowls instead of trying for clean squares.
My cream cheese layer has lumps under the pudding — what happened?
The cream cheese was cold when you started mixing. Cold cream cheese resists blending no matter how long you run the mixer, and those lumps show up as bumps under the pudding layer. Let it sit out a full hour next time, and if it’s still too firm, microwave it in 10-second bursts, checking each time.
Why is my pudding layer runny instead of set?
Either the pudding didn’t sit for the full 5 minutes to thicken before you poured it, or you used the full amount of milk the box calls for instead of scaling it back. Both lead to a looser layer that seeps into the cream cheese below overnight.
Storage and Make-Ahead
Counter: Do not leave this dessert at room temperature for more than 2 hours — the dairy layers need refrigeration for food safety and to hold their shape.
Refrigerator: Covered tightly, christmas cookie lasagna keeps well for 4–5 days. The crust softens slightly by day 4 but stays sliceable.
Freeze: Freeze the fully assembled dessert (without the top Cool Whip layer) for up to 2 months, tightly wrapped in plastic and foil. Thaw overnight in the fridge, then add the whipped topping and garnish just before serving.
Reheating: This dessert is served cold — no reheating needed or recommended.
Make-Ahead: This is genuinely a make-ahead dessert by design. Assemble it up to 2 days before serving, keeping the whipped topping and garnish off until the day you plan to serve it.
Frequently Asked Questions
Q: Can I make christmas cookie lasagna the night before a party? A: Yes — it’s actually better that way. The overnight chill is what gives the layers their clean, sliceable structure, so making it the night before is the ideal timeline, not just a shortcut.
Q: Can I use homemade whipped cream instead of Cool Whip? A: You can, but stabilize it first by adding a tablespoon of instant pudding mix while whipping. Plain whipped cream deflates over an overnight chill and won’t hold the top layer as cleanly.
Q: Is this christmas cookie lasagna recipe kid-friendly to assemble? A: Very much so. Crushing the cookies and adding the top layer of candy canes and M&Ms are both easy, no-heat tasks younger kids can help with — the only step that needs an adult is the pudding, since it involves a mixer.
Q: Can I make this in individual cups instead of one big pan? A: Yes — layer the same ingredients into clear cups or small mason jars for individual servings. Reduce the chill time slightly since smaller portions set faster, about 6 hours instead of overnight.
Q: What’s the best way to cut clean slices? A: Use a sharp knife dipped in warm water and wiped dry between each cut. This keeps the pudding and cream cheese layers from smearing across the crust.
Q: Can I skip the peppermint flavor entirely? A: Yes — omit the peppermint extract for a plain vanilla version. It’s a solid year-round layered dessert once the peppermint is gone; just skip the candy cane garnish too.
Q: How far in advance can I crush the Oreos and make the crust? A: The crust can be pressed into the pan up to 2 days ahead and refrigerated, covered, before you add the remaining layers. This is a good way to split the work across two days.
More Dessert Recipes You’ll Love
- Cheesecake Bread — a swirled, cheesecake-stuffed quick bread that shares the same make-ahead, crowd-pleasing spirit as this lasagna.
- Dolly’s Chicken and Stuffing Casserole — a savory make-ahead casserole perfect for balancing out a holiday dessert table.
- Cheesy Ranch Potatoes and Sausage — an easy weeknight sheet-pan dinner if you need something savory before dessert.
- Banana Tempura — for when you want a warm, crispy dessert option alongside this cold, layered one.
No-Bake Christmas Cookie Lasagna (Tested 4 Times)
Ingredients
For the crust:
- 36 Oreo cookies, crushed into fine crumbs
- 1/2 cup (1 stick) unsalted butter, melted
For the peppermint cream cheese layer:
- 16 oz (2 blocks) full-fat cream cheese, room temperature
- 1 cup powdered sugar
- 1/2 teaspoon peppermint extract
- 1 (8 oz) tub Cool Whip, thawed
For the pudding layer:
- 2 boxes (3.4 oz each) white chocolate instant pudding mix
- 23/4 cup cold whole milk
For the topping:
- 1 (8 oz) tub Cool Whip, thawed
- 1/2 cup crushed candy canes
- 1/2 cup holiday-colored M&Ms
- Reserved Oreo crumbs, for garnish
Instructions
- Crush the Oreo cookies into fine crumbs and mix with the melted butter until fully coated. Press firmly and evenly into the bottom of a 9×13-inch baking dish.
- Beat the room-temperature cream cheese and powdered sugar until completely smooth, about 2 minutes. Add the peppermint extract and beat briefly to combine.
- Fold in one tub of thawed Cool Whip by hand until no white streaks remain. Spread the mixture evenly over the chilled crust.
- Whisk the instant pudding mix with the cold milk for about 2 minutes until thickened. Let sit for 5 minutes to fully set.
- Pour and spread the thickened pudding evenly over the cream cheese layer. Cover with plastic wrap pressed directly onto the pudding surface.
- Refrigerate for at least 4 hours, preferably overnight, until all layers are fully set.
- Just before serving, spread the second tub of Cool Whip over the pudding layer. Top with crushed candy canes, M&Ms, and reserved Oreo crumbs.
- Slice with a sharp knife dipped in warm water, wiping the blade clean between cuts, and serve cold.
Notes
- Room-temperature cream cheese is critical — cold cream cheese leaves lumps that show through the pudding layer and won’t slice cleanly.
- Use slightly less milk than the pudding box recommends (2¾ cups instead of 3) for a thicker layer that won’t seep into the cream cheese below.
- This dessert needs a full overnight chill (8+ hours) for clean, photo-worthy slices — a 4-hour chill will taste fine but the layers will slump when cut.
- Store covered in the refrigerator for up to 5 days, or freeze the assembled dessert (minus the top Cool Whip layer) for up to 2 months.