Tangy-Sweet Pickle Cake Recipe

The first time I told my husband I was making a pickle cake, he backed out of the kitchen like I’d announced I was baking a shoe. That’s the reaction this recipe gets every single time — right up until someone actually tastes it, and then the conversation changes fast.
Here’s what’s really going on: this is a vanilla cake with tangy cream cheese frosting, dyed and shaped to look exactly like a jar of dill pickles. Nothing about it is actually savory except one clever ingredient. I tested this three times to find the amount of real pickle brine that gives the frosting a believable tang without making it taste like an actual pickle jar, and the third batch is the one below.
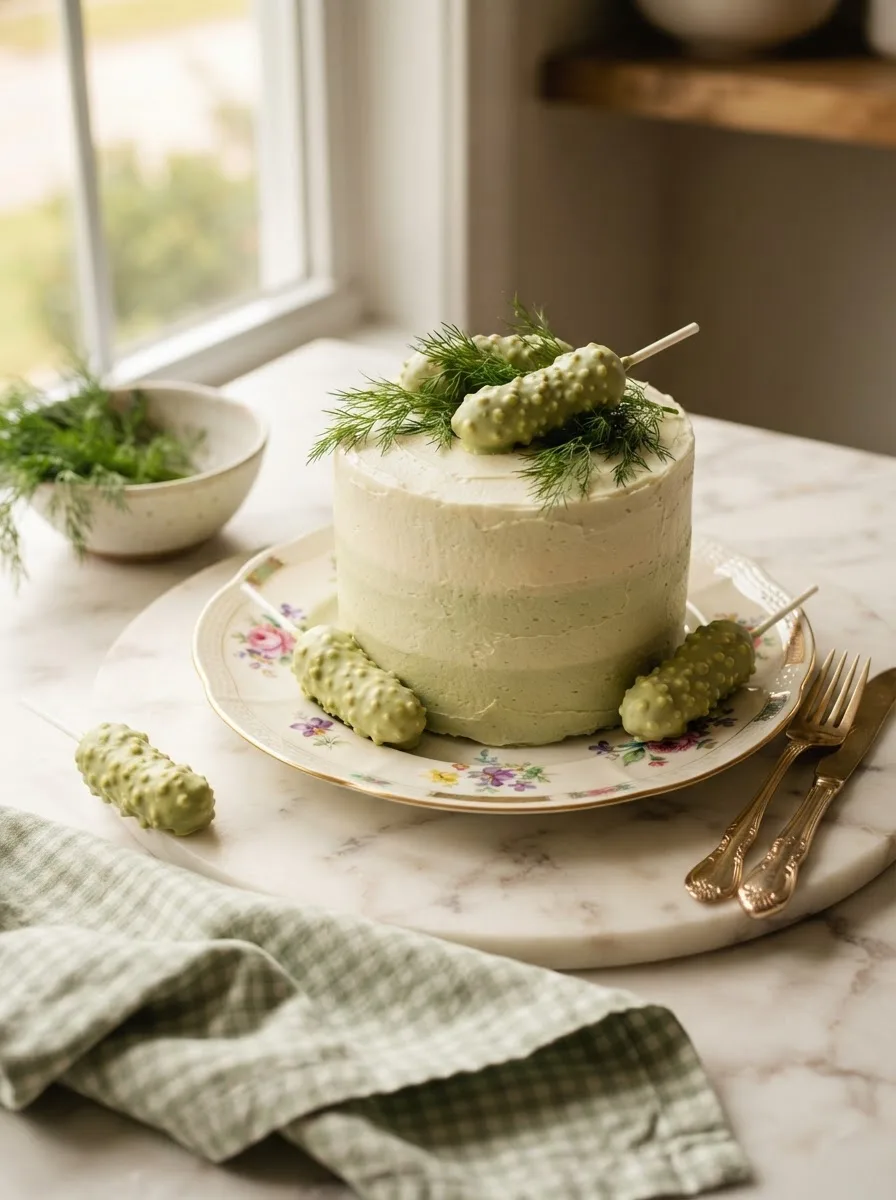
The result is a cake that gets gasps before the first slice even comes off — and then gasps again once people realize the “pickles” are actually vanilla cake pops. It photographs like a joke and eats like a genuinely good dessert, which is the whole point.
★★★★★ “I brought this to my daughter’s April Fools’ party and nobody would touch it until I cut the first slice. Then it was gone in ten minutes. The cake pops are the best part — everyone thought they were real pickles.” — Dana K., recipe tester (pre-launch)
Why You’ll Love This Pickle Cake
- It’s a genuine conversation piece: People will stop mid-sentence when they see this on the table. Nobody expects a jar of pickles to be dessert.
- The tang is real, not gimmicky: A small amount of actual dill pickle brine in the frosting cuts the sweetness in a way that tastes surprisingly good, not weird.
- The cake pop pickles are the showstopper: They look uncannily real from a few feet away, and they’re the part people remember and ask about.
- It’s genuinely easy to execute in stages: You can bake the cake one day, make the cake pops the next, and assemble on day three. Nothing here has to happen all at once.
Key Ingredients
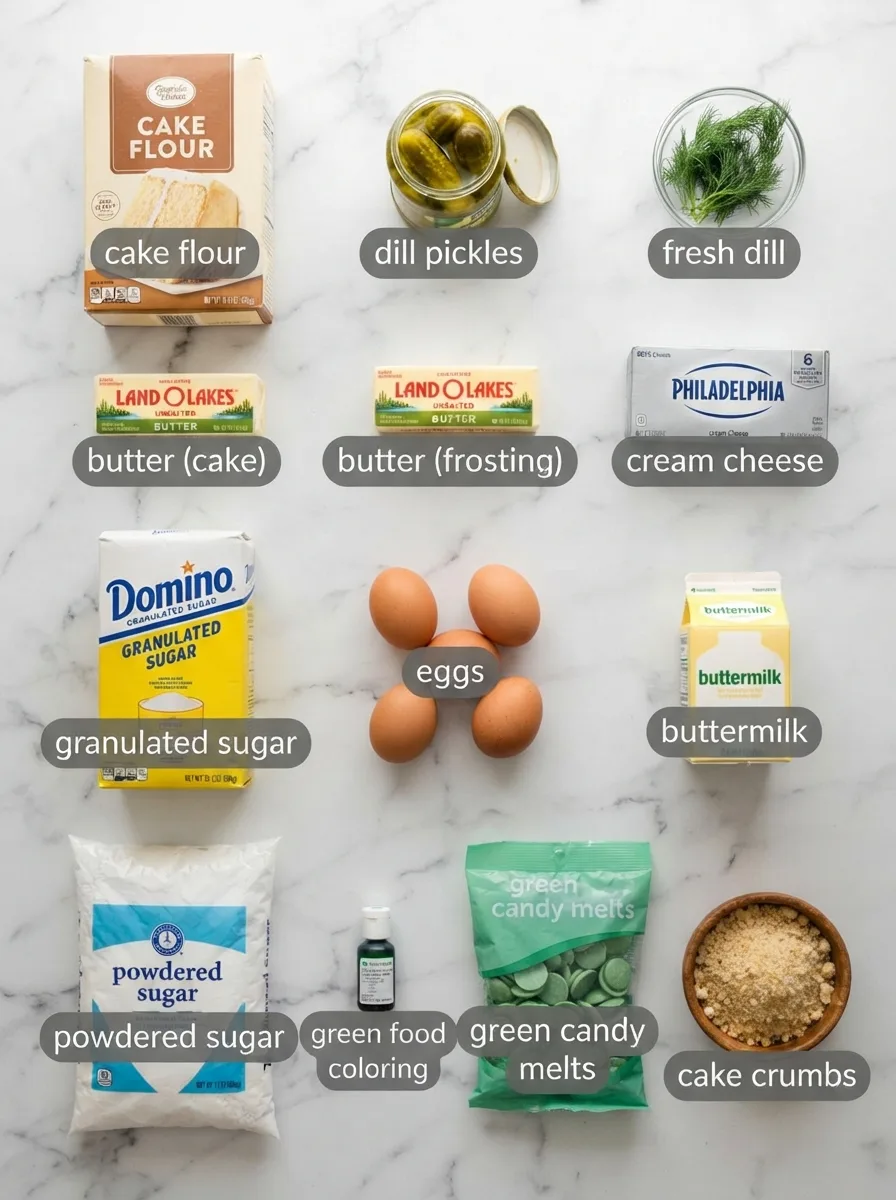
Cake flour (2½ cups). Cake flour has less protein than all-purpose, which gives this cake a finer, softer crumb that holds up well once it’s tinted and layered. All-purpose flour works as a 1:1 swap, but the crumb will be slightly denser.
Dill pickle brine (from the jar, divided between cake and frosting). This is the entire joke and the entire trick. A small amount adds real tang without making the cake taste like pickles outright — it reads more like a lemon-adjacent sourness that plays surprisingly well against the sweet frosting. Do not use vinegar alone as a substitute; brine has salt and pickling spices that balance the acidity differently.
Buttermilk (1 cup). Buttermilk’s acidity tenderizes the gluten in the batter, which is part of why this cake stays soft for days instead of drying out. Whole milk with a tablespoon of lemon juice stirred in works in a pinch.
Cream cheese (8 oz, full-fat, room temperature). This is what keeps the frosting from tasting like straight sugar — the tang here does double duty with the pickle brine, so the overall flavor stays balanced instead of cloying. Low-fat cream cheese will make the frosting noticeably softer and harder to pipe.
Green candy melts (12 oz). These coat the cake pop pickles and are what gives them their believable, slightly waxy pickle-skin look. White chocolate melted with green oil-based food coloring also works, but gel coloring will cause the chocolate to seize.
Green gel food coloring. Gel coloring is concentrated enough to tint the frosting and cake without adding extra liquid that would throw off the batter’s texture. Liquid food coloring works too, but you’ll need significantly more of it to get the same depth of color.
Ingredient Note: Use the brine straight from a jar of regular dill pickles, not sweet or bread-and-butter pickles. The sweeter brines don’t have enough acidity to give the frosting its signature tang, and the flavor comes out flat instead of interesting.
Equipment You’ll Need
- Two 8-inch round cake pans — If you only have one, bake the layers one at a time; just don’t leave the second batch of batter sitting out too long.
- Stand mixer or hand mixer — Needed for both the cake batter and the frosting. A hand mixer works fine; it just takes a little longer to get the frosting fully smooth.
- Offset spatula — Makes the ombre frosting effect much easier to control. A butter knife works as a substitute, just expect a slightly less clean finish.
- Piping bag or zip-top bag with the corner snipped — For the fine green “brine line” details near the top of the cake.
- Toothpick or bamboo skewer — Used to texture the cake pop pickles so they have the slightly bumpy look of real pickle skin.
- Microwave-safe bowl for melting candy — A double boiler works too if you prefer more control over the melt.
Controlling the Tang: How Much Brine to Use (A Controlled Test)
This is the variable that makes or breaks the whole joke. Too little pickle brine and the cake just tastes like a slightly odd vanilla cake — you lose the entire point. Too much, and it tips over into tasting like something went wrong in the kitchen. I tested the frosting three times, changing only the amount of brine each time, to find the range that reads as “interesting tang” instead of “accident.”
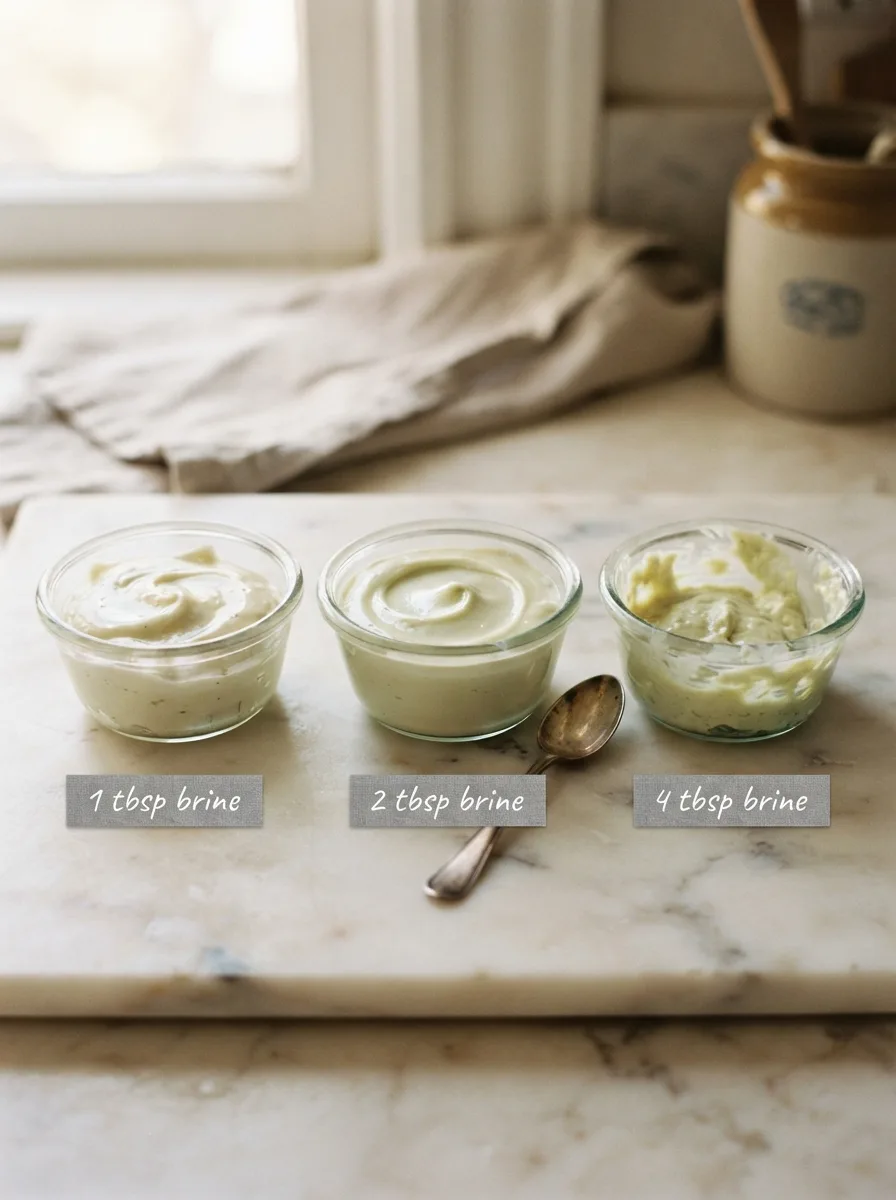
1 tablespoon of brine: Barely noticeable. The frosting tasted like a slightly less sweet cream cheese frosting — nice, but nobody guessed there was pickle involved.
2 tablespoons of brine: This is the winner. The tang is present and genuinely interesting against the sweetness, but it reads as “tangy frosting,” not “pickle jar.” This is the amount in the recipe card below.
4 tablespoons of brine: The frosting thinned out noticeably and became harder to pipe, and the flavor tipped into tasting like an actual pickle got involved. Two testers said it was “almost good” and one said it was “a mistake.” That’s your answer on why 2 tablespoons is the number.
How to Make Pickle Cake
Before you start: Bring the butter, cream cheese, eggs, and buttermilk to room temperature — cold ingredients won’t emulsify properly and the batter can look curdled. Preheat your oven to 350°F (175°C) and grease and flour your two cake pans.
Step 1 — Make and Bake the Vanilla-Brine Cake Layers
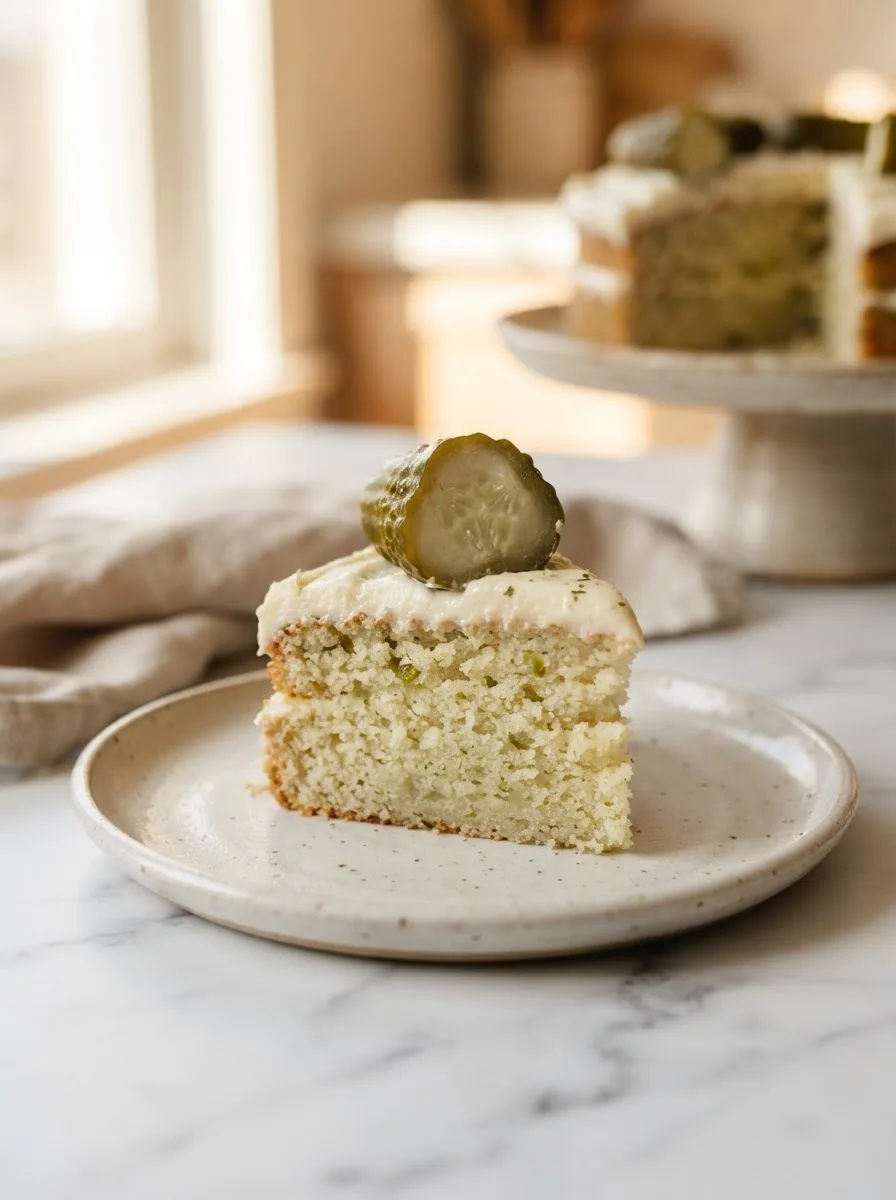
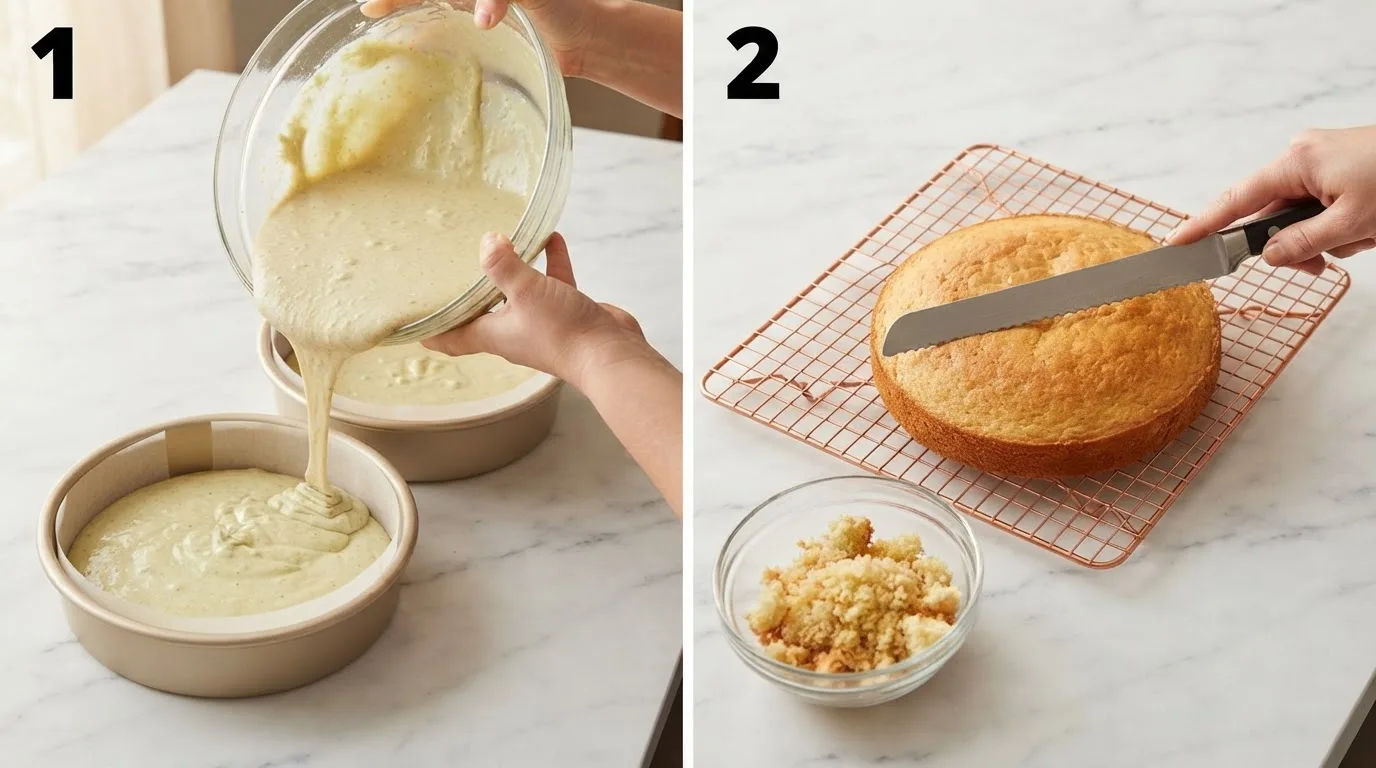
Cream the butter and sugar together for a full 3 minutes until pale and fluffy — this is what gives the crumb its lift, so don’t rush it. Add the eggs one at a time, then the vanilla and 1 tablespoon of the pickle brine. Alternate adding the flour mixture and buttermilk, starting and ending with flour, mixing just until combined. Divide the batter between your two prepared pans and bake for 24–28 minutes, until a toothpick comes out with a few moist crumbs, not wet batter.
Step 2 — Cool and Level the Cake Layers
Let the layers cool in their pans for 10 minutes, then turn them out onto a wire rack to cool completely — at least an hour. Once fully cool, use a serrated knife to level the domed tops so the layers stack evenly. Save every bit of the trimmed crumb; you’ll need about 1 cup of it for the cake pop pickles later.
Step 3 — Make the Tangy Cream Cheese Frosting
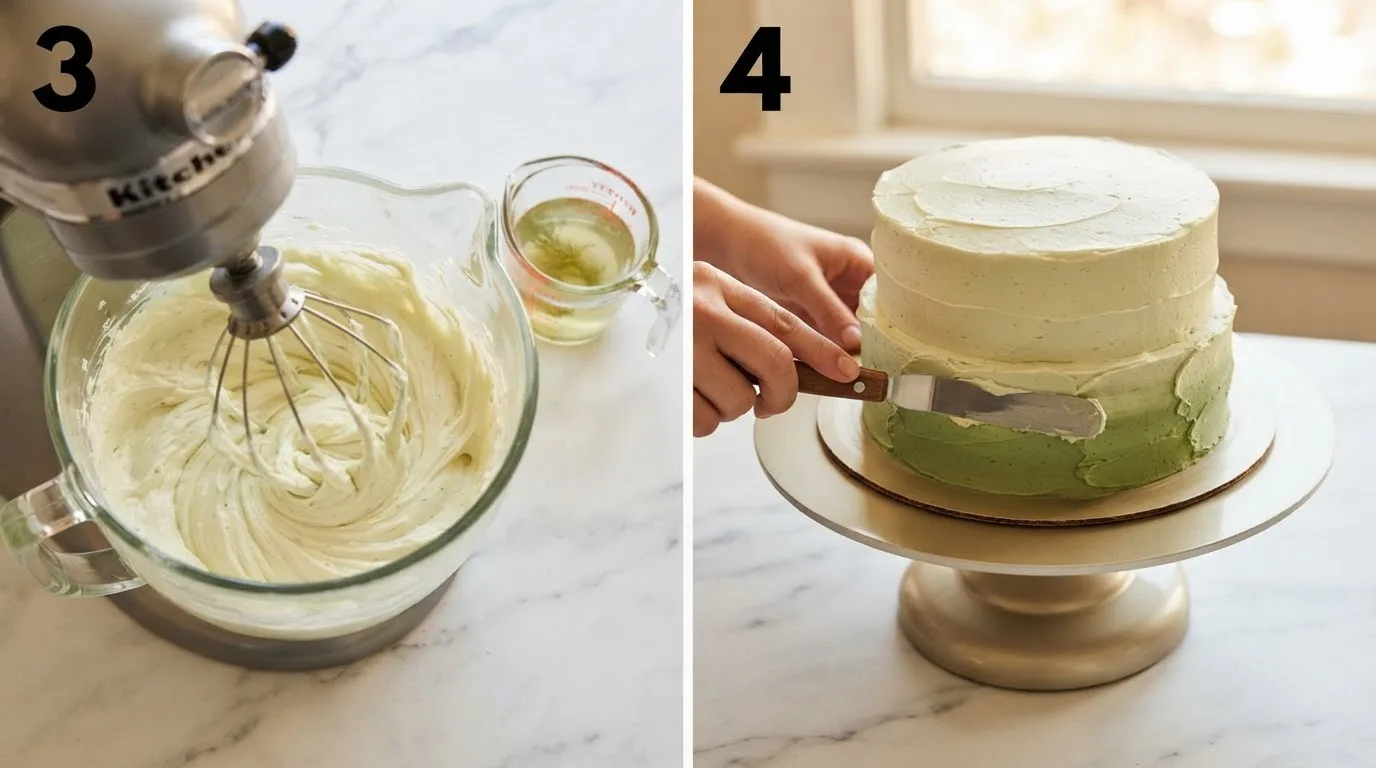
Beat the room-temperature butter and cream cheese together until completely smooth with no lumps — this usually takes about 2 minutes on medium speed. Add the powdered sugar in two batches, mixing on low so it doesn’t fly everywhere, then add the vanilla, salt, and exactly 2 tablespoons of pickle brine per the test above. Beat on medium-high for another minute until light and spreadable. Tint with green gel coloring a drop at a time until you reach a pale, brine-like green.
Step 4 — Frost and Create the Ombre “Brine” Effect
Divide your frosting into three bowls and tint each a slightly different shade of green, from deep at the base to pale near the top. Frost the cake with the darkest shade at the bottom third, blending upward into the medium shade, then the lightest near the top — use your offset spatula in upward strokes to soften the transitions between shades so they blend like light through brine in a jar.
Step 5 — Shape and Coat the Cake Pop Pickles
Mix the reserved cake crumbs with 2–3 tablespoons of frosting until the mixture holds together like dough when pressed. Roll into small oval, slightly tapered shapes about the size of a real pickle spear. Chill these for 15 minutes so they hold their shape, then dip each one in melted green candy coating. While the coating is still wet, roll a toothpick lightly across the surface in a crosshatch pattern to mimic pickle skin texture.
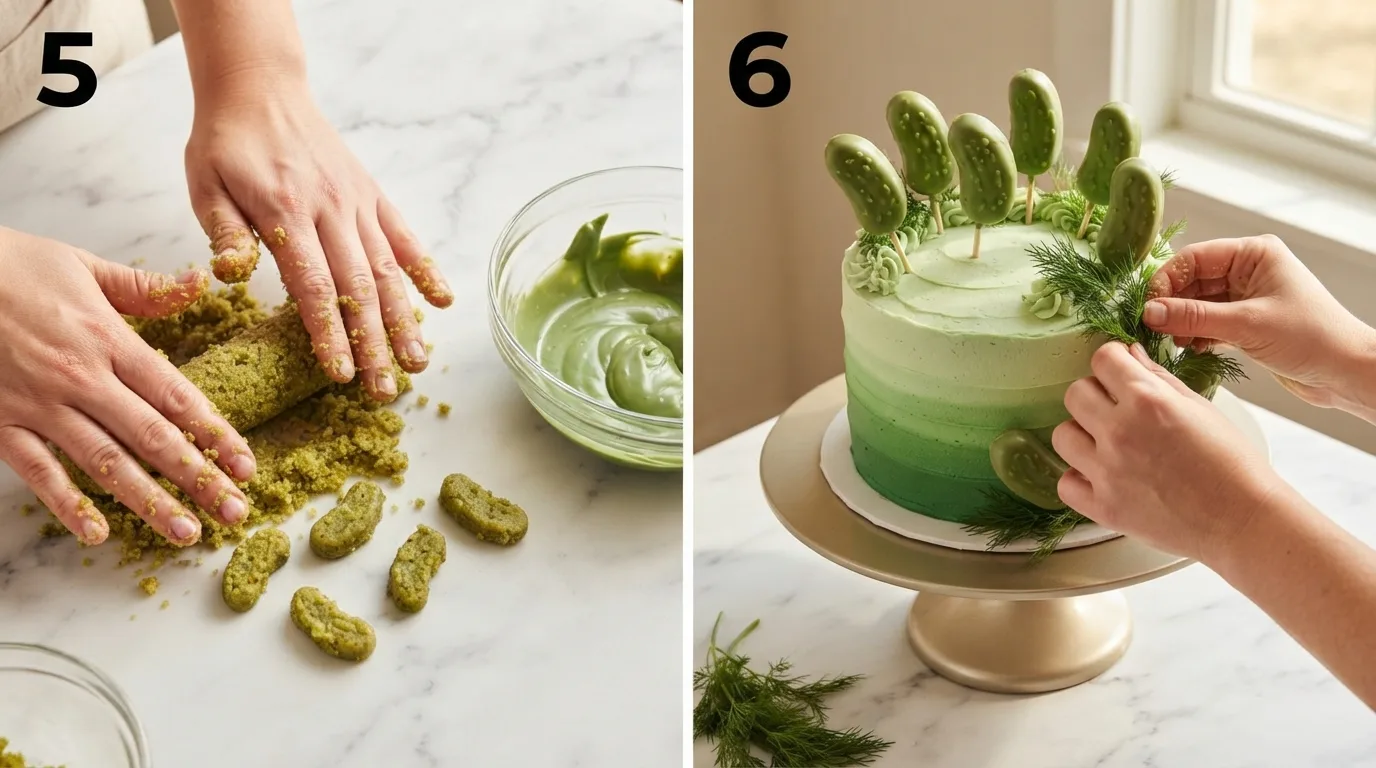
Step 6 — Assemble Your Pickle Cake
Once the candy coating on your cake pop pickles has set (about 10 minutes at room temperature), arrange them standing upright on top of the cake and leaning against the base, mimicking pickles packed into a jar. Tuck a few fresh dill sprigs between them for a more convincing finish, and pipe a few thin, slightly translucent lines of leftover pale frosting near the top of the cake to suggest brine lines. Step back and let someone see it before you tell them what it actually is.
Pro Tips for Perfect Pickle Cake
Tip 1: Chill the cake pops before dipping. If the crumb-and-frosting mixture is too soft when it hits the melted candy coating, the shapes will slump and lose their pickle silhouette. Fifteen minutes in the fridge firms them up enough to hold their shape through the dip.
Tip 2: Thin your candy melts if they seize. Candy melts can turn thick and clumpy if any water gets into the bowl. Stir in a teaspoon of coconut oil or shortening to smooth them back out — never add water, which will make them worse.
Tip 3: Blot your brine before adding it to frosting. Pickle brine can carry tiny bits of dill or spice that look odd suspended in pale frosting. Pour it through a fine mesh strainer first so you get the flavor without the flecks.
Tip 4: Build your ombre in thin layers, not one thick coat. Two thin passes of each frosting shade blend together far more smoothly than one thick pass. If the colors look too separated, go back over the transition zones with a clean, barely-frosted spatula to soften the line.
Variations and Substitutions
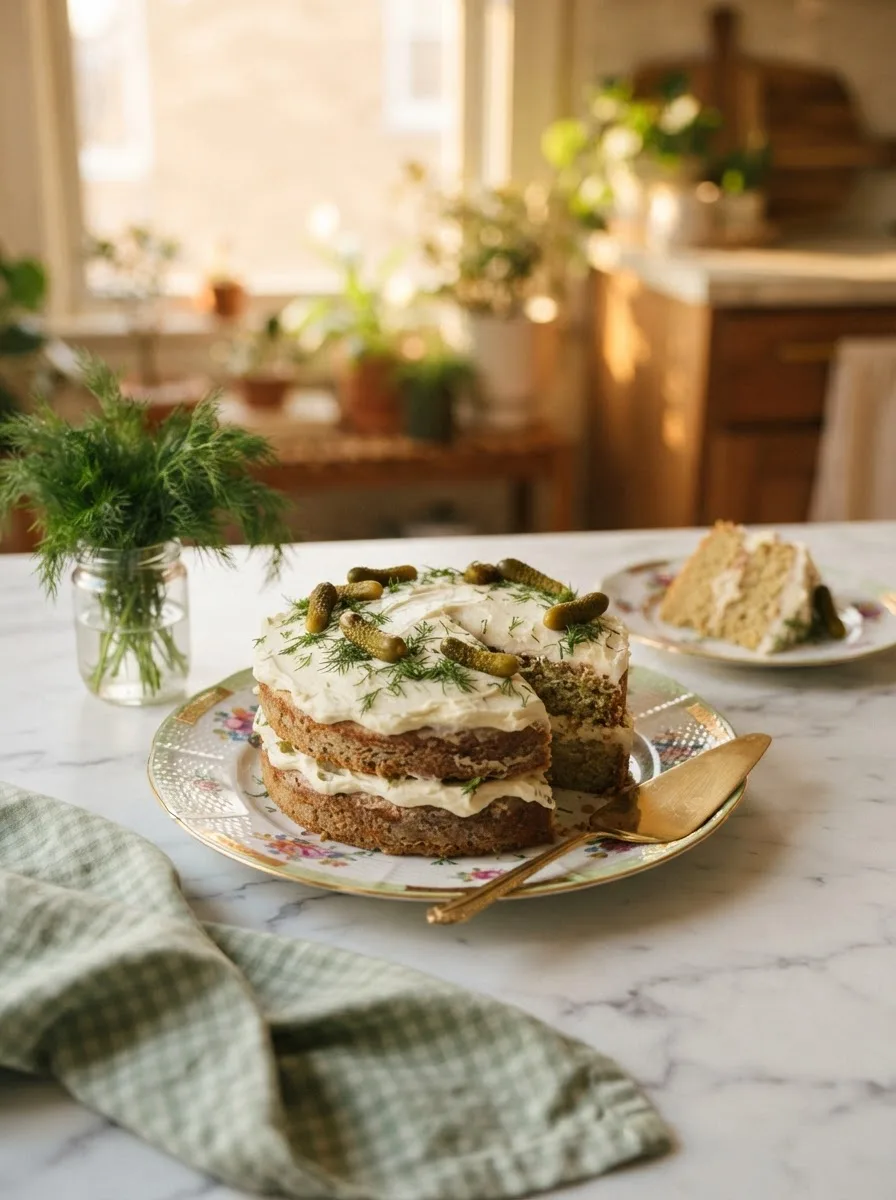
Dietary Variations:
- Gluten-free: Swap in a 1:1 gluten-free cake flour blend. The crumb will be slightly more delicate, so handle the trimmed pieces gently when shaping the cake pop pickles.
- Dairy-free: Use a plant-based butter and dairy-free cream cheese for the frosting, and a dairy-free buttermilk substitute (plant milk plus a splash of vinegar) for the cake. The tang will be slightly less rounded, but the brine still carries the flavor well.
Flavor Variations:
- Spicy pickle version: Use brine from a jar of spicy or jalapeño dill pickles for a frosting with real heat behind the tang — a fun twist if you’re serving adults only.
- Sweeter, milder version: Swap the dill pickle brine for bread-and-butter pickle brine and skip the visual pickle spears in favor of a simple green ombre cake, if you want the joke without the full tang.
Ingredient Substitutions:
- Green candy melts → white chocolate melted with a few drops of oil-based green food coloring (avoid gel coloring here, which will seize the chocolate)
- Fresh dill sprigs → dried dill sprinkled lightly over the finished cake, if fresh isn’t available
If trompe l’oeil desserts are your thing, my cheesecake bread plays a similar trick — it looks like a loaf of bread but slices like a cheesecake.
Troubleshooting
Why does my frosting taste too much like an actual pickle?
This almost always means too much brine went in, or the brine wasn’t strained. Stick to exactly 2 tablespoons per batch of frosting, strained through a fine mesh sieve first to remove any spice flecks that can intensify the flavor.
Why did my cake pop pickles crack when I dipped them?
This happens when the candy coating is too hot or the cake pop mixture wasn’t chilled first. Let your melted candy cool slightly before dipping, and always chill the shaped cake mixture for at least 15 minutes beforehand so it can handle the temperature difference.
Why does my green frosting look uneven or streaky?
Uneven color usually means the gel coloring wasn’t fully mixed in before you started building the ombre layers. Mix each bowl of frosting until the color is completely uniform, with no visible swirls, before you start spreading it on the cake.
Storage and Make-Ahead
Counter: The assembled cake is fine at room temperature for up to 4 hours, especially if you’re serving it at a party — after that, the cream cheese frosting needs to go in the fridge.
Refrigerator: Store the fully assembled cake, loosely covered, for up to 4 days. The frosting firms up slightly when cold, which actually makes the cake pop pickles hold their shape even better.
Freeze: Freeze the unfrosted cake layers, wrapped tightly in plastic, for up to 2 months. The cake pop pickles also freeze well on their own for up to 1 month — thaw both in the fridge overnight before assembling.
Reheating: This cake isn’t meant to be reheated. If it’s been chilled, let slices sit at room temperature for 20–30 minutes before serving for the best texture.
Make-Ahead: Bake the cake layers up to 2 days ahead and store wrapped at room temperature. Shape and coat the cake pop pickles up to 2 days ahead and refrigerate. Frost and assemble the day you’re serving for the freshest look.
Frequently Asked Questions
Q: Does this cake actually taste like pickles? A: No — the cake itself is vanilla, and the frosting has just enough real pickle brine to taste tangy, not sour or savory. Most people describe it as “a tangier cream cheese frosting” rather than anything pickle-flavored.
Q: Can I make this without the cake pop pickles? A: Yes. The ombre green frosting alone still gets a strong reaction, and it’s a much faster version if you’re short on time. You’ll lose some of the visual surprise, but the cake itself is unchanged.
Q: Is this safe for kids to eat? A: Yes, as long as you skip the spicy pickle brine variation. The amount of brine used is small and mostly reads as tang rather than pickle flavor, and there’s no alcohol or anything else that would make it inappropriate for kids.
Q: Can I use bottled pickle brine instead of brine from an actual jar of pickles? A: Yes, as long as it’s plain dill pickle brine with a similar vinegar and salt content. Avoid any brine labeled “sweet” or “candied,” which won’t give you the same tang.
Q: How far in advance can I make this for a party? A: You can bake the cake and shape the cake pop pickles up to 2 days ahead. I’d frost and assemble the day of, or the morning of, so the ombre effect and the pickle shapes both look their freshest.
Q: Can I make this as cupcakes instead of a full cake? A: Yes — the batter makes about 24 cupcakes. Reduce the bake time to 16–18 minutes, and top each with a small dollop of ombre frosting and a single mini cake pop pickle for a fun individual version.
More Fun and Family-Friendly Recipes You’ll Love
- Cheesecake Bread — Another trompe l’oeil dessert that looks like a savory loaf but slices like a cheesecake.
- Dolly’s Chicken and Stuffing Casserole — A cozy, no-fuss dinner if you want something reliably savory after all this novelty baking.
- Cheesy Ranch Potatoes and Sausage — An easy weeknight sheet-pan dinner that pairs well with a party spread.
- Banana Tempura — Another playful, conversation-starting dessert if you loved the surprise factor here.
Tangy-Sweet Pickle Cake Recipe
Ingredients
For the Cake Layers:
- 21/2 cup cake flour
- 1 tbsp baking powder
- 1/2 tsp baking soda
- 1/2 tsp salt
- 1 cup unsalted butter, room temperature
- 13/4 cup granulated sugar
- 4 large eggs, room temperature
- 1 tbsp vanilla extract
- 1 cup (240ml) buttermilk, room temperature
- 1 tbsp dill pickle brine
- Green gel food coloring, a few drops
For the Tangy Cream Cheese Frosting:
- 1 cup unsalted butter, softened
- 8 oz full-fat cream cheese, softened
- 41/2 cup powdered sugar
- 2 tbsp dill pickle brine, strained
- 1/2 tsp vanilla extract
- Pinch of salt
- Green gel food coloring, divided into 3 shades
For the Cake Pop Pickles:
- 1 cup reserved cake crumbs
- 2 –3 tbsp frosting (from above)
- 12 oz green candy melts
- Fresh dill sprigs, for garnish
Instructions
- Preheat the oven to 350°F (175°C). Grease and flour two 8-inch round cake pans.
- Whisk together the cake flour, baking powder, baking soda, and salt in a bowl. Set aside.
- Cream the butter and sugar together for a full 3 minutes until pale and fluffy.
- Add the eggs one at a time, beating well after each addition, then mix in the vanilla and 1 tablespoon of pickle brine.
- Alternate adding the flour mixture and buttermilk to the batter in three additions, starting and ending with flour, mixing just until combined.
- Divide the batter between the prepared pans and bake for 24–28 minutes, until a toothpick comes out with a few moist crumbs.
- Cool the cakes in their pans for 10 minutes, then turn out onto a wire rack to cool completely, about 1 hour.
- Level the cooled cake layers with a serrated knife, reserving 1 cup of the trimmed crumbs for the cake pop pickles.
- Beat the softened butter and cream cheese together until smooth. Add the powdered sugar in two batches on low speed, then mix in the vanilla, salt, and strained pickle brine.
- Divide the frosting into three bowls and tint each a different shade of green, from deep to pale.
- Frost the cake in an ombre effect, with the darkest shade at the base blending up to the palest shade at the top.
- Mix the reserved cake crumbs with 2–3 tablespoons of frosting until it holds together like dough. Shape into small pickle-spear ovals and chill for 15 minutes.
- Melt the candy coating and dip each cake pop pickle, texturing the surface with a toothpick while the coating is still wet.
- Once the coating has set, arrange the cake pop pickles on top of and around the base of the cake, tucking in fresh dill sprigs for the finished look.
Notes
- Strain the pickle brine before adding it to the frosting to remove any dill flecks or spice bits.
- Stick to exactly 2 tablespoons of brine in the frosting — more than that shifts the flavor from "tangy" to "actual pickle."
- Chill the cake pop pickle shapes for at least 15 minutes before dipping so they hold their shape.
- If candy melts seize, stir in a teaspoon of coconut oil rather than water.
- The unfrosted cake layers freeze well, tightly wrapped, for up to 2 months.
- The finished cake keeps in the fridge, loosely covered, for up to 4 days.
- Build the ombre frosting in two thin layers per shade rather than one thick coat for smoother blending.
- For a milder version, swap the dill brine for bread-and-butter pickle brine and reduce it to 1 tablespoon.