Sweet Potato Pineapple Donut Rings Recipe (No-Fail)

If you’ve been hunting for a sweet potato pineapple donut rings recipe that holds its shape once you flip it out of the pan, this is the one I finally got right after three sticky, collapsed attempts.
The combination sounds simple — sweet potato for body, pineapple for brightness — but too much fruit turns the center gummy every time. This version bakes instead of frying and uses well-drained crushed pineapple to fix that.
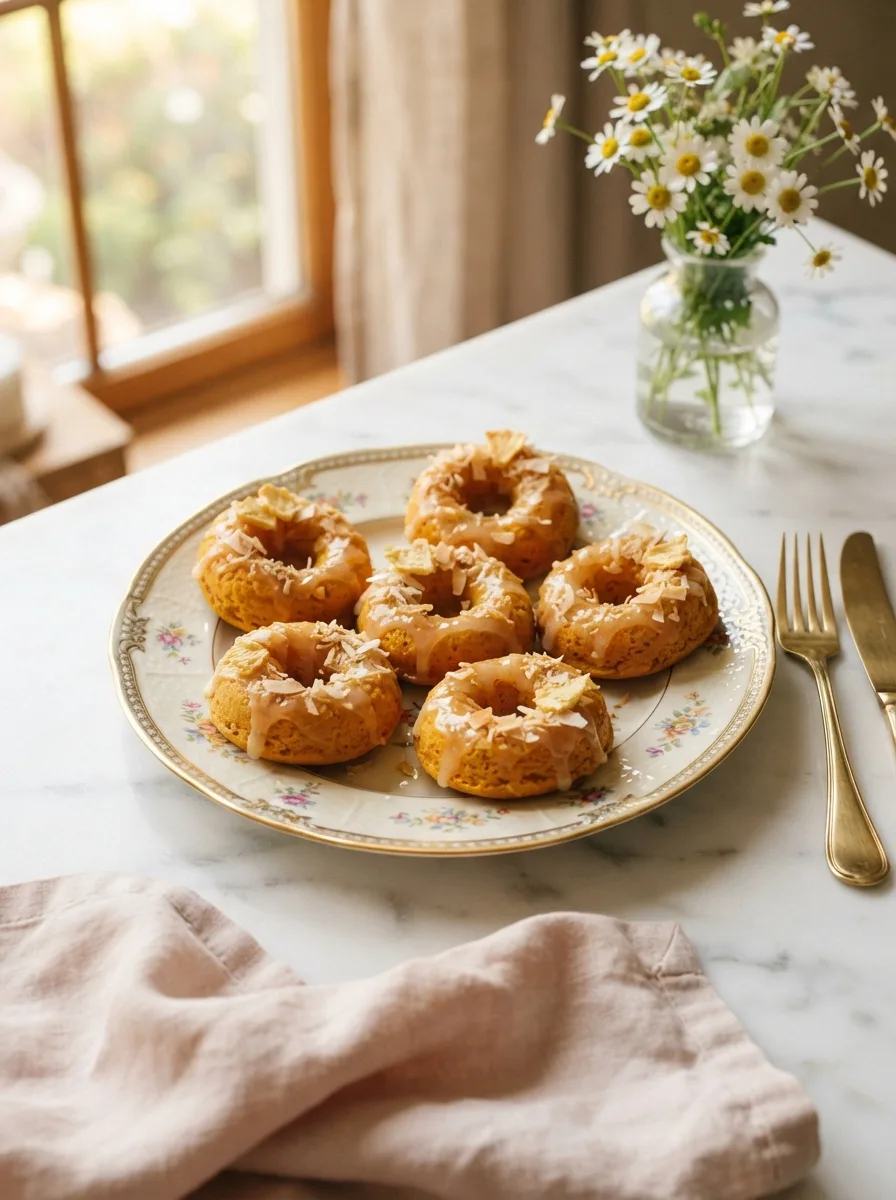
I tested this three times, changing only how much liquid I pressed out of the pineapple before folding it in. The batch below set up clean every time, with a soft crumb that still holds a glaze.
★★★★★ “I make a lot of baked donuts and these actually taste like sweet potato and pineapple, not just sugar. Mine came out clean from the pan on the first try, no sticking.” — Renata M., recipe tester (pre-launch)
Why You’ll Love This Sweet Potato Pineapple Donut Rings Recipe
- Baked, not fried: No oil, no splatter, no standing over a pot — just a donut pan and a 350°F oven.
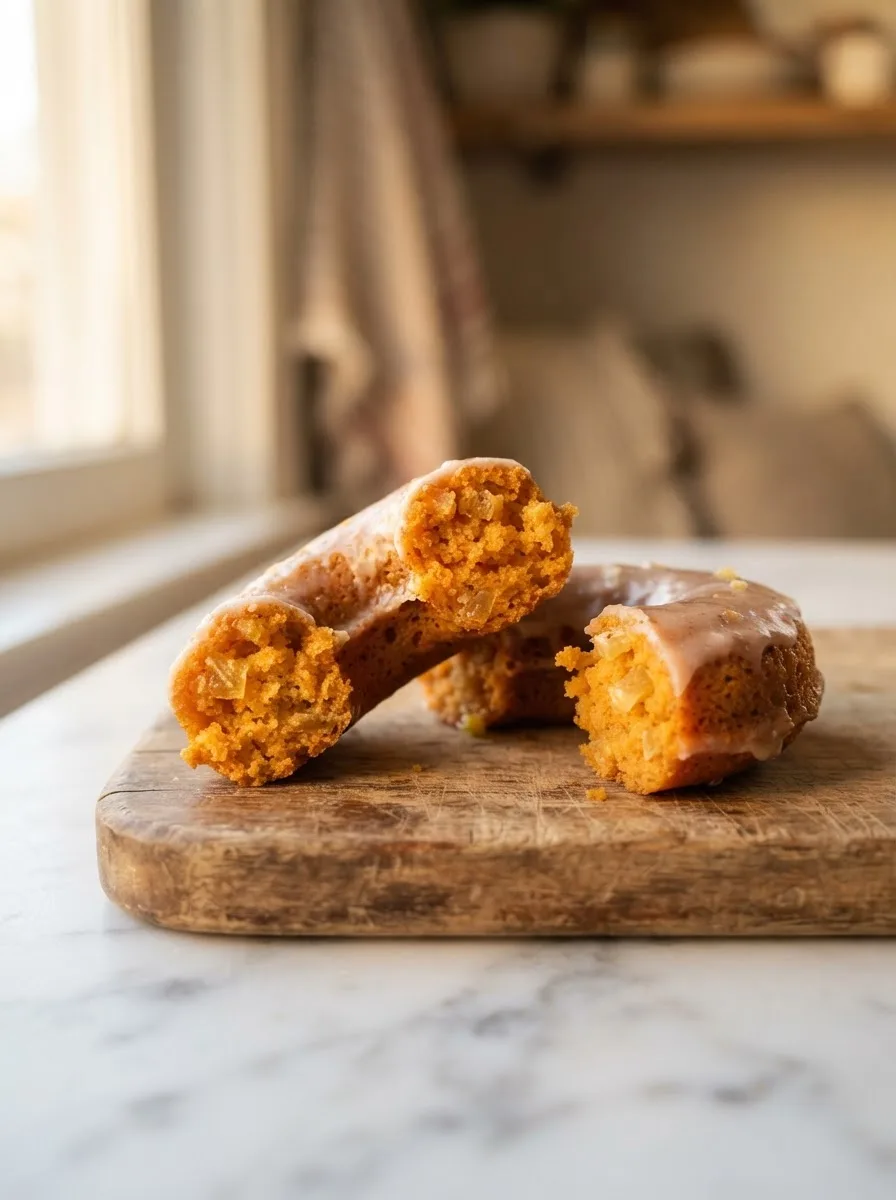
- No gummy centers: The pineapple-drain step (tested three times) keeps the crumb tender without turning wet or dense.
- Real sweet potato flavor: Roasted mashed sweet potato does the work here, not the canned pie-filling kind, so the flavor is earthy and warm, not just sweet.
- Make-ahead friendly: Bake the donuts a day ahead and glaze them fresh — they hold their texture well overnight.
Key Ingredients
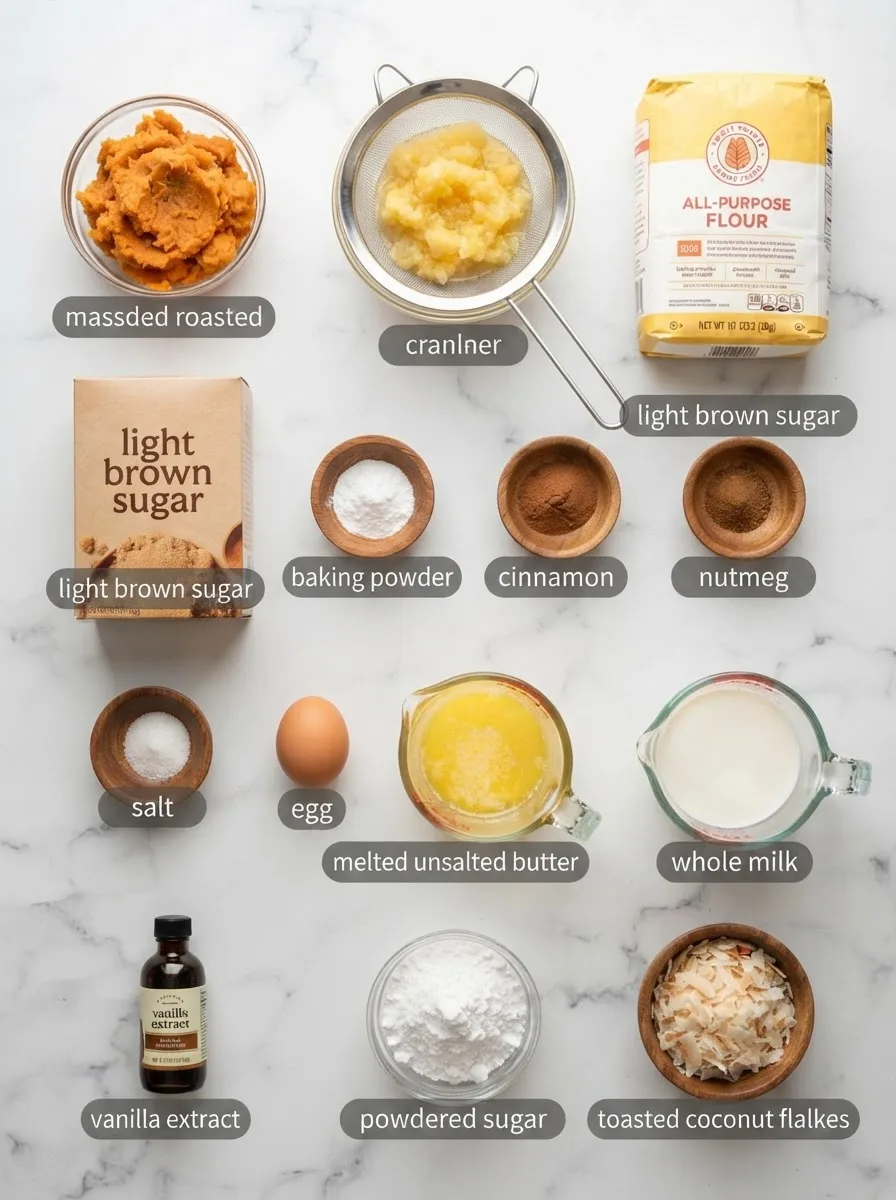
Mashed sweet potato (1 cup / 225g). Roast a medium sweet potato until fork-tender, then mash it smooth — this gives you real flavor and the right moisture level. Canned sweet potato puree works in a pinch, but it’s wetter, so drain any excess liquid off the top first.
Crushed pineapple (¾ cup / 155g, drained and pressed). This is the ingredient the whole recipe hinges on. Straight from the can, crushed pineapple carries a surprising amount of liquid — pressed dry in a sieve, it adds flavor without adding water the batter can’t absorb.
Brown sugar (½ cup / 100g). The molasses in brown sugar keeps the crumb soft for longer than white sugar would, and it plays well with the roasted sweet potato flavor.
Melted butter (⅓ cup / 75g). Melted, not creamed — this recipe doesn’t need the air a creaming method gives you. Melted butter keeps the batter simple to mix by hand.
Ingredient Note: Don’t skip pressing the pineapple. This one step is the difference between a donut that holds its ring shape and one that sinks in the middle. More on that in the test section below.
Equipment You’ll Need
- 6-cavity donut pan — This recipe is written for a standard nonstick donut pan. If you only have one pan, bake in two batches; letting the batter sit 10 minutes before the second bake won’t hurt it.
- Fine mesh sieve — For draining and pressing the pineapple. A clean kitchen towel works if you don’t have one — just twist and squeeze.
- Piping bag or zip-top bag with the corner snipped — Makes filling the donut cavities neatly much easier than a spoon. Not required, but it saves a mess.
- Wire cooling rack — Lets air circulate around the donuts so the bottoms don’t turn soggy while they cool.
Controlling the Center: A Controlled Test on Draining the Pineapple
I tested this recipe three times, changing only one thing each time: how much liquid I pressed out of the crushed pineapple before folding it into the batter.
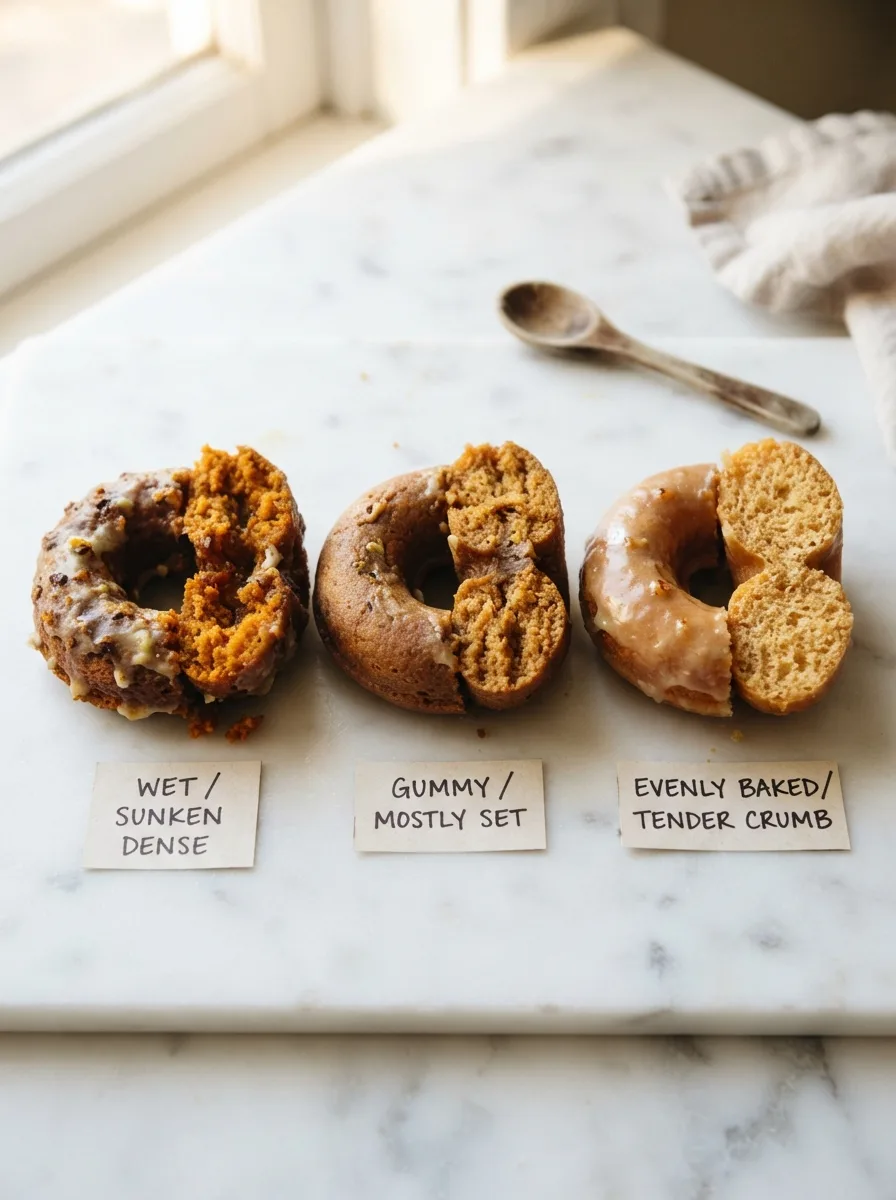
Test 1 — Straight from the can, undrained: The center sank as it cooled and stayed visibly wet even after 18 minutes in the oven. Too much liquid for the batter to absorb.
Test 2 — Drained but not pressed: Better, but the middle still had a faint gummy band right at the core.
Test 3 — Drained and pressed dry with the back of a spoon: No sinking, no gummy band. The crumb was evenly tender edge to edge. This is the method in the recipe below.
Takeaway: Pressing the pineapple until only 2–3 tablespoons of liquid remain (save that liquid for the glaze) is the one non-negotiable step in this recipe.
How to Make Sweet Potato Pineapple Donut Rings
Before you start: Preheat your oven to 350°F (175°C) and grease your donut pan well, even if it’s nonstick — the sweet potato batter is sticky and will grab onto any dry spots.
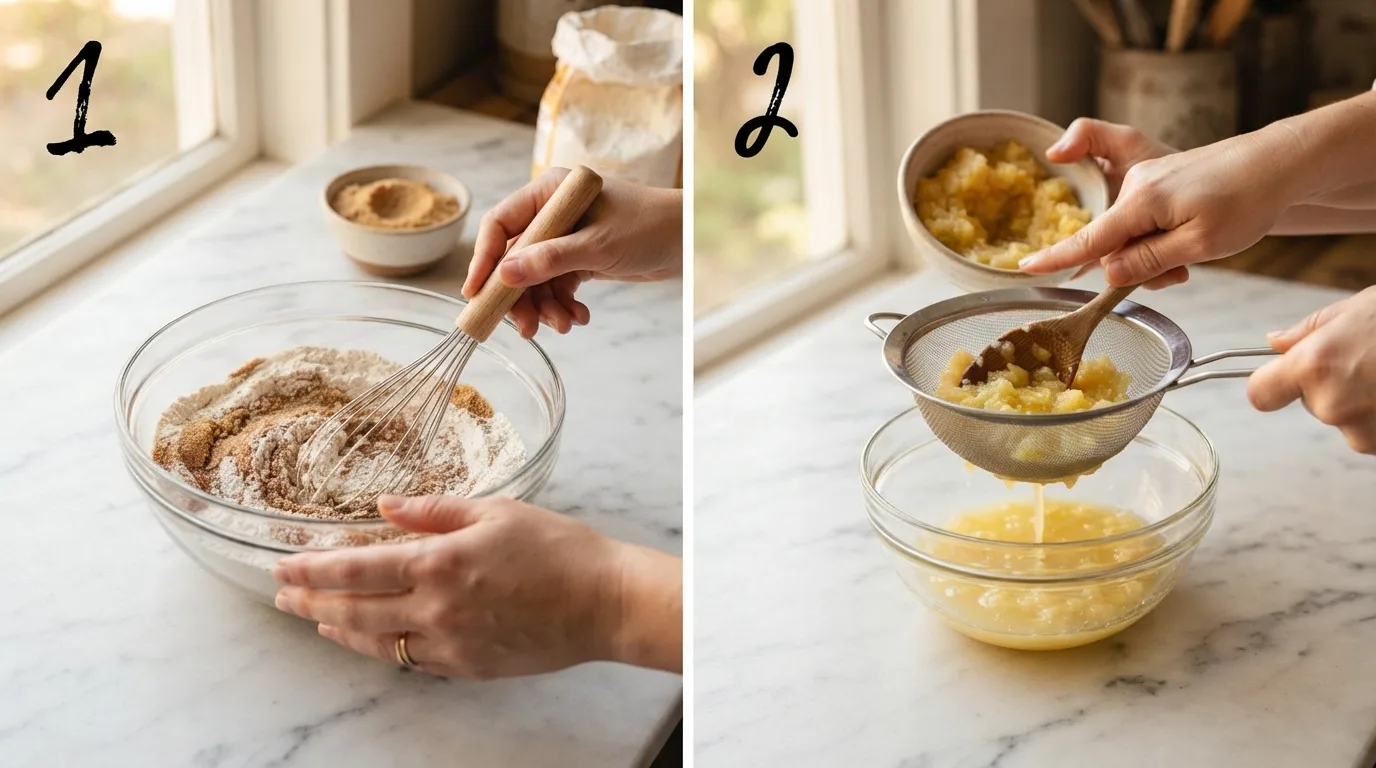
Step 1 — Mix the dry ingredients
In a medium bowl, whisk together the flour, brown sugar, baking powder, cinnamon, nutmeg, and salt until evenly combined. Breaking up any brown sugar clumps here means you won’t find sugar streaks in the baked donuts.
Step 2 — Drain and press the pineapple
Set the crushed pineapple in a fine mesh sieve over a bowl. Press it firmly with the back of a spoon until only 2–3 tablespoons of liquid drips through. Set the pineapple aside and reserve the liquid for the glaze.
Step 3 — Mix the wet ingredients
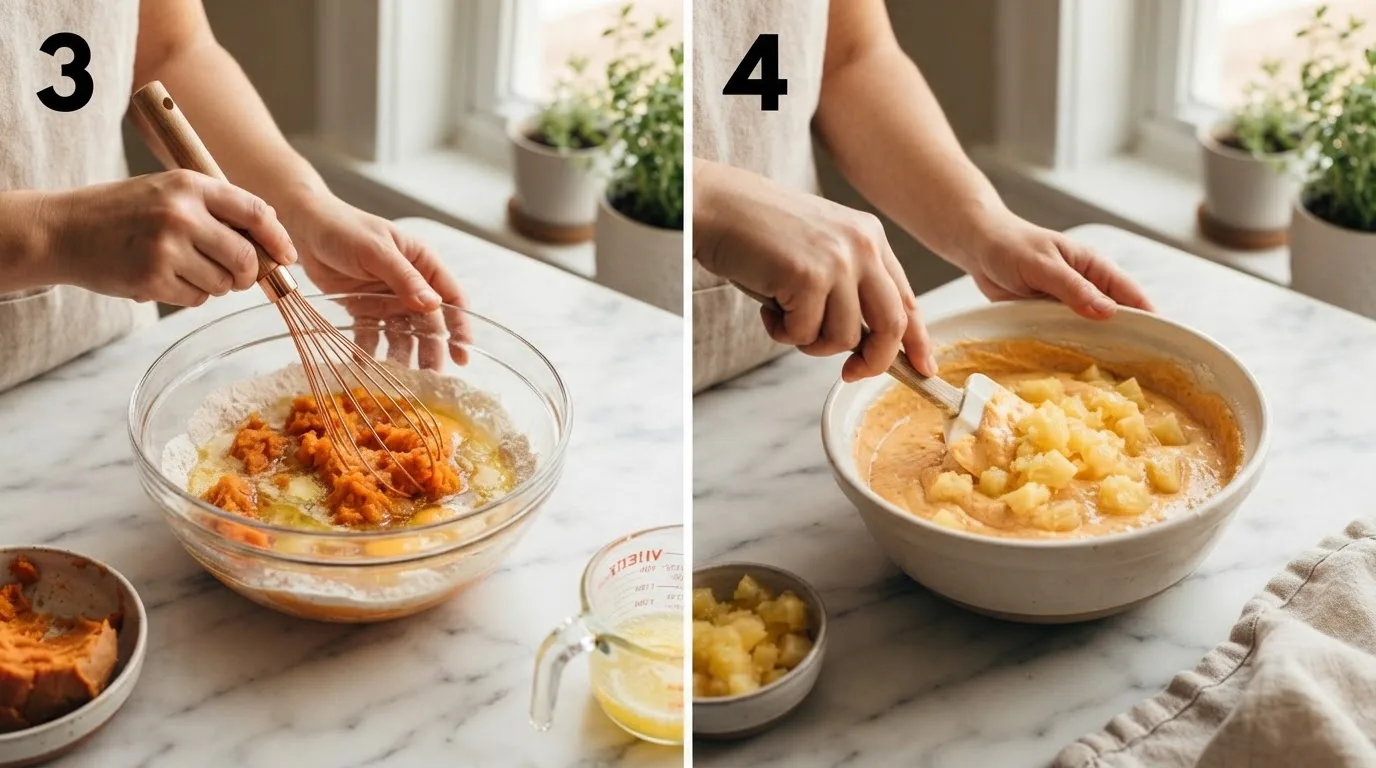
In a separate bowl, whisk the egg, melted butter, milk, and vanilla until smooth, then whisk in the mashed sweet potato until no streaks remain.
Step 4 — Combine and fold in the pineapple
Pour the wet ingredients into the dry ingredients and fold with a spatula just until no dry flour is visible. Fold in the pressed pineapple last, stirring only enough to distribute it evenly. Overmixing here is what leads to a tough, dense donut.
Step 5 — Fill the donut pan
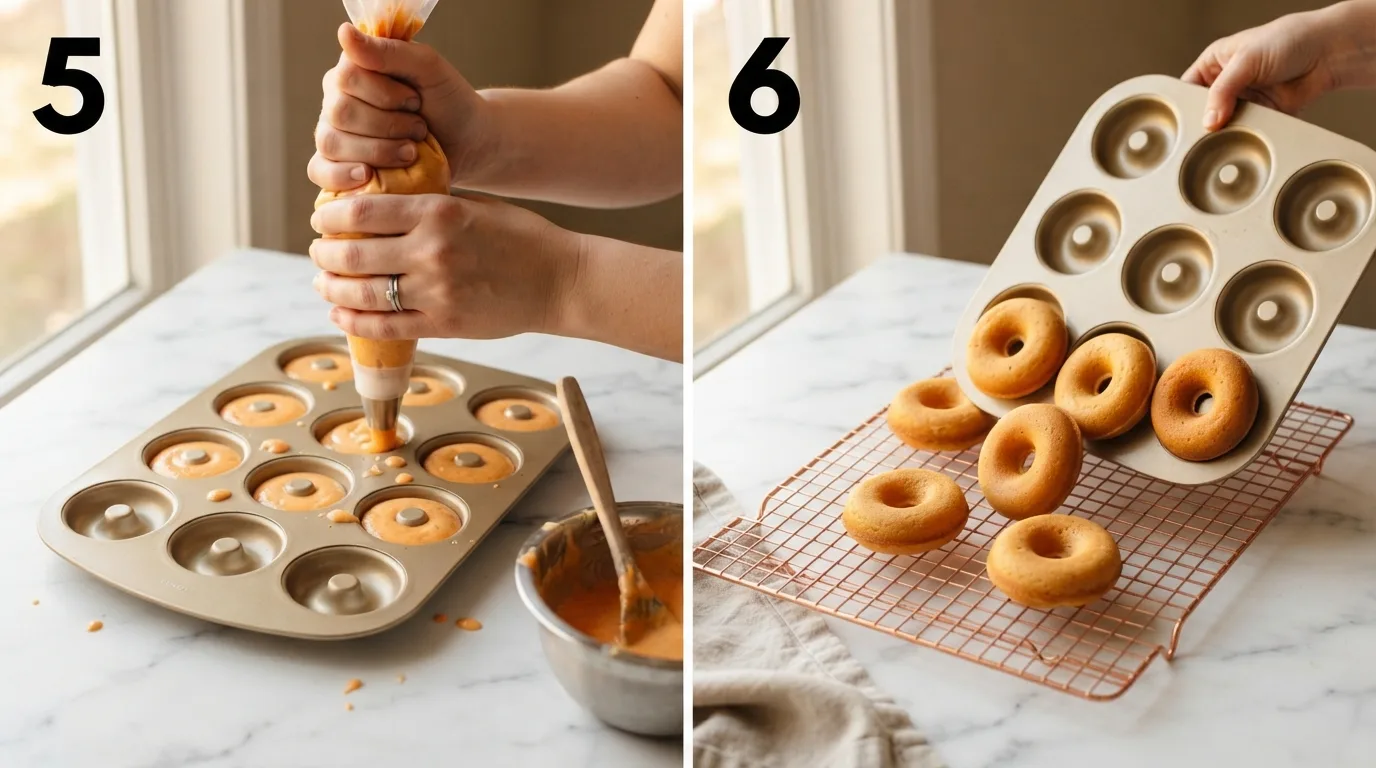
Spoon or pipe the batter into the greased cavities, filling each about two-thirds full. Overfilling is the most common reason donuts lose their ring shape in the oven.
Step 6 — Bake and cool
Bake for 14–16 minutes, until the edges are golden and a toothpick inserted near the center comes out clean. Let the donuts cool in the pan for 5 minutes, then turn them out onto a wire rack to cool completely before glazing.
Step 7 — Glaze
Whisk the powdered sugar with the reserved pineapple juice and a pinch of salt until smooth and pourable. Dip the top of each cooled donut into the glaze, then set back on the rack. Sprinkle with toasted coconut while the glaze is still wet, if using.
Pro Tips for Perfect Sweet Potato Pineapple Donut Rings
Tip 1: Press the pineapple bone-dry. Two to three tablespoons of liquid is the target — any more and the center won’t fully set, even with a longer bake.
Tip 2: Don’t overfill the cavities. Two-thirds full gives the batter room to rise into a proper ring without doming over the hole and closing it up.
Tip 3: Weigh your sweet potato if you can. 225g of mashed sweet potato is a more reliable measurement than “1 cup,” since mashing density varies a lot from potato to potato.
Tip 4: Let the donuts cool fully before glazing. A warm donut melts the glaze right off. Ten extra minutes on the rack makes the glaze set into a real coating instead of sliding down the sides.
Variations and Substitutions

Dietary Variations:
- Gluten-free: Swap the all-purpose flour for a 1:1 gluten-free baking blend. The crumb turns out slightly more delicate, so let the donuts cool fully before removing from the pan.
- Dairy-free: Use melted coconut oil in place of the butter and full-fat canned coconut milk in place of the whole milk. The coconut flavor pairs naturally with the pineapple.
Flavor Variations:
- Toasted coconut everything: Fold ¼ cup toasted coconut into the batter in addition to the topping for a stronger coconut presence throughout.
- Warm spice swap: Replace the cinnamon and nutmeg with 1 teaspoon pumpkin pie spice for a cozier, more fall-forward flavor.
Ingredient Substitutions:
- Fresh pineapple, finely chopped, works in place of canned — just drain it even longer, since fresh pineapple holds more liquid than canned.
- No donut pan? Bake the batter as muffins in a lined muffin tin for 18–20 minutes; you’ll lose the ring shape but keep the flavor and texture.
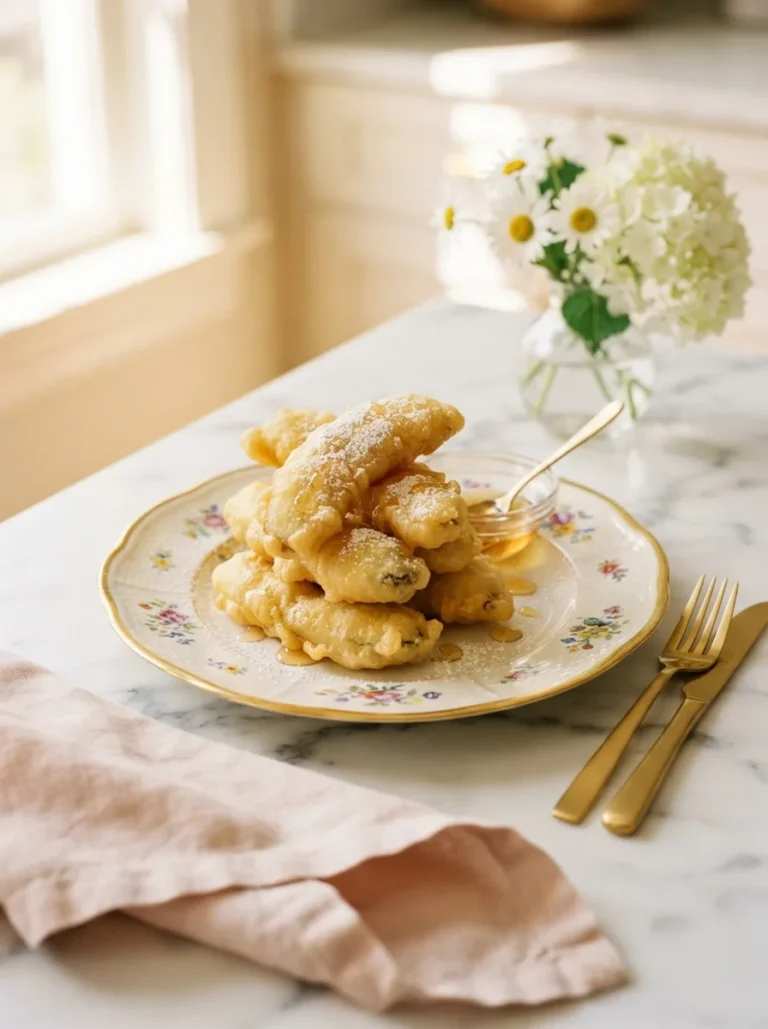
If you like recipes that use up leftover mashed vegetables in a sweet direction, my banana tempura takes a similarly unexpected approach with fruit instead.
Troubleshooting
Why did my donuts sink in the middle?
This almost always means the pineapple wasn’t pressed dry enough before it went into the batter. Extra liquid keeps the center from fully setting, even if the edges look done. Press until only 2–3 tablespoons of liquid remain next time.
Why are my donuts dense or gummy instead of tender?
Overmixing after adding the pineapple develops the gluten in the flour too much, which tightens up the crumb. Fold just until the pineapple is distributed — a few uneven streaks are fine.
Why did the glaze slide right off?
The donuts were still warm. Glaze poured over warm donuts melts and runs instead of setting. Let them cool completely on the rack — about 20–25 minutes — before glazing.
Storage and Make-Ahead
Counter: Store glazed donuts in an airtight container for up to 2 days. The glaze will soften slightly but the crumb stays fine.
Refrigerator: Up to 5 days in an airtight container. Bring to room temperature before serving for the best texture.
Freeze: Freeze the unglazed donuts in a single layer, then transfer to a freezer bag for up to 2 months. Glaze after thawing, not before.
Reheating: A few seconds in the microwave or 5 minutes in a 300°F oven brings back the just-baked texture.
Make-Ahead: Bake the donuts up to a day ahead and store unglazed at room temperature. Make the glaze and finish them the day you plan to serve.
Frequently Asked Questions
Q: Can I fry these instead of baking them? A: This recipe is written and tested for baking. The batter is too soft to hold up as a fried ring without a different flour ratio, so I don’t recommend frying it as written.
Q: Can I use canned sweet potato instead of roasting my own? A: Yes, but drain any liquid pooled on top of the canned puree first — canned sweet potato tends to be wetter than fresh roasted and mashed.
Q: Do I really have to drain the pineapple? A: Yes. It’s the single step that determines whether the center sets properly. Skipping it is the most common cause of a sunken or gummy middle.
Q: Can I make these without a donut pan? A: Yes — bake the same batter in a lined muffin tin for 18–20 minutes. You’ll get a muffin shape instead of a ring, but the flavor and texture stay the same.
Q: Can I freeze the glazed donuts? A: Freeze them unglazed for the best texture. Glaze tends to turn sticky and slightly weep after freezing and thawing.
Q: Can I make this gluten-free? A: Yes, a 1:1 gluten-free baking blend works well here. See the Variations section above for texture notes.
More Easy Home Recipes You’ll Love
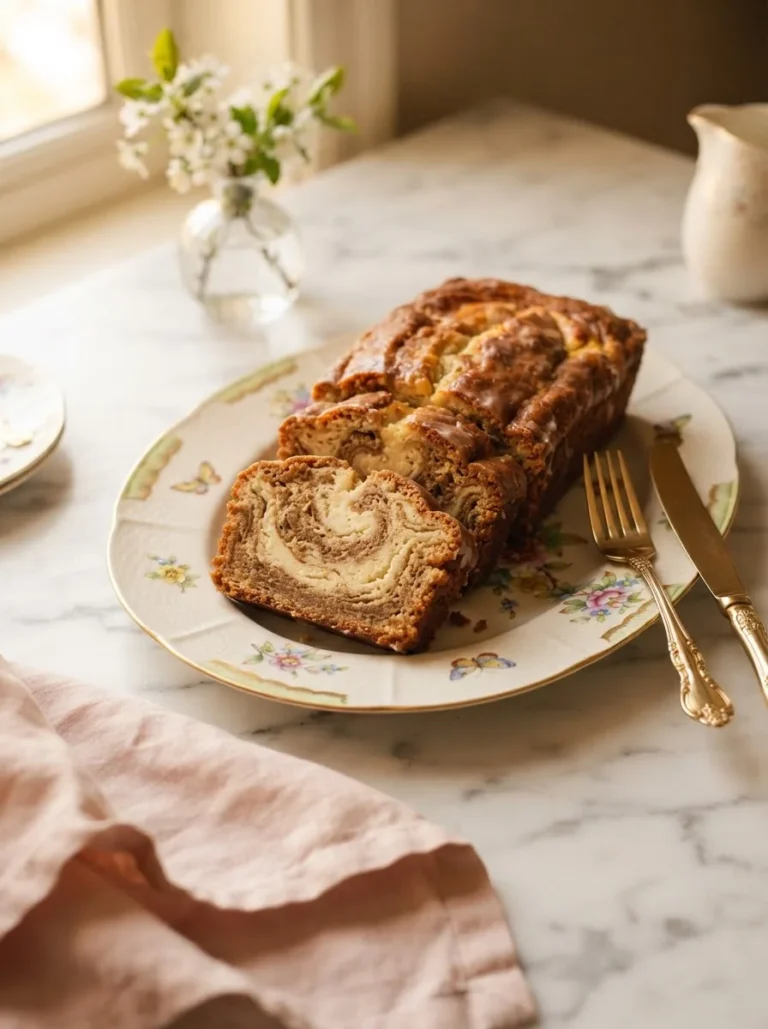
- Cheesecake Bread — a swirled sweet bread with a cream cheese layer baked right in
- Dolly’s Chicken and Stuffing Casserole — a cozy, make-ahead weeknight dinner
- Cheesy Ranch Potatoes and Sausage — a one-pan dinner loaded with flavor
- Banana Tempura — crispy fried bananas with a light, crackly coating
- Baked Pumpkin Donuts — another baked donut ring using the same pan
- Brown Butter Banana Bread — for when you want a loaf instead of a ring

Sweet Potato Pineapple Donut Rings Recipe (No-Fail)
Ingredients
For the donuts:
- 1 cup mashed roasted sweet potato
- 3/4 cup crushed pineapple, drained and pressed dry (juice reserved)
- 11/2 cup all-purpose flour
- 1/2 cup packed light brown sugar
- 2 tsp baking powder
- 1/2 tsp ground cinnamon
- 1/4 tsp ground nutmeg
- 1/4 tsp salt
- 1 large egg, room temperature
- 1/3 cup unsalted butter, melted and slightly cooled
- 1/4 cup (60ml) whole milk
- 1 tsp vanilla extract
For the glaze:
- 1 cup powdered sugar
- 2 –3 tbsp reserved pineapple juice
- Pinch of salt
- 1/4 cup toasted coconut flakes, for topping (optional)
Instructions
- Preheat the oven to 350°F (175°C) and grease a 6-cavity donut pan well.
- Whisk together the flour, brown sugar, baking powder, cinnamon, nutmeg, and salt in a medium bowl.
- Press the crushed pineapple through a fine mesh sieve, reserving the drained liquid for the glaze.
- In a separate bowl, whisk the egg, melted butter, milk, and vanilla, then whisk in the mashed sweet potato until smooth.
- Pour the wet ingredients into the dry ingredients and fold until just combined. Fold in the pressed pineapple last.
- Spoon or pipe the batter into the donut cavities, filling each about two-thirds full.
- Bake for 14–16 minutes, until the edges are golden and a toothpick comes out clean.
- Cool in the pan for 5 minutes, then turn out onto a wire rack to cool completely.
- Whisk the powdered sugar, reserved pineapple juice, and a pinch of salt into a smooth glaze.
- Dip the top of each cooled donut into the glaze and top with toasted coconut, if using.
Notes
- Pressing the pineapple until only 2–3 tablespoons of liquid remain is the most important step — skipping it leads to a sunken or gummy center.
- Weigh the sweet potato if you can; 225g is more consistent than measuring by volume.
- Only one donut pan? Bake in two batches — the batter holds fine for 10–15 minutes at room temperature.
- Store glazed donuts at room temperature in an airtight container for up to 2 days.
- Refrigerate for up to 5 days; bring to room temperature before serving.
- Freeze unglazed donuts in a single layer for up to 2 months; glaze after thawing.
- Reheat briefly in the microwave or a 300°F oven for 5 minutes to refresh texture.
- For a gluten-free version, use a 1:1 gluten-free baking blend.
- For a dairy-free version, use melted coconut oil and canned coconut milk in place of butter and milk.
- No donut pan? Bake the same batter as muffins for 18–20 minutes.