Mo Bettahs Teriyaki Chicken (Copycat Recipe)

If the closest Mo Bettahs is an hour away — or doesn’t exist where you live — you already know the problem. You want that sticky, glossy chicken with the salty-sweet glaze that clings to every bite, and you want it tonight, not on your next road trip.
I tested this mo bettahs teriyaki chicken recipe four times, changing one thing each round: the sugar ratio, the reduction time, the marinade length, and finally the glazing method. The fourth batch was the one that made my husband ask if I’d ordered takeout.
The result is a glaze that thickens into something you can actually see clinging to the chicken, not a thin, watery soy sauce puddle at the bottom of the pan.
The chicken thighs stay juicy because they never touch a dry grill grate — they sear in a hot skillet, then simmer right in the glaze until the sauce reduces around them. No smoker, no charcoal, no waiting for a grill to preheat.
This is the version I make on a Tuesday when the craving hits and Hawaii is nowhere near the calendar.
★★★★★ “I made this for my husband, who grew up going to Mo Bettahs in Utah, and he said it tasted closer to the real thing than any copycat he’s tried. The glaze is the whole difference.” — Renee T., recipe tester (pre-launch)
Why You’ll Love This Mo Bettahs Teriyaki Chicken
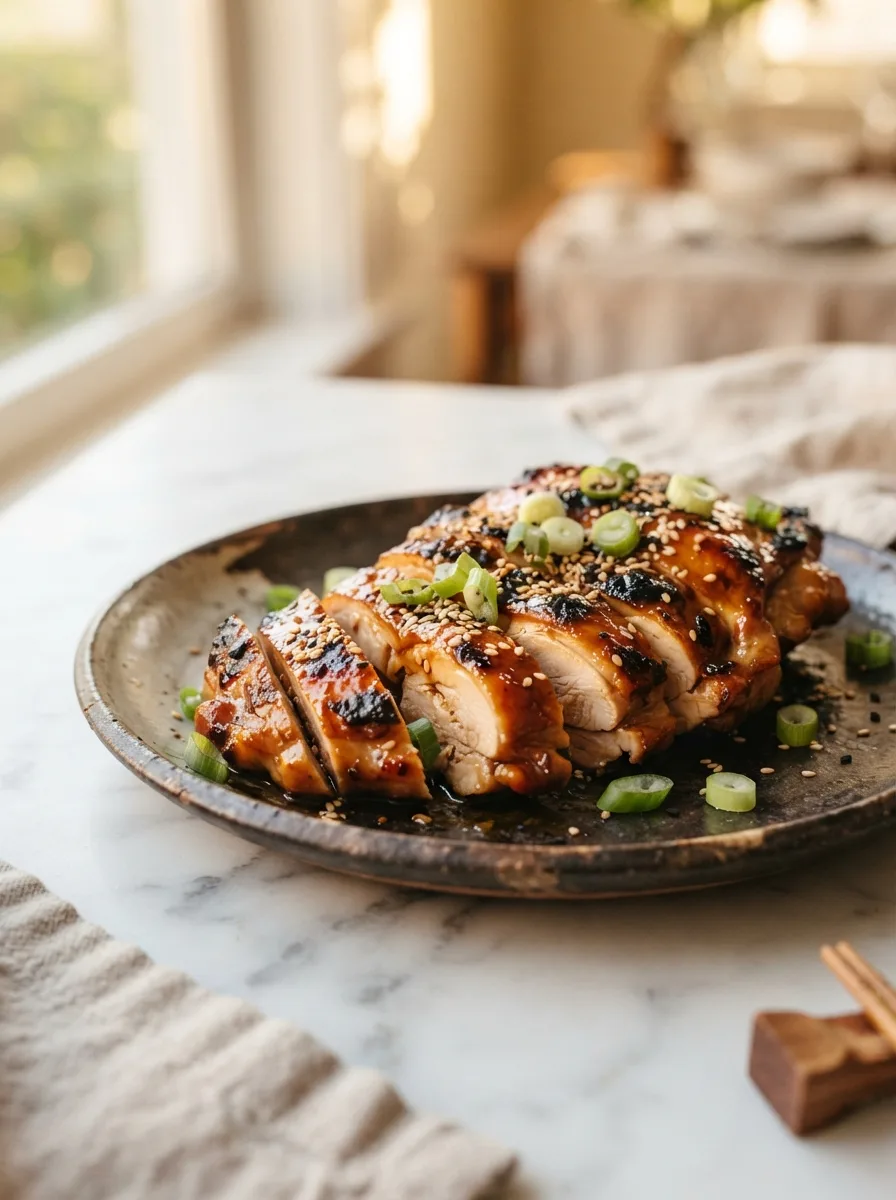
- The glaze actually clings: Most copycat teriyaki sauces stay thin and watery. This one reduces with a small cornstarch slurry until it coats the back of a spoon — and the chicken.
- No grill required: A hot skillet does everything a charcoal grill would do, minus the propane tank and the 20-minute preheat.
- Tested for the exact ratio: I went through four rounds of soy sauce, brown sugar, and pineapple juice until the sweet-salty balance matched what I remembered from the restaurant.
- Meal-prep friendly: The chicken keeps beautifully in the fridge for lunches all week, and the sauce actually improves overnight.
Key Ingredients
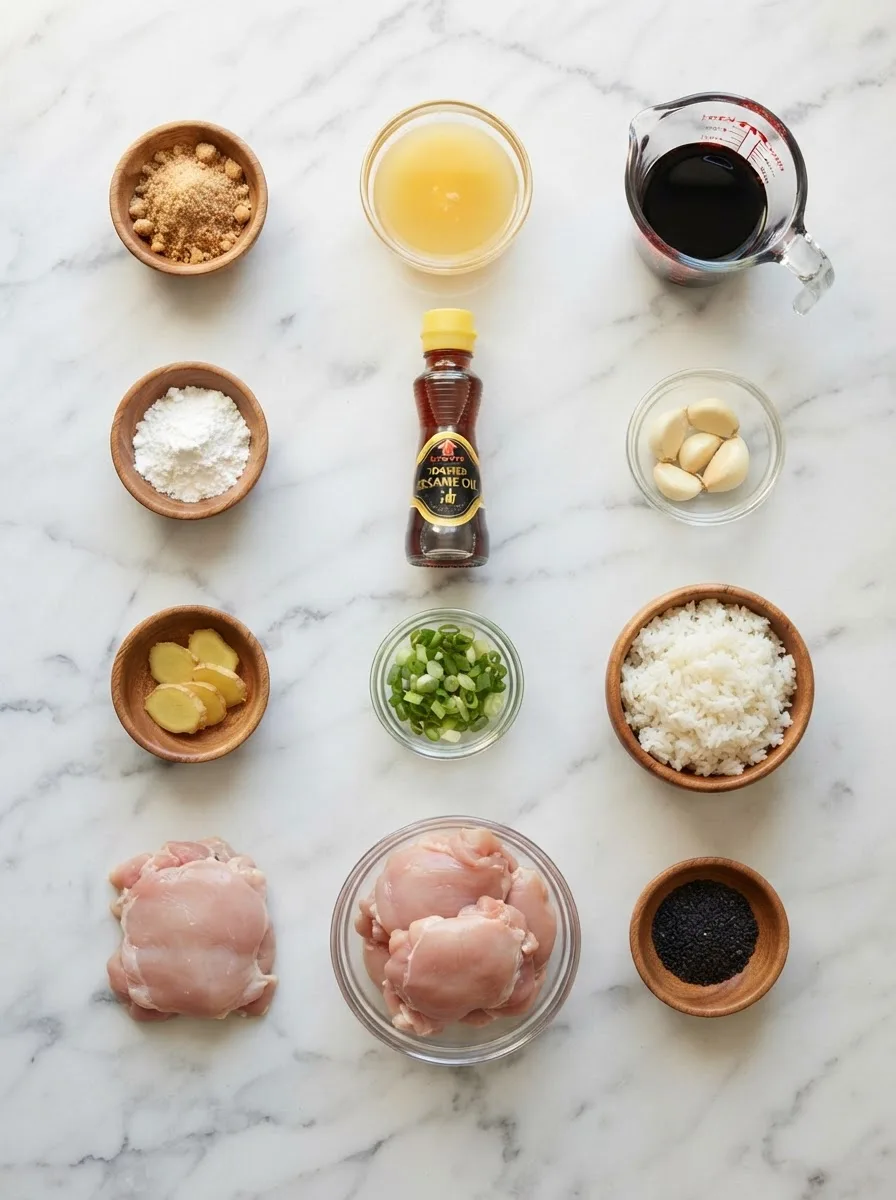
Boneless, skinless chicken thighs (2 lbs). Thighs stay juicy through the sear-and-simmer method in a way breasts just don’t — the extra fat renders slowly instead of drying out. If you only have breasts, pound them to an even thickness and watch the cook time closely; they’ll need a few minutes less.
Soy sauce (½ cup). The salty backbone of the glaze. Low-sodium soy sauce works, but you’ll want to add a pinch of salt back in at the end to keep the flavor from tasting flat.
Brown sugar (⅓ cup, packed). This is the sweetness that caramelizes into that glossy, sticky finish. White sugar works in a pinch, but you lose the faint molasses note that makes the glaze taste closer to the restaurant version.
Fresh garlic and ginger (3 cloves + 1 tablespoon grated). Fresh, not powdered — the aroma is what makes this taste homemade instead of bottled. Powdered versions flatten the flavor considerably.
Pineapple juice (¼ cup). This is the ingredient most copycat recipes skip, and it’s the one that gets the flavor right. The natural sugars add brightness that plain soy-and-sugar glazes can’t fake.
Cornstarch (1 tablespoon, mixed with 2 tablespoons water). The slurry that turns a thin sauce into a glaze that actually sticks to the chicken instead of pooling on the plate.
Ingredient Note: Don’t skip the pineapple juice. I tested this recipe once without it, using only soy sauce and brown sugar, and the glaze tasted one-dimensional — salty and sweet, but flat. The pineapple juice is what rounds it out.
Equipment You’ll Need
- Large skillet or cast iron pan — nonstick works, but cast iron gives a better sear. No grill needed.
- Small saucepan — for building the glaze separately if you prefer a thicker, more controlled reduction (see the Controlled Test below).
- Whisk — for the cornstarch slurry; a fork works if that’s all you’ve got.
- Meat thermometer — the fastest way to know the chicken hit 165°F without cutting into it and losing juices.
Controlling the Glaze Thickness (A Controlled Test)
I tested this recipe four times, and three of those tests were about one thing: how much cornstarch it takes to get a glaze that clings to the chicken instead of running off onto the plate.
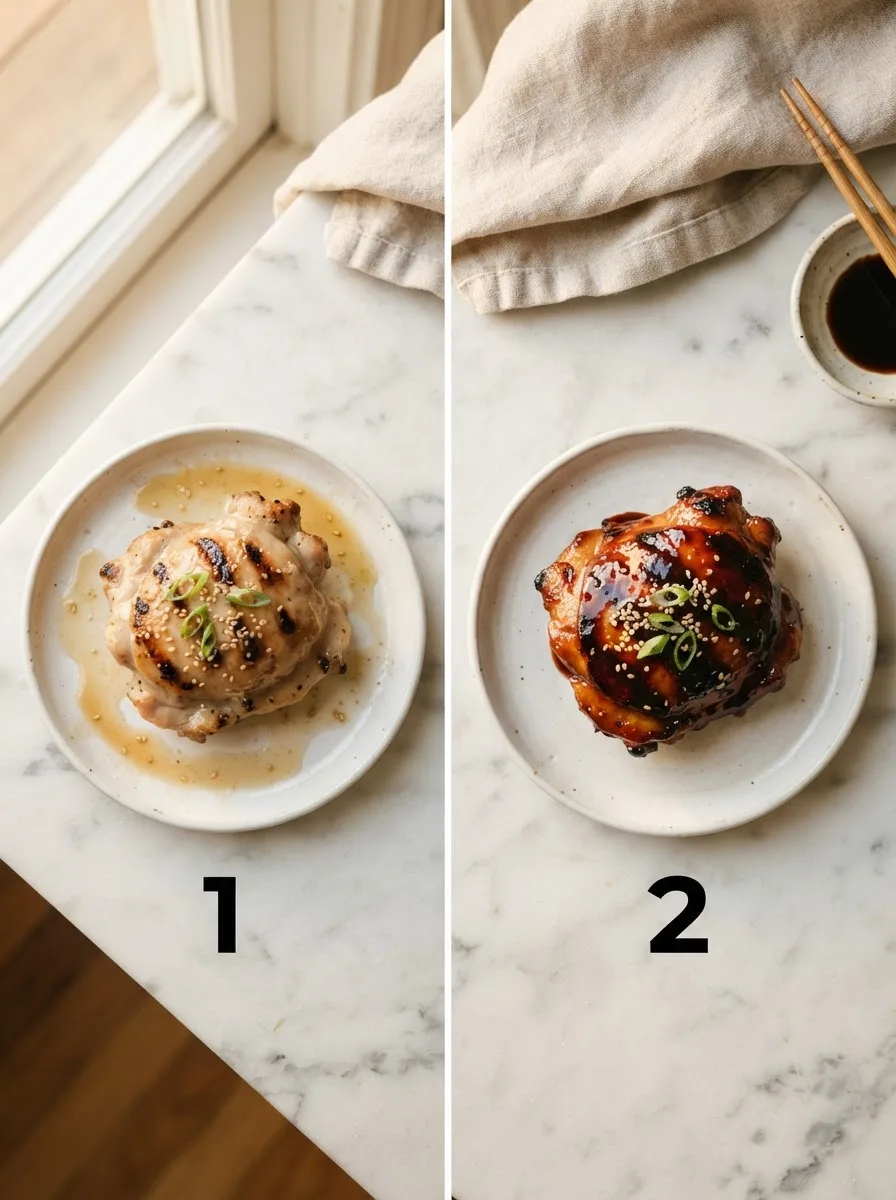
No cornstarch: The sauce reduced but stayed thin and syrupy, more like a dipping sauce than a glaze. It ran straight off the chicken and pooled on the plate.
1 teaspoon cornstarch slurry: Better, but the glaze was still loose enough to drip when you lifted a piece with tongs.
1 tablespoon cornstarch slurry (the winner): This is the amount in the recipe below. The glaze thickens enough to coat the back of a spoon and hold its shine on the chicken without turning gluey.
The takeaway: don’t skip the slurry, and don’t eyeball it. A full tablespoon, whisked into cold water first so it doesn’t clump, is the exact amount that gets the texture right.
How to Make Mo Bettahs Teriyaki Chicken
Before you start: Pat the chicken thighs dry with paper towels. Wet chicken won’t sear — it’ll steam, and you’ll lose the browning that gives the glaze something to grip onto.
Step 1 — Marinate the Chicken
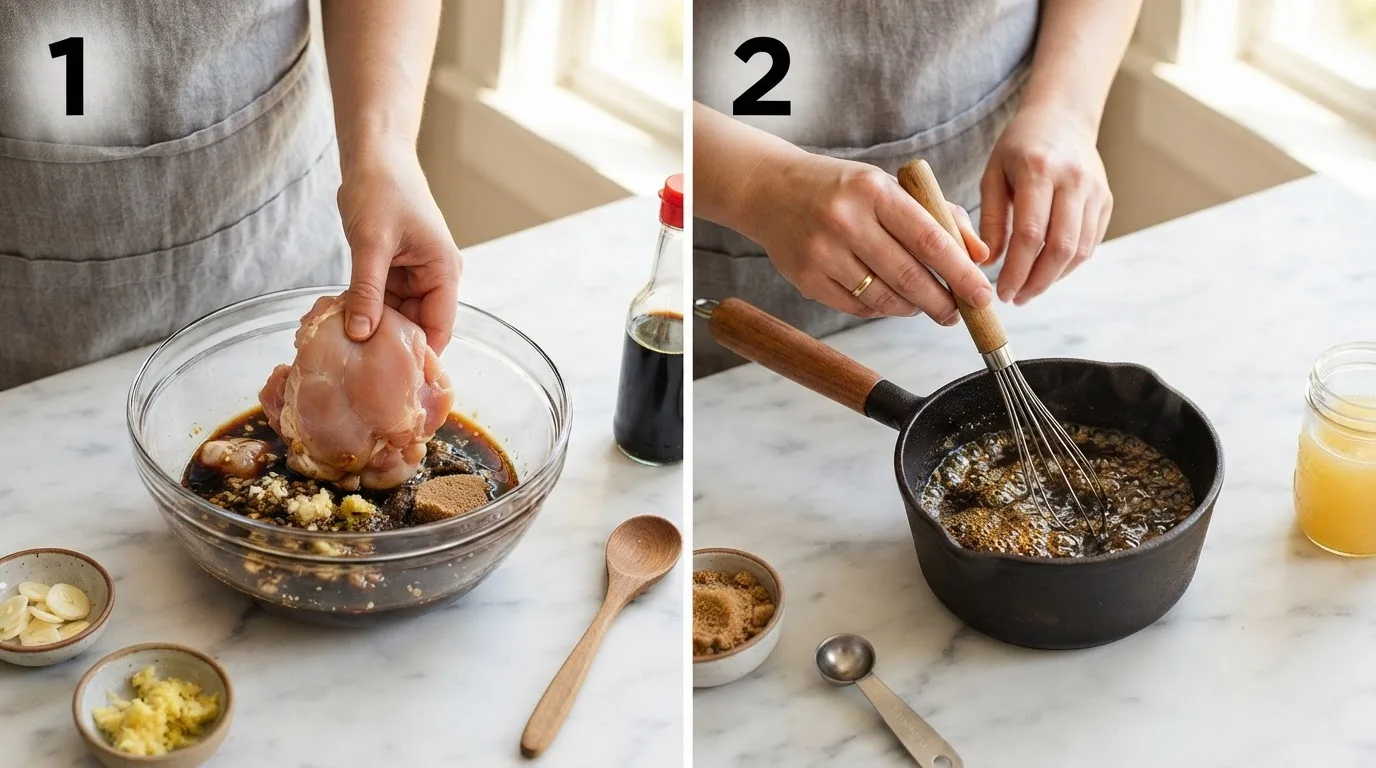
In a bowl or zip-top bag, combine the chicken thighs with 3 tablespoons of the soy sauce, 1 clove of the minced garlic, and half the grated ginger. Let it sit for at least 20 minutes at room temperature, or up to 4 hours in the fridge. This isn’t the whole glaze — just enough to season the meat from the inside before it hits the pan.
Step 2 — Build the Sauce Base
While the chicken marinates, whisk together the remaining soy sauce, brown sugar, pineapple juice, remaining garlic, and remaining ginger in a small saucepan. Don’t heat it yet — you’re just combining it so it’s ready to go the moment the chicken is seared.
Step 3 — Sear the Chicken
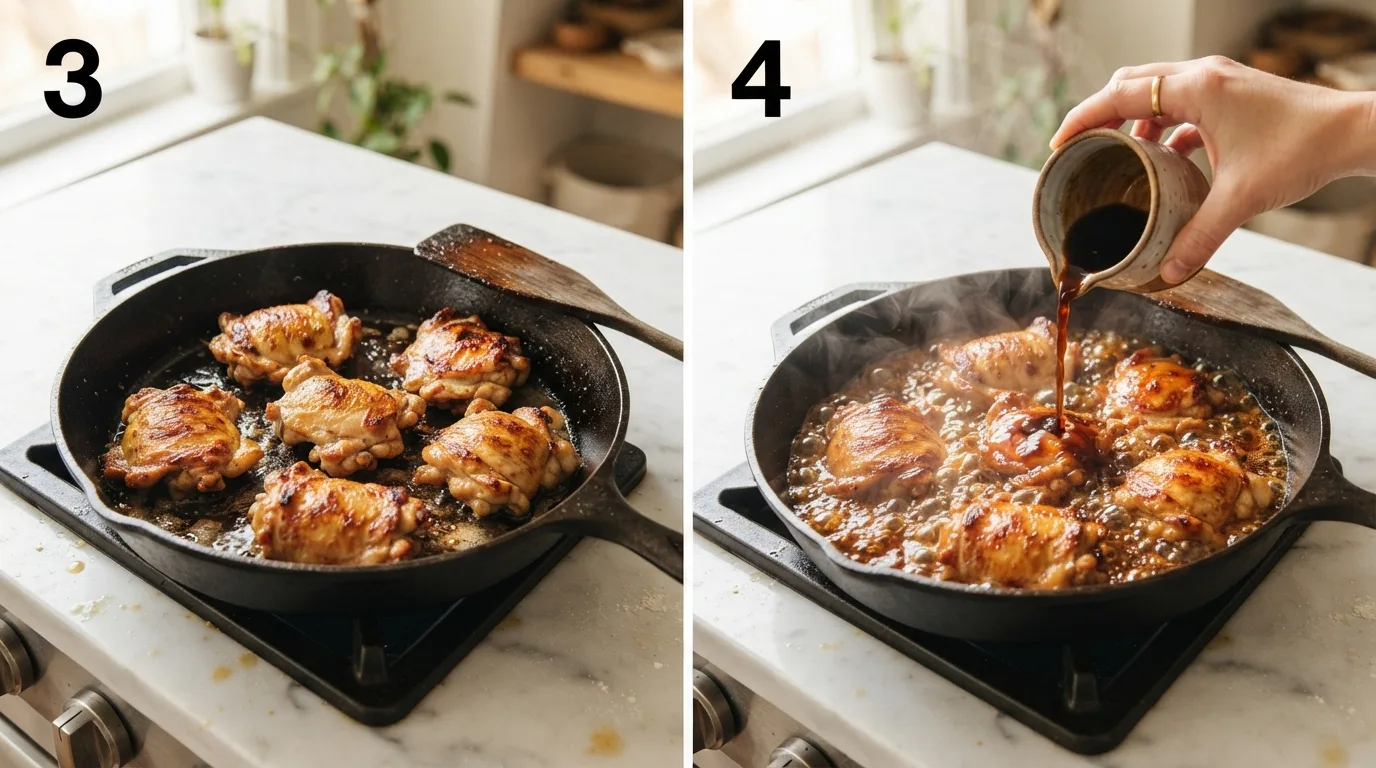
Heat 1 tablespoon of sesame oil in a large skillet over medium-high heat until it shimmers. Add the chicken thighs (shake off excess marinade first) and sear for 4–5 minutes per side, until deeply golden. You’re listening for a sharp, steady sizzle — if the pan goes quiet, it’s not hot enough yet.
Step 4 — Add the Sauce and Simmer
Pour the sauce base over the seared chicken, reduce the heat to medium-low, and simmer uncovered for 8–10 minutes, flipping once, until the internal temperature hits 165°F. The sauce will start to reduce and thicken slightly on its own during this stage.
Step 5 — Glaze the Chicken
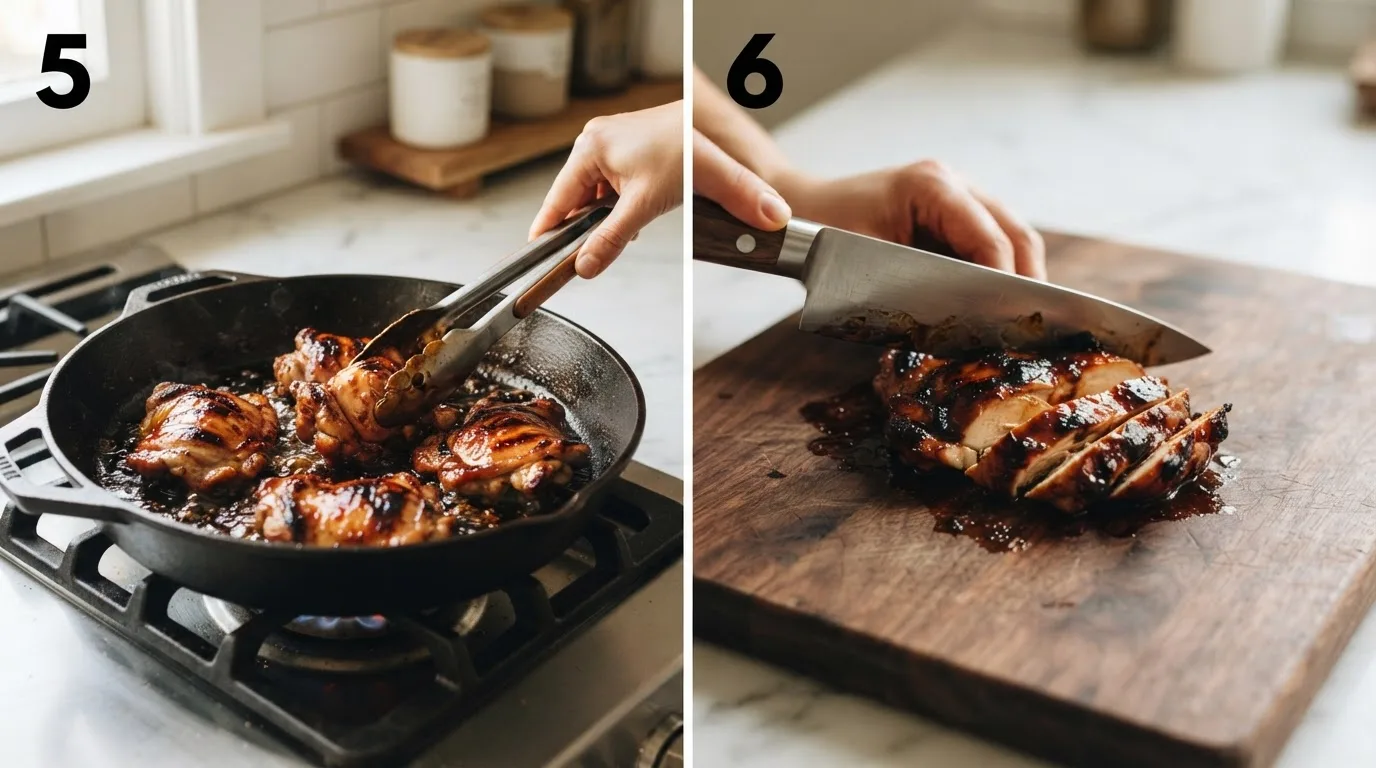
Remove the chicken to a plate. Whisk the cornstarch slurry into the sauce remaining in the pan and simmer for 1–2 minutes, whisking constantly, until it thickens enough to coat the back of a spoon. Return the chicken to the pan and turn it a few times to coat every side in the glaze.
Step 6 — Rest and Slice
Let the chicken rest for 5 minutes before slicing — this keeps the juices in the meat instead of on your cutting board. Slice against the grain and spoon any extra glaze from the pan over the top.
Pro Tips for Perfect Mo Bettahs Teriyaki Chicken
Tip 1: Dry the chicken before it touches the pan. Any surface moisture turns straight into steam and blocks the sear. A minute with a paper towel makes a real difference in color.
Tip 2: Don’t crowd the skillet. If the thighs are touching, work in two batches. A crowded pan drops in temperature and you’ll get gray, boiled-looking chicken instead of a proper sear.
Tip 3: Whisk the cornstarch into cold liquid first. Adding dry cornstarch directly to a hot pan gives you lumps that never fully dissolve. Mix it with cold water in a small bowl before it goes anywhere near the heat.
Tip 4: Taste the sauce before you add the cornstarch. This is your last chance to adjust — a little more brown sugar if it’s too salty, a splash more soy sauce if it’s too sweet. Once it thickens, the balance is locked in.
Variations and Substitutions
Dietary Variations:
- Gluten-free: Swap the soy sauce for an equal amount of tamari or coconut aminos. Coconut aminos are noticeably sweeter, so cut the brown sugar by about a tablespoon to keep the balance right.
- Lower sugar: Reduce the brown sugar to ¼ cup and add an extra tablespoon of pineapple juice for sweetness. The glaze will be slightly thinner and less glossy, but the flavor still holds up.
Flavor Variations:
- Spicy mo bettahs teriyaki chicken: Whisk in 1 teaspoon of sriracha or ½ teaspoon of red pepper flakes with the sauce base in Step 2. It cuts through the sweetness nicely.
Ingredient Substitutions:
- Chicken thighs → boneless, skinless chicken breasts (pound to even thickness; reduce simmer time by 2–3 minutes to avoid drying out)
- Fresh ginger → ½ teaspoon ground ginger (flavor is milder and less bright)
- Pineapple juice → orange juice in a pinch (different flavor note, but keeps the acidity that balances the soy)
If you’re building out a full Hawaiian-plate-style dinner, my cheesy ranch potatoes and sausage makes a hearty side that holds up well next to the sweet glaze.
Troubleshooting
Why is my glaze too thin?
This usually means the cornstarch slurry was skipped or under-measured. Whisk together 1 tablespoon cornstarch with 2 tablespoons cold water, then stir it into the simmering sauce and cook for another 1–2 minutes. It will thicken quickly — don’t walk away once it’s in.
My chicken turned out dry — what happened?
Most likely the chicken simmered too long after hitting 165°F, or it was chicken breast instead of thighs. Thighs forgive a little overcooking because of their higher fat content; breasts do not. Pull the chicken the moment it hits temperature and let it finish resting off the heat.
The sauce tastes too salty — how do I fix it?
If you used regular (not low-sodium) soy sauce and didn’t adjust, this is the likely cause. Add a tablespoon more brown sugar and a splash more pineapple juice to rebalance, then taste again before adding the cornstarch slurry.
Storage and Make-Ahead
Counter: Not recommended past 2 hours — this is cooked chicken with a sugar-based glaze, so it should go in the fridge promptly.
Refrigerator: Store in an airtight container for up to 4 days. The glaze actually tastes even better the next day, once the flavors have had time to settle into the meat.
Freeze: Cool completely, then freeze in a freezer-safe container for up to 3 months. Thaw overnight in the fridge before reheating.
Reheating: Warm gently in a skillet over medium-low heat with a splash of water to loosen the glaze, about 5 minutes. Microwaving works too, but the glaze won’t be quite as glossy.
Make-Ahead: The sauce base (Step 2) can be mixed up to 2 days ahead and stored in the fridge — just whisk it again before it goes into the pan, since the sugar can settle.
Frequently Asked Questions
Q: Is this the same as the mo bettahs teriyaki chicken recipe from the restaurant? A: It’s a copycat, built from testing the flavor and texture I remember from the restaurant version — not an official recipe. I tested this mo bettahs teriyaki chicken recipe four times to get the glaze consistency and sweet-salty balance as close as I could.
Q: Can I grill this instead of using a skillet? A: Yes. Grill the marinated thighs over medium heat, then brush with the reduced glaze (made separately in a saucepan) during the last few minutes of cooking so it caramelizes without burning.
Q: Can I use chicken breast instead of thighs? A: You can, but watch the timing closely — breasts dry out faster than thighs. Pound them to an even thickness first and pull them the moment they hit 165°F.
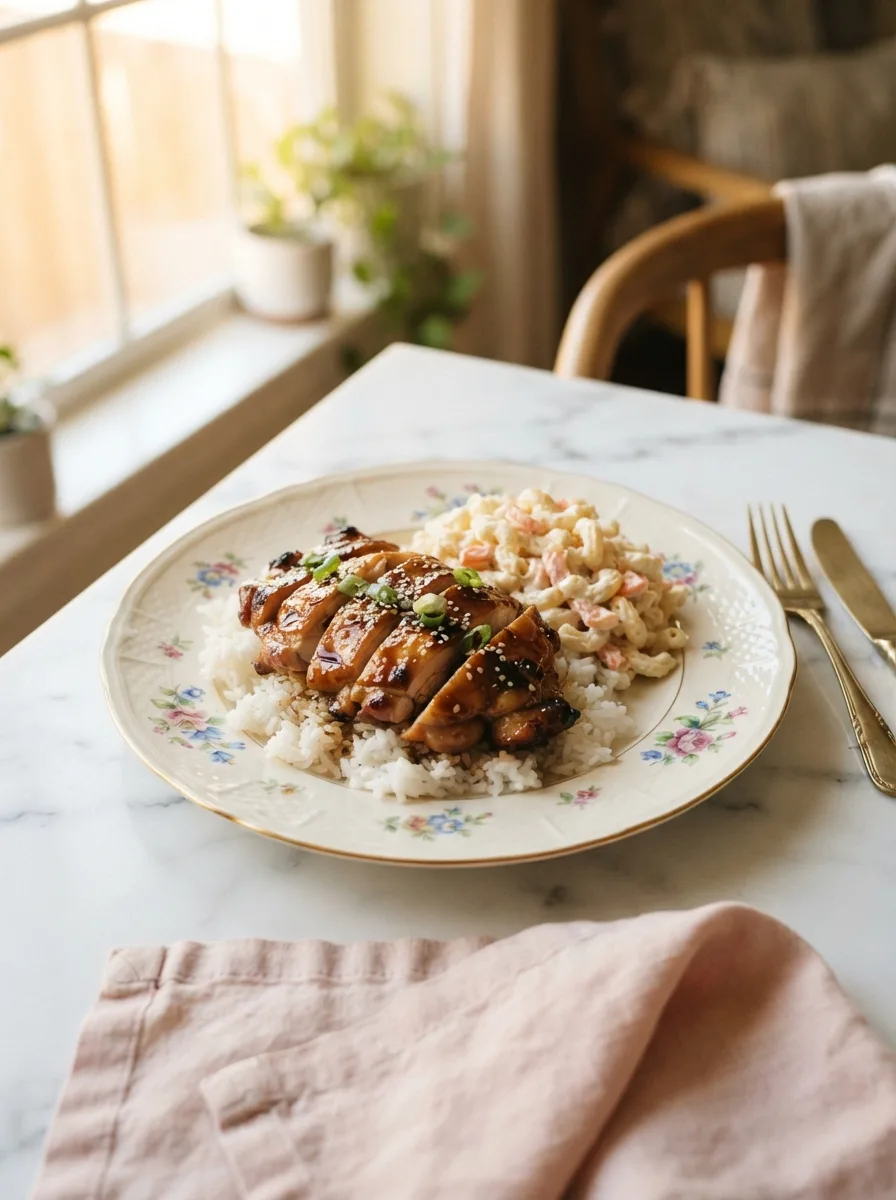
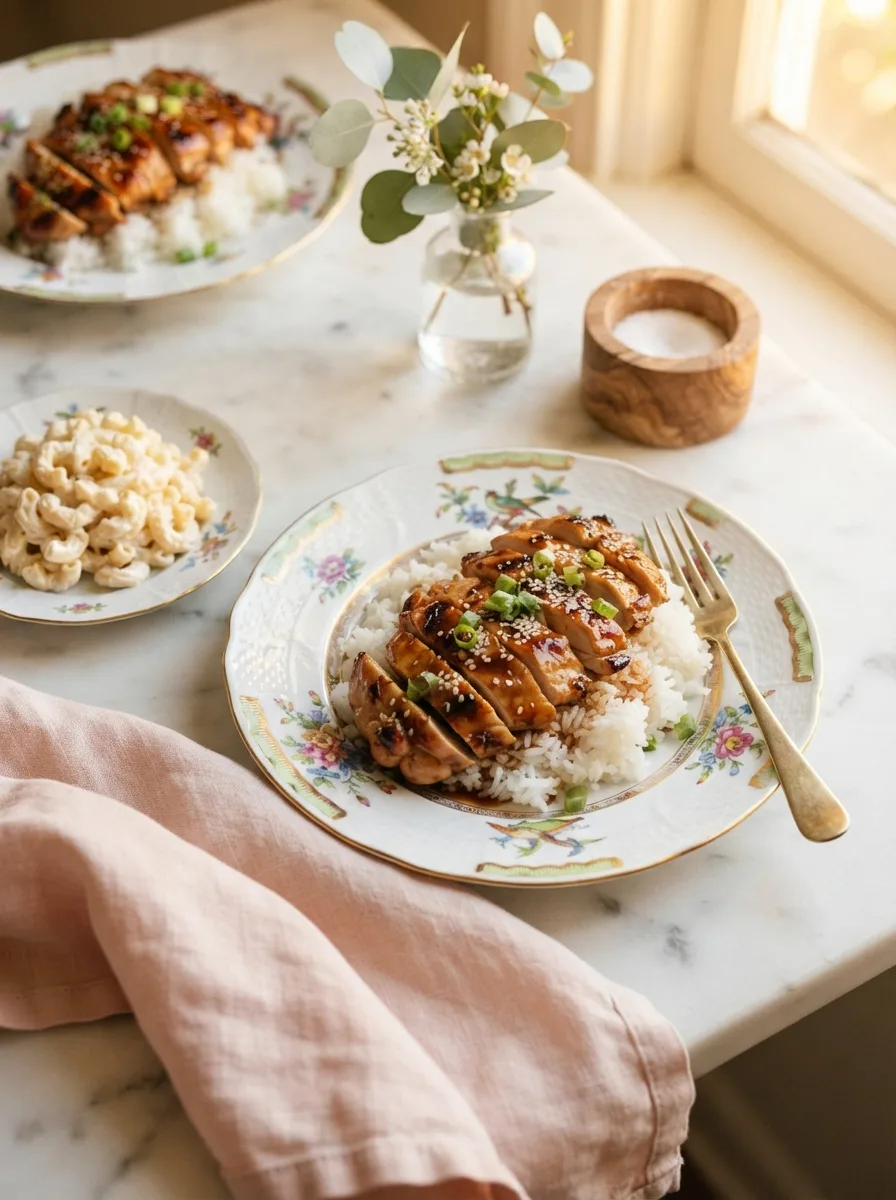
Q: What do I serve with mo bettahs teriyaki chicken? A: Steamed white rice and a scoop of macaroni salad is the classic plate-lunch combination. My cheesy ranch potatoes and sausage also works well as a heartier side.
Q: Can I make this ahead for meal prep? A: Absolutely — it reheats well and the flavor deepens overnight. Portion it into containers with rice for grab-and-go lunches through the week.
Q: Why did my chicken turn out rubbery instead of tender? A: This is almost always overcooking. Pull the thighs at 165°F exactly, and don’t let them simmer in the sauce longer than the recipe states once they hit temperature.
Q: Can I double this recipe for a crowd? A: Yes — double every ingredient, but sear the chicken in batches so the pan doesn’t get crowded. Crowding drops the pan temperature and prevents a proper sear.
More Chicken Dinner Recipes You’ll Love
- Dolly’s Chicken and Stuffing Casserole — a cozy, comforting baked casserole that’s the opposite of fussy
- Cheesy Ranch Potatoes and Sausage — the sheet-pan side dish that pairs perfectly with this teriyaki chicken
- Cheesecake Bread — if dinner needs a sweet finish, this one’s worth the detour
- Banana Tempura — another Hawaiian-plate-lunch-inspired favorite, crispy and lightly sweet
Mo Bettahs Teriyaki Chicken (Copycat Recipe)
Ingredients
For the Chicken and Marinade:
- 2 lb boneless, skinless chicken thighs
- 1/2 cup soy sauce, divided
- 3 clove garlic, minced, divided
- 1 tablespoon grated fresh ginger, divided
- 1 tablespoon sesame oil
For the Teriyaki Glaze:
- 1/3 cup brown sugar, packed
- 1/4 cup pineapple juice
- 1 tablespoon cornstarch
- 2 tablespoon cold water
- 2 tablespoon sliced green onion, for garnish
- 1 teaspoon sesame seeds, for garnish
Instructions
- In a bowl, combine the chicken thighs with 3 tablespoons of the soy sauce, 1 clove of minced garlic, and half the grated ginger. Marinate at room temperature for 20 minutes, or refrigerate up to 4 hours.
- In a small saucepan, whisk together the remaining soy sauce, brown sugar, pineapple juice, remaining garlic, and remaining ginger. Set aside.
- Heat sesame oil in a large skillet over medium-high heat. Sear the chicken thighs 4–5 minutes per side, until deeply golden.
- Pour the sauce mixture over the chicken. Reduce heat to medium-low and simmer uncovered for 8–10 minutes, flipping once, until internal temperature reaches 165°F.
- Remove the chicken to a plate. Whisk the cornstarch and cold water together, then whisk into the sauce in the pan. Simmer 1–2 minutes, whisking constantly, until thickened. Return the chicken to the pan and turn to coat in the glaze.
- Let the chicken rest 5 minutes, then slice against the grain. Garnish with green onion and sesame seeds and serve over rice.
Notes
- The cornstarch slurry is not optional if you want a glaze that clings instead of pooling — whisk it into cold water first to avoid lumps.
- Leftovers keep in an airtight container in the fridge for up to 4 days, and the flavor actually improves after the first day.
- To freeze, cool completely and store in a freezer-safe container for up to 3 months; thaw overnight before reheating.
- For a gluten-free version, substitute tamari or coconut aminos for the soy sauce, reducing the brown sugar slightly since coconut aminos are sweeter.