Varsity Chili Recipe (Tested 4 Times)

If you’ve ever had a Varsity Chili Recipe in Atlanta, you know the chili on top doesn’t look like chili at all. There are no beans, no visible chunks of meat, no tomato pieces floating around. It’s fine, glossy, almost like a meat sauce — and it clings to a hot dog in a way that regular chili just doesn’t.
I tried to recreate it four separate times before I got the texture right. The first batch tasted close but looked like taco meat. The second batch tasted right and looked closer, but it still had little flecks of browned crust from searing the beef in a pan. The breakthrough came when I stopped browning the beef in oil altogether and started cooking it in water instead — which sounds backwards, but it’s the actual trick behind that famous fine texture.
This version is the one that finally passed the test: my husband, who has eaten more chili dogs at that drive-in than he’ll admit to, took one bite and said, “That’s it. That’s the chili.”
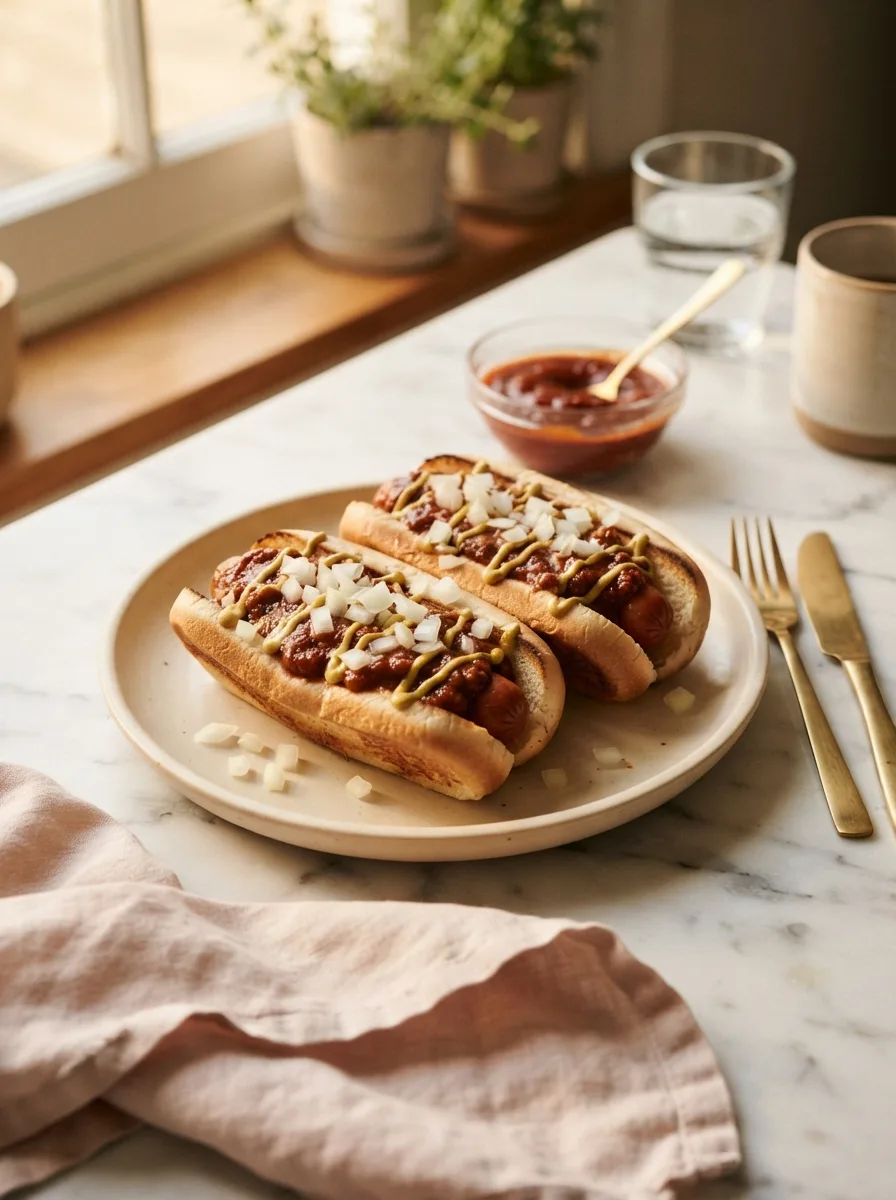
The whole thing takes about 90 minutes, most of which is just letting it simmer while you do something else. There’s no chopping, no browning skill required, and no beans to soak. What matters is the method — cook the meat in water instead of oil, mash it as it simmers, and let it reduce down slow. Skip any one of those three things and you’ll end up with regular chili, which is fine, but it’s not this.
★★★★★ “I grew up two hours from Atlanta and my dad used to bring home a dozen chili dogs from The Varsity every time he drove up for business. This recipe is the closest thing I’ve had outside of Georgia — the texture is exactly right.” — Rachel M., recipe tester (pre-launch)
Why You’ll Love This Varsity Chili Recipe
- It tastes like the real thing, not a guess: This isn’t “chili that’s kind of like Varsity’s.” The water-cooking method and the mustard-forward seasoning blend are what actually gets you there.
- No beans, no fuss: If you’ve been searching for a topping-style chili without kidney beans floating everywhere, this is built exactly for that.
- One pot, no browning required: You don’t need to sear anything or babysit a skillet. The beef cooks right in its own pot with water.
- Freezes like a dream: Because it’s already fully cooked and reduced, this reheats from frozen without losing its texture — genuinely useful for a stocked freezer.
Key Ingredients
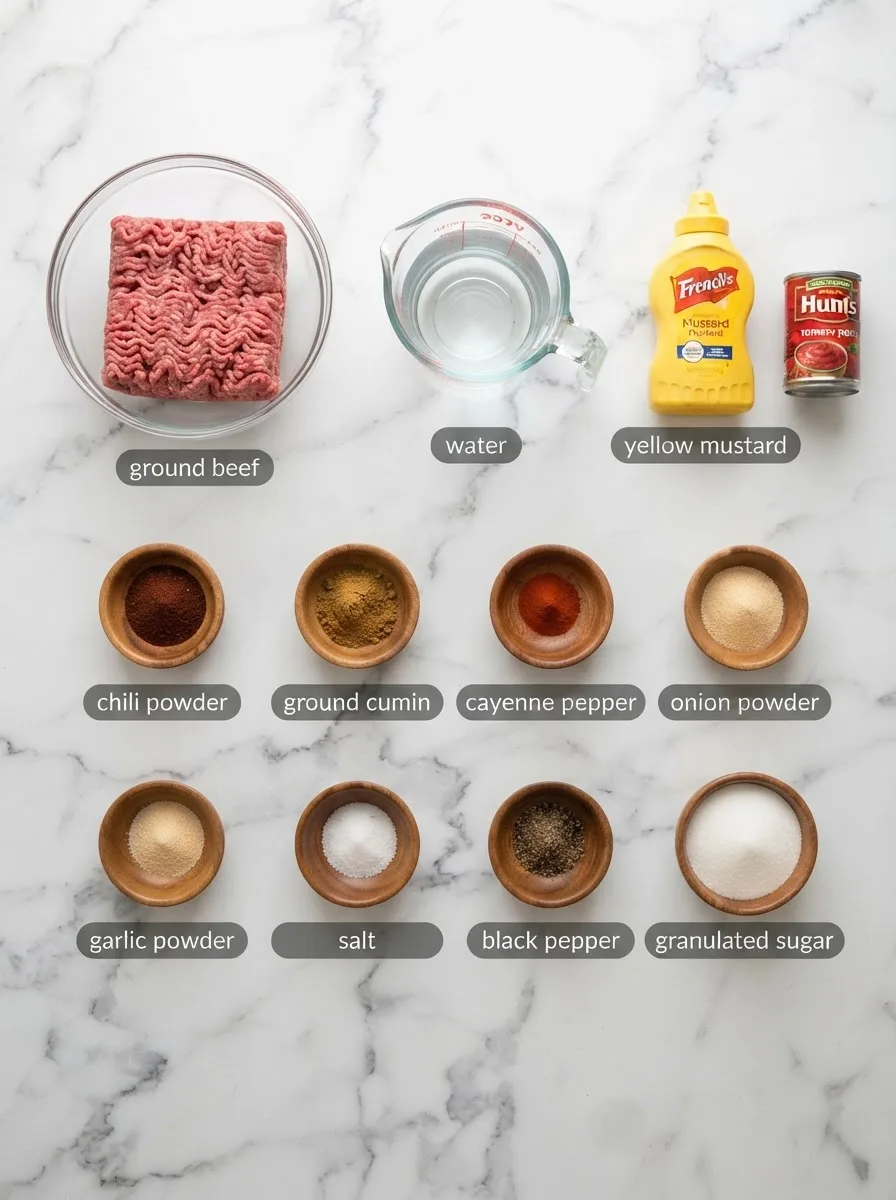
Ground beef (2 lbs, 80/20). Don’t reach for lean beef here. The fat is what renders out into the water and gives the finished sauce its glossy, almost silky texture. Lean beef gives you a drier, grainier result — I tested both.
Water (2 cups). This is the whole trick. Cooking the beef in water instead of browning it in oil keeps the meat soft enough to mash into that signature fine texture. Browned beef develops a crust that never fully breaks down, no matter how long you simmer it.
Yellow mustard (3 tablespoons). Not a garnish — a structural ingredient. The vinegar tang in yellow mustard is what keeps this chili from tasting like plain taco meat. Dijon works in a pinch, but the flavor is noticeably milder.
Tomato paste (3 tablespoons). Gives body and a deep reddish color without turning this into a tomato-forward chili. Crushed tomatoes or tomato sauce will make the sauce too wet and too tomato-heavy — stick with paste.
Chili powder, cumin, and cayenne. This trio is the backbone of the flavor. Cumin does most of the “chili” flavor lifting; cayenne is there for a low background heat, not a punch. Adjust cayenne up or down depending on how spicy you want it.
Sugar (1 teaspoon, optional). A small amount balances the acidity from the mustard and tomato paste. You won’t taste sweetness — you’ll taste a chili that seems more balanced without knowing exactly why.
Ingredient Note: Resist the urge to add beans, diced tomatoes, or bell pepper. I know it’s tempting to make this into a heartier bowl of chili, but every one of those additions moves it further from the fine, saucy texture that makes Varsity chili what it is.
Equipment You’ll Need
- Large heavy-bottomed pot or Dutch oven — Thin pots scorch the tomato paste and sugar on the bottom during the long simmer. If you only have a thin pot, keep the heat lower and stir more often.
- Potato masher or firm fork — This is how you break the meat down into that fine texture as it simmers. A fork works, but it takes longer than a masher.
- Food processor (optional) — For an ultra-smooth, restaurant-style texture, pulse the finished chili in batches. Not required, but it’s the closest you’ll get to the real thing.
- Wooden spoon — For frequent stirring once the mixture starts to reduce and thicken.
Controlling the Texture: How Fine You Mash the Meat (A Controlled Test)
This is the single most important variable in the whole recipe, so I tested it three ways side by side: no mashing at all, mashing with a potato masher partway through the simmer, and finishing with a few pulses in the food processor.
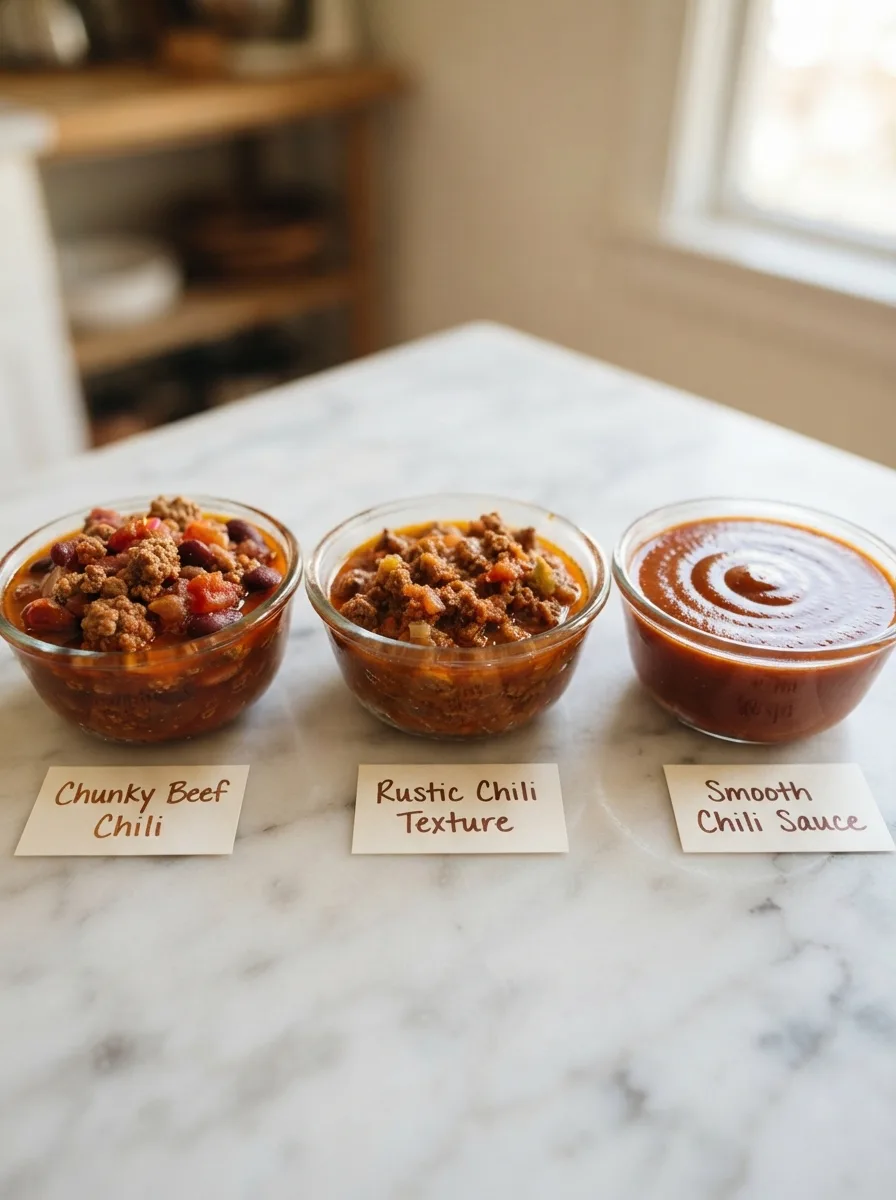
No mashing: Tasted right, but looked like seasoned taco meat. It sat on top of the hot dog instead of clinging to it. This is a fine chili if you’re serving it over rice or nachos, but it isn’t Varsity chili.
Mashed with a potato masher (my default method): This is the sweet spot for a home kitchen. About 10 minutes of mashing during the simmer breaks the meat down into small, soft fragments — close enough to the real thing that nobody at my table could tell the difference from the drive-in version.
Finished in the food processor: The closest match to the actual texture at The Varsity — completely smooth, no discernible meat pieces, almost like a thick sauce. Worth the extra step if you’re serving guests who’ve had the real thing and will notice.
The takeaway: mashing with a potato masher gets you 90% of the way there with zero extra equipment. If you want the full 100%, pulse the finished chili in a food processor in two batches.
How to Make Varsity Chili
Before you start: Have your spices measured out before you start the pot — once the beef is cooking in water, things move quickly and you don’t want to be digging through the spice cabinet with wet hands.
Step 1 — Cook the beef in water
Add the ground beef and water to your pot over medium heat. Break the beef apart with a wooden spoon as it heats — you’re not browning anything here, just cooking the meat through while it’s submerged. It will look pale and a little unappetizing at this stage. That’s normal. The color and shine come later.
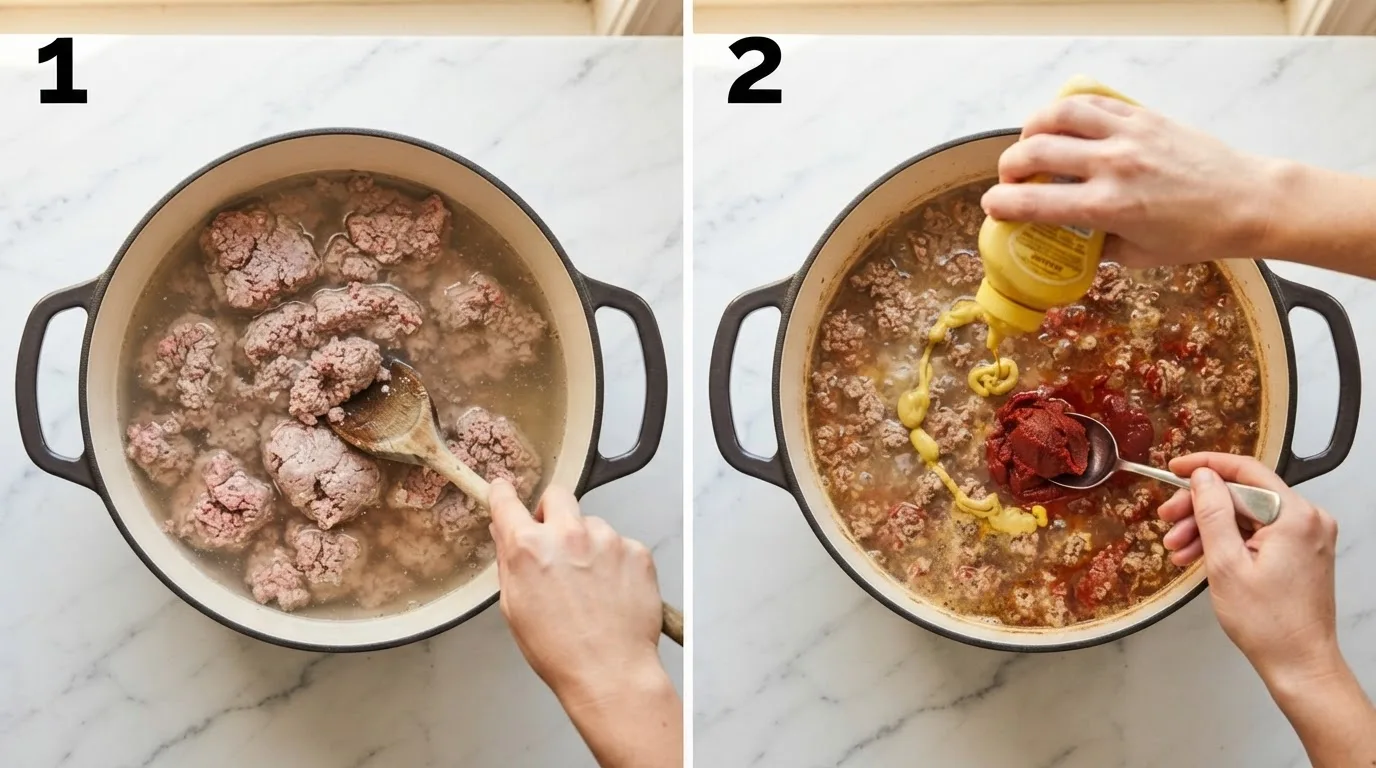
Step 2 — Stir in the mustard, tomato paste, and dry spices
Once the beef is cooked through (about 8–10 minutes, no more pink), stir in the mustard, tomato paste, chili powder, cumin, cayenne, onion powder, garlic powder, salt, pepper, and sugar. Stir well — the mixture will still look thin and watery at this point. That’s exactly where it should be.
Step 3 — Mash while it simmers
Reduce the heat to low and start mashing with a potato masher, working through the pot every few minutes as it simmers. This is where the texture actually happens — you’re breaking the softened beef down into fine fragments instead of leaving it in clumps. Keep mashing on and off for about 10 minutes.
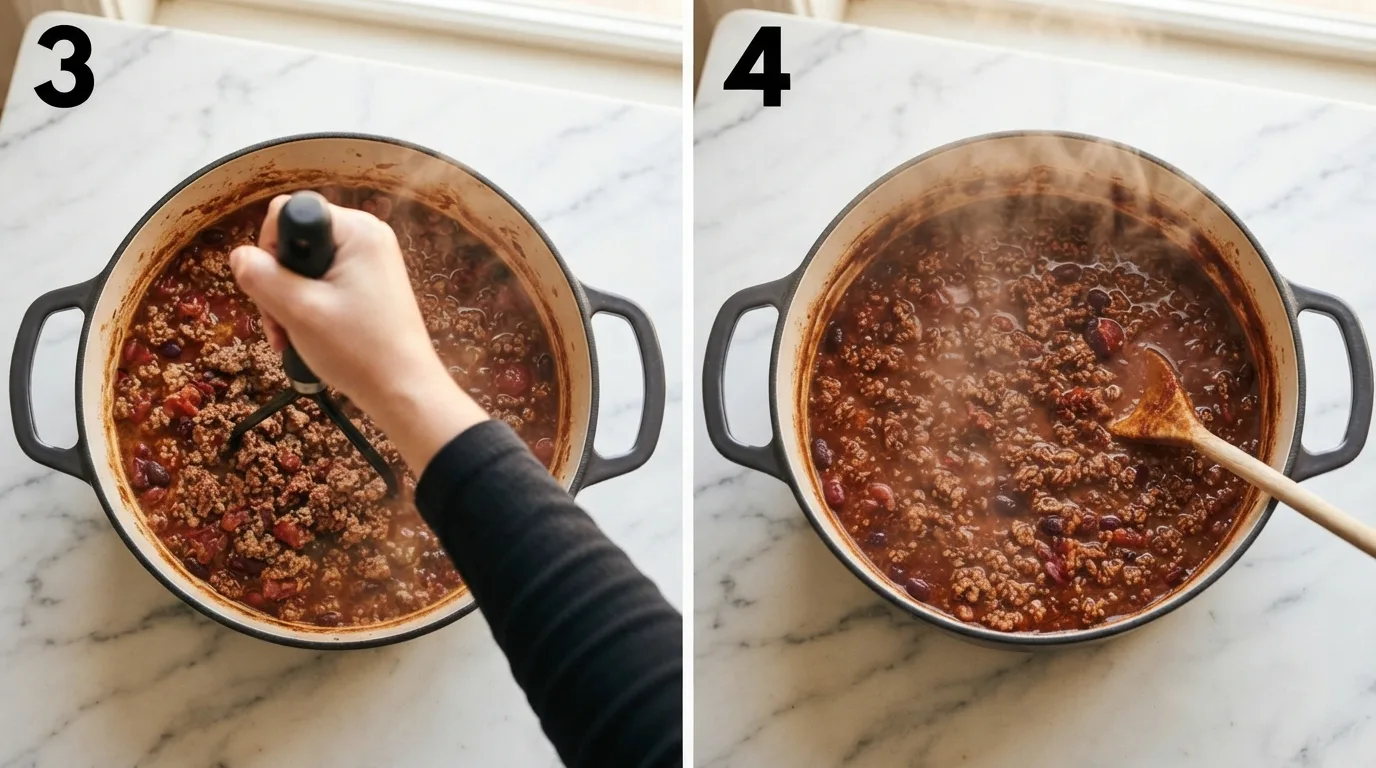
Step 4 — Simmer uncovered and reduce
Let the chili simmer uncovered on low for 45–55 minutes, stirring every 8–10 minutes so the bottom doesn’t scorch. This is the step people rush, and it’s the one that matters most for flavor — the water needs to cook off slowly so the sauce concentrates and darkens. Don’t crank the heat to speed this up. High heat scorches the sugar and tomato paste on the bottom of the pot and turns the whole batch bitter.
Step 5 — Check for the right consistency
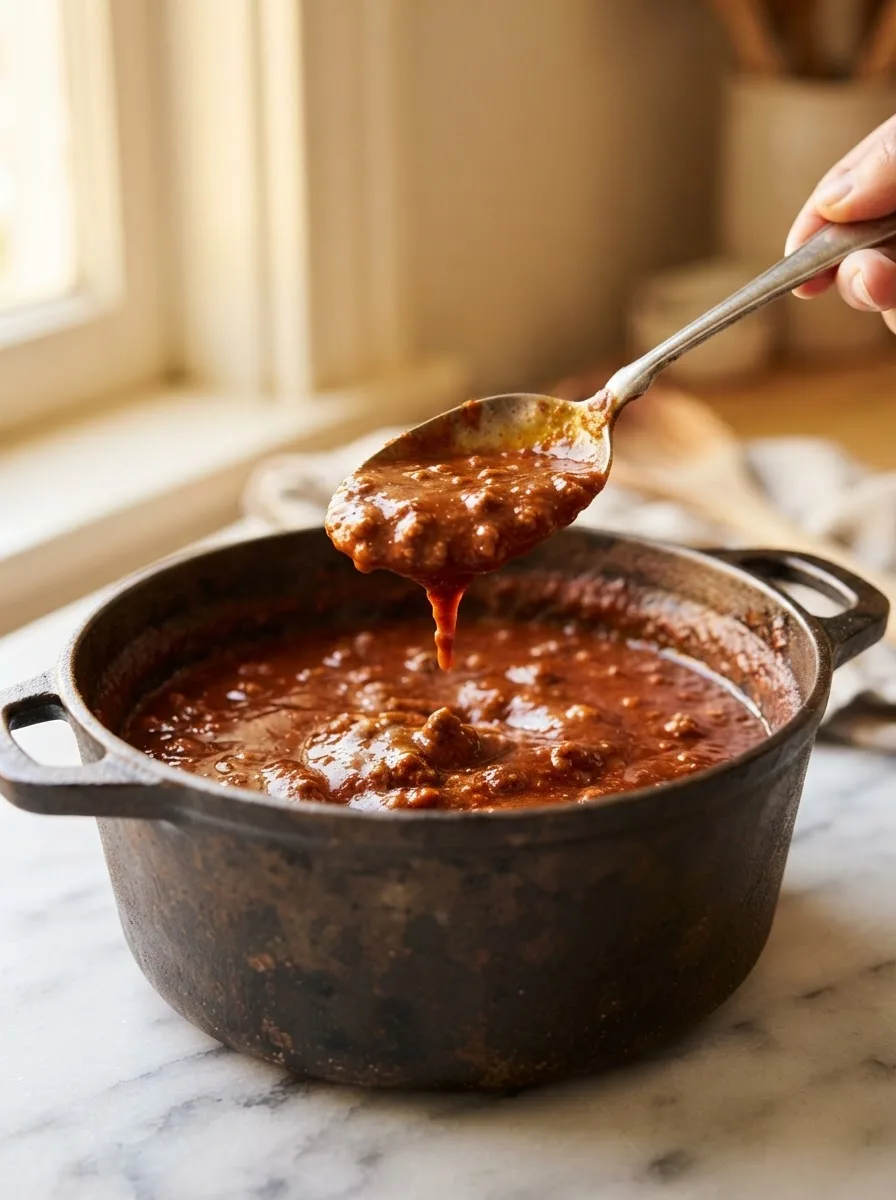
You’re looking for a thick, glossy sauce that coats the back of a spoon and holds its shape without pooling liquid around the edges. If you run a spoon through the middle of the pot, the trail should stay open for a couple of seconds before the sauce settles back. If it still looks soupy, keep simmering in 10-minute increments and check again.
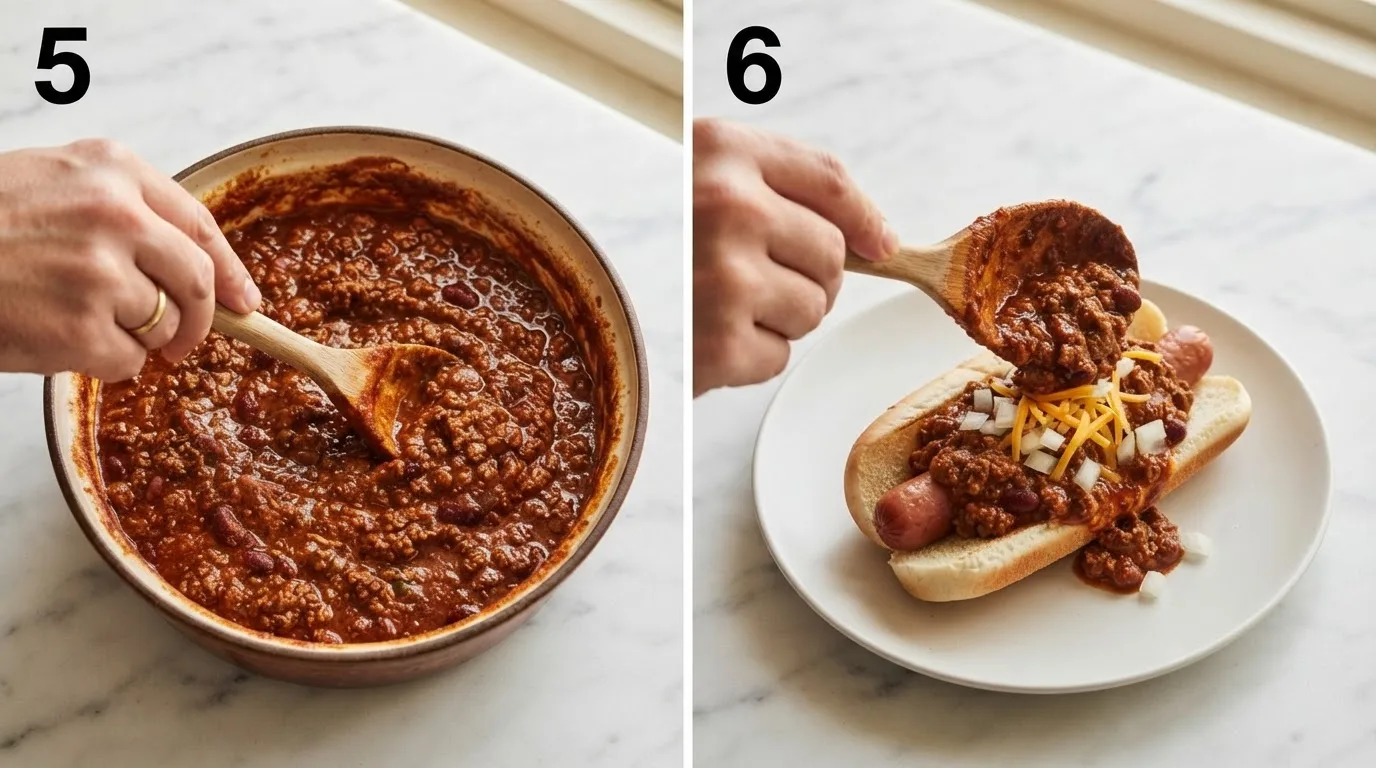
Step 6 — Serve or cool for storage
If you’re serving right away, spoon it hot over hot dogs, burgers, or fries. If you’re making it ahead, let it cool at room temperature for about 30 minutes before transferring to the fridge or freezer — moving a hot pot of anything straight into a sealed container traps steam and can make the texture grainy as it cools.
Pro Tips for Perfect Varsity Chili
Tip 1: Skip the browning step entirely. It’s tempting to sear the beef first out of habit, but browning builds a crust that never fully breaks down under mashing. Cooking straight in water is the entire secret to the texture.
Tip 2: Mash while it’s still hot. As the fat cools, it firms back up and makes the meat harder to break apart. If you let the pot sit and cool before mashing, you’ll be fighting the texture instead of shaping it.
Tip 3: Don’t skip the mustard, and don’t reduce it. It reads as a small amount, but it’s doing the tangy, slightly sharp flavor work that separates this from generic taco meat. I tested a version with half the mustard and it tasted flat.
Tip 4: Low heat during the reduction is non-negotiable. The sugar and tomato paste will scorch on the bottom of the pot if the heat is too high during the long simmer. If you smell anything faintly burnt, turn the heat down immediately and stir up from the bottom.
Variations and Substitutions

Dietary Variations:
- Leaner version: Swap in 90/10 ground beef or ground turkey. The texture will be slightly less silky since there’s less fat rendering into the water, but it still mashes down fine with a little extra patience.
- Lower sodium: Cut the added salt to ¼ teaspoon and season to taste at the end. The mustard and chili powder already carry some sodium, so it’s easy to oversalt if you measure by habit instead of tasting.
Flavor Variations:
- Extra heat: Double the cayenne, or stir in a finely minced jalapeño along with the spices in Step 2.
- Smokier version: Swap in a smoked chili powder, or add ½ teaspoon of smoked paprika alongside the regular chili powder.
Ingredient Substitutions:
- No tomato paste on hand? Use 3 tablespoons of ketchup instead, and skip the added sugar — ketchup brings its own sweetness.
- No yellow mustard? Dijon works in the same amount, though the tang will be noticeably milder.
If you’re building a full backyard spread around this, my cheesy ranch potatoes and sausage makes an easy side that goes in the oven while the chili simmers — no extra pots to watch.
Troubleshooting
My chili is too watery and won’t thicken?
Most likely it hasn’t simmered uncovered long enough. Give it another 15–20 minutes on low, stirring occasionally, and check the spoon test again — the liquid needs time to cook off, and there’s no shortcut for that step.
My chili still has visible chunks of meat?
This usually means the beef was browned in oil before adding water, or the mashing step got skipped. Browned meat develops a crust that resists breaking down no matter how long you mash it. If this happens, pulse the mixture in a food processor in batches to salvage the texture.
My chili tastes flat, not like the real thing?
Check whether you measured the mustard by eye instead of the full 3 tablespoons — it’s an easy one to shortchange, and it’s doing more flavor work than it looks like on paper. A pinch more salt at the very end can also wake up the whole batch.
Storage and Make-Ahead
Counter: Safe for up to 2 hours after cooking, then it needs to go into the fridge.
Refrigerator: Store in an airtight container for up to 5 days. The flavor actually improves by day two as the spices settle in.
Freezer: Cool completely, then freeze in an airtight container or freezer bag for up to 3 months. Portion it into smaller containers if you want to thaw only what you need at a time.
Reheating: Warm gently on the stovetop over low heat with a splash of water to loosen it back up, stirring often. In the microwave, reheat in 30-second bursts, stirring between each, to avoid a rubbery texture.
Make-Ahead: This is genuinely better made a day or two ahead. Make it fully, cool, refrigerate, then reheat gently before serving — it holds its texture well and the flavor has more time to come together.
Frequently Asked Questions
Q: What makes Varsity chili different from regular chili? A: It’s a fine, saucy meat topping rather than a bowl-style chili — no beans, no visible chunks of meat or tomato. It’s cooked and mashed specifically to be smooth enough to top a hot dog without falling off.
Q: Is this recipe spicy? A: It’s mild by default, with just a background warmth from the cayenne. Increase the cayenne or add a diced jalapeño if you want more heat — see the Flavor Variations above.
Q: Does Varsity chili have beans? A: No. Beans (and diced tomatoes, and bell peppers) all work against the fine, saucy texture that makes this recipe what it is. Leave them out.
Q: Can I use ground turkey instead of beef? A: Yes, though the texture will be slightly less rich since turkey has less fat to render into the water. It still mashes down fine — just give it a few extra minutes with the masher.
Q: Can I make this in a slow cooker? A: You can cook the beef and water on the stovetop first, then transfer everything to a slow cooker on low for 3–4 hours with the lid slightly cracked to let liquid evaporate. You’ll still need to mash it by hand partway through.
Q: How long does it keep in the fridge? A: Up to 5 days in an airtight container. It reheats well and the flavor holds up nicely.
Q: Can I freeze it? A: Yes — it freezes for up to 3 months and reheats without losing its texture, which makes it a genuinely good freezer staple.
Q: What else can I serve this on besides hot dogs? A: Burgers, fries, baked potatoes, or a bed of nachos all work well. It’s built as a topping, so anything that benefits from a saucy, savory layer is fair game.
More Comfort Food Recipes You’ll Love
- Cheesy Ranch Potatoes and Sausage — an easy oven-baked side that pairs perfectly with a platter of chili dogs
- Dolly’s Chicken and Stuffing Casserole — another cozy, no-fuss comfort dinner for busy nights
- Cheesecake Bread — a sweet finish if you’re building out a full menu
- Banana Tempura — a fun, crispy dessert option for a game-day spread

Varsity Chili Recipe (Tested 4 Times)
Ingredients
For the Chili:
- 2 lb ground beef (80/20)
- 2 cup water
- 3 tbsp yellow mustard
- 3 tbsp tomato paste
- 2 tbsp chili powder
- 1 tbsp ground cumin
- 1 tsp cayenne pepper (adjust to taste)
- 1 tsp onion powder
- 1 tsp garlic powder
- 1 tsp salt, plus more to taste
- 1/2 tsp black pepper
- 1 tsp granulated sugar (optional)
Instructions
- Add the ground beef and water to a large heavy-bottomed pot over medium heat. Break the beef apart with a wooden spoon as it heats, cooking it through without browning it — about 8–10 minutes, until no pink remains.
- Stir in the mustard, tomato paste, chili powder, cumin, cayenne, onion powder, garlic powder, salt, pepper, and sugar. Stir well to combine.
- Reduce heat to low. Mash the mixture with a potato masher on and off for about 10 minutes, breaking the beef down into fine fragments.
- Simmer uncovered on low for 45–55 minutes, stirring every 8–10 minutes to prevent scorching, until the sauce has reduced and thickened.
- Check consistency: the chili should coat the back of a spoon and hold a trail briefly when a spoon is dragged through the center. If it’s still thin, continue simmering in 10-minute increments.
- Serve hot over hot dogs, burgers, or fries. If making ahead, cool for 30 minutes at room temperature before refrigerating.
Notes
- Use 80/20 ground beef, not a leaner blend — the fat is what gives this its signature glossy texture.
- Cooking the beef in water instead of browning it in oil is the entire trick to the fine, no-chunks texture. Don’t skip this step or sear the meat first.
- For an ultra-smooth, restaurant-style texture, pulse the finished chili in a food processor in two batches after it’s done simmering.
- Keep the heat low during the long simmer — high heat scorches the sugar and tomato paste on the bottom of the pot and turns the batch bitter.
- This recipe keeps in the fridge for up to 5 days and actually tastes better on day two.
- Freezes well for up to 3 months in an airtight container; reheat gently with a splash of water to loosen the texture.
- If doubling the recipe, use a wider pot rather than a deeper one — this helps the extra liquid evaporate at the same rate during the simmer.
- Taste and adjust salt at the very end of cooking, after the sauce has reduced, since the flavor concentrates significantly during the simmer.