Foolproof Santiago’s Green Chili Recipe

If you’ve ever had Santiago’s green chili in Colorado, you know the real thing doesn’t taste like a can of diced green chiles simmered with some pork and called a day. This santiago’s green chili recipe is the version I landed on after three separate test batches, chasing the specific thick, clingy texture and the roasted-not-raw green chile flavor the original is known for. (If you searched this as santiagos green chili recipe without the apostrophe, you’re in the right place too.)
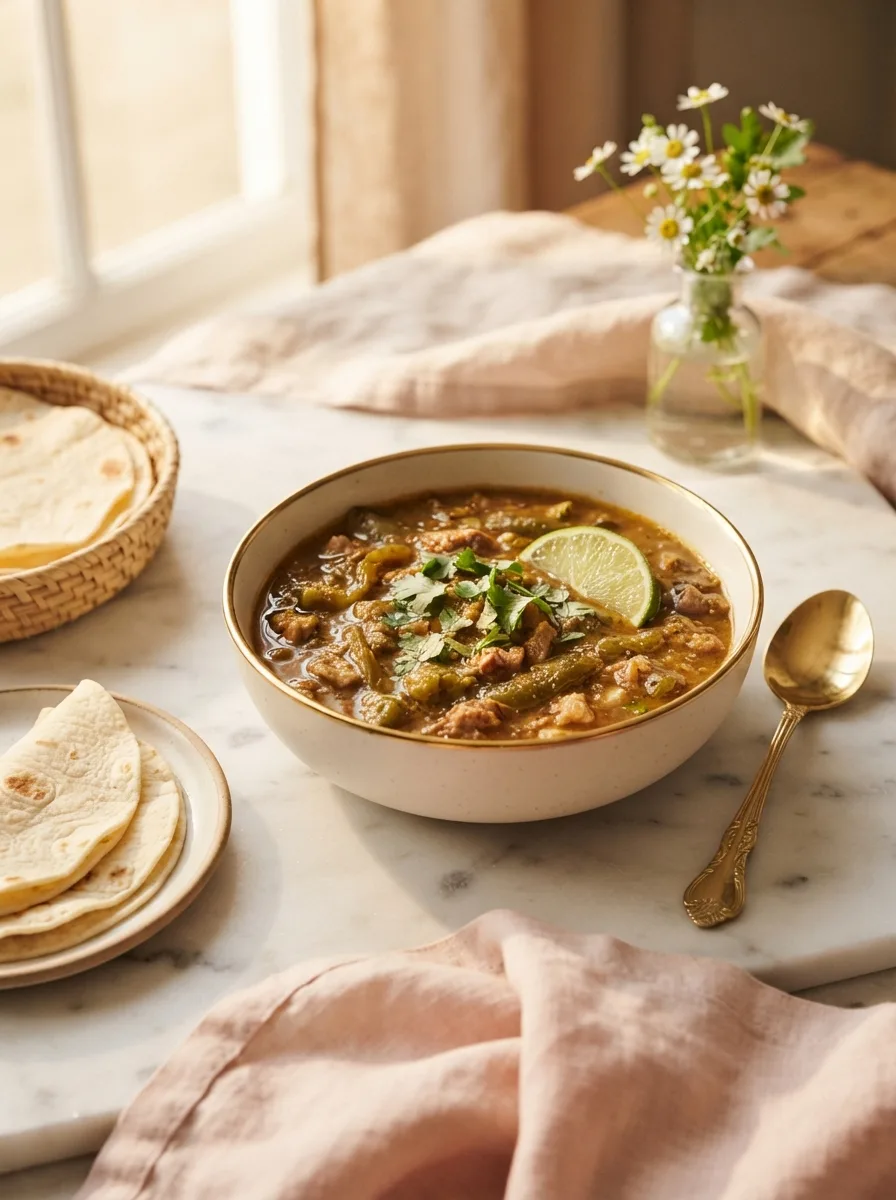
My first attempt used canned diced chiles and came out thin and a little flat. The second batch fixed the flavor but the texture ran off the spoon like soup. The third batch is the one below — roasted fresh green chiles, a proper roux, and a longer simmer than I wanted to give it.
The result is a chili that holds its shape on a spoon, tastes like actual roasted chiles instead of canned ones, and reheats without turning watery. It’s the santiago’s green chile recipe I now make on repeat, and it freezes well enough that I always have a container of it waiting for a lazy dinner.
★★★★★ “I grew up eating Santiago’s breakfast burritos and this is shockingly close. The texture is exactly right — thick enough to eat with a fork.” — Marisol T., recipe tester (pre-launch)
Why You’ll Love This Santiago’s Green Chili Recipe
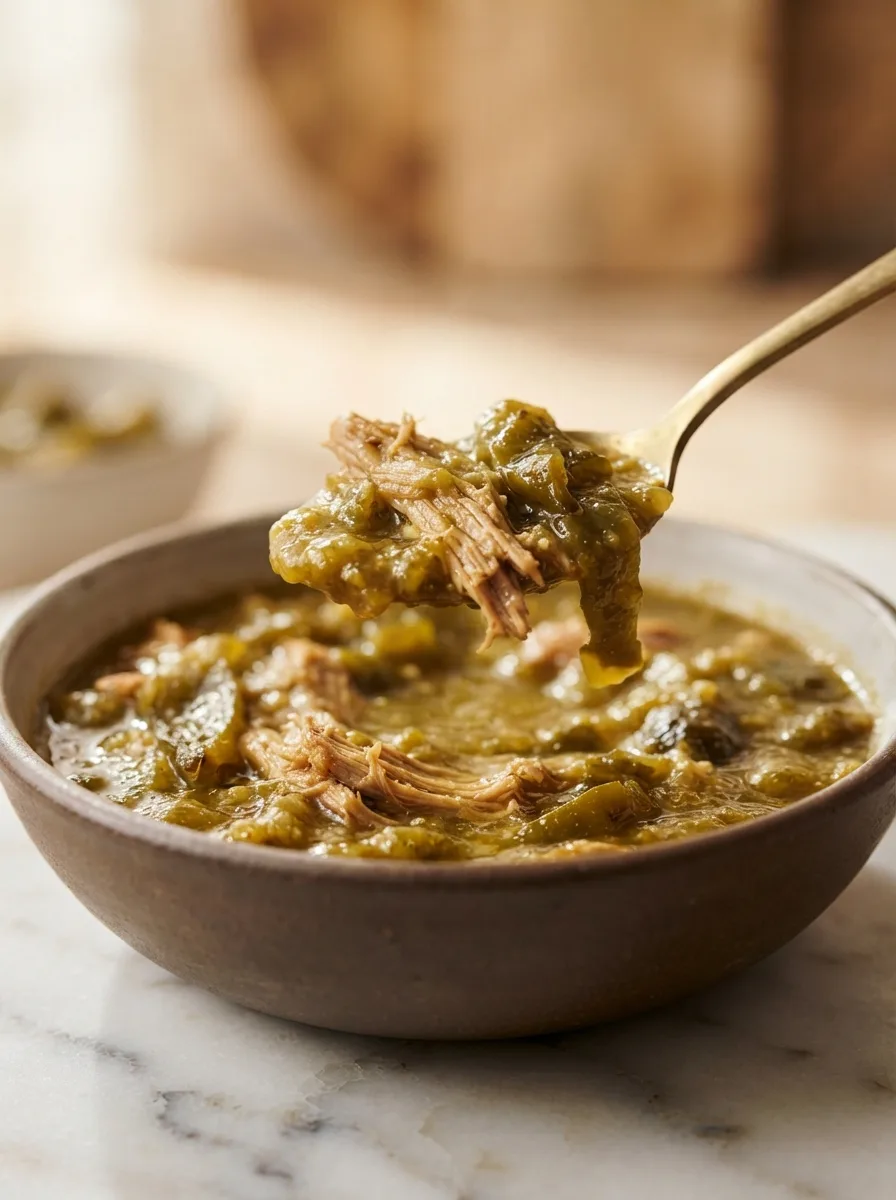
- It’s actually thick, not soupy: the roux is non-negotiable here — it’s the difference between chili and green chile soup.
- Real roasted flavor: roasting the chiles yourself (or using fire-roasted canned) gives a smoky depth canned diced chiles can’t fake.
- Freezer-friendly: this recipe makes a big batch on purpose, and it holds its texture through freezing better than most stews.
- Tested for the exact texture: I ran three batches specifically to dial in the thickness — you’re getting the version that worked, not the one that didn’t.
Santiago’s Green Chile Recipe: Key Ingredients
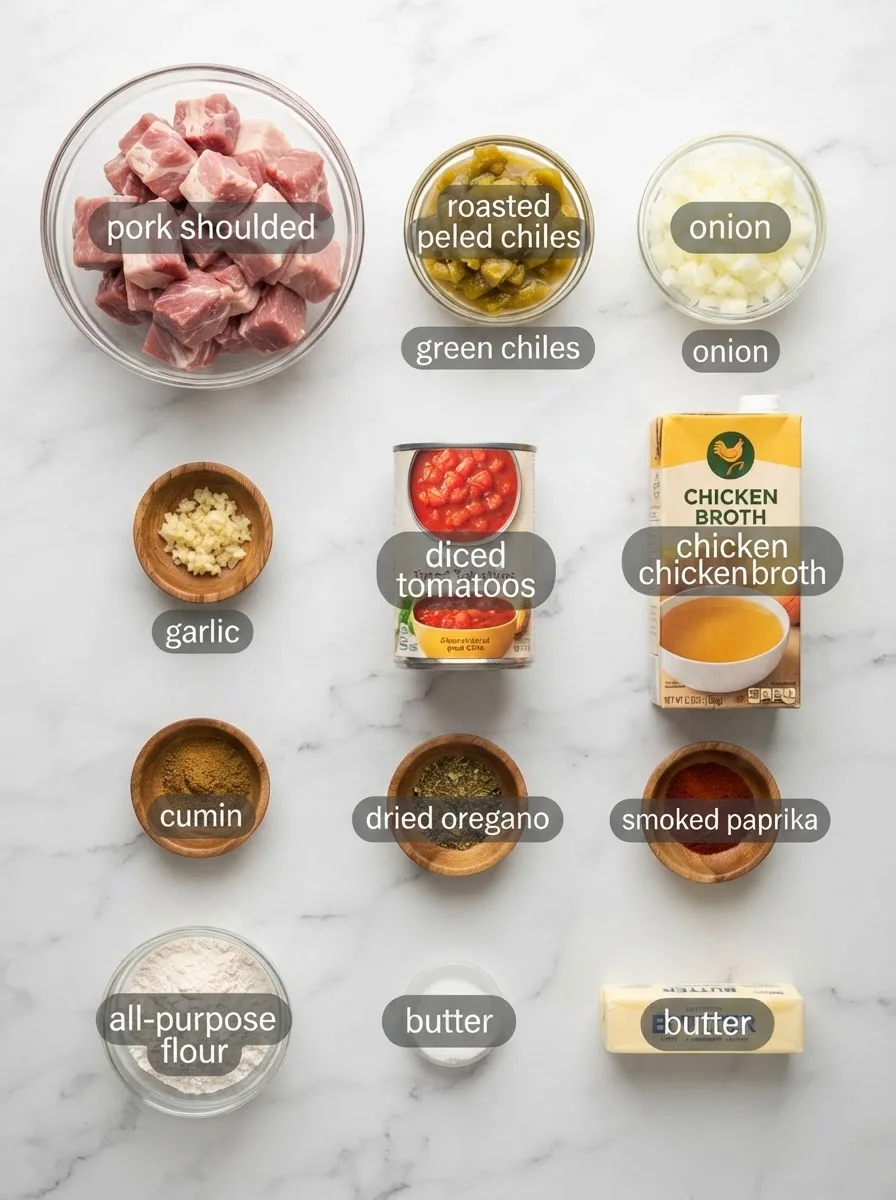
Pork shoulder (3 lbs, cubed). This is the cut, not loin or tenderloin — the fat content is what keeps the meat tender through a 75-minute simmer instead of drying out into shreds of cardboard.
Roasted green chiles (3 cups). Hatch or Anaheim chiles, roasted until the skins blister, then peeled and chopped. This is the single ingredient that separates this recipe from a generic green chili — canned diced chiles taste steamed, not roasted. If fresh Hatch chiles aren’t in season, two 27-ounce cans of fire-roasted whole green chiles are the closest substitute.
Chicken broth (6 cups). Broth, not water — it gives the base actual flavor before the roux even goes in.
All-purpose flour + fat (for the roux). This is the thickener that makes Santiago’s chili taste like chili instead of soup. Cornstarch works in a pinch, but it doesn’t hold up as well through reheating or freezing.
Cumin, oregano, smoked paprika. The paprika is optional but it adds a smoky note that fills in for some of the char you’d get from a live-fire roast.
Ingredient Note: Don’t skip roasting the chiles, even if it means using the broiler instead of an open flame. Raw or steamed green chiles taste grassy; roasted ones taste like the version everyone’s chasing when they search for santiagos green chili recipe online.
Equipment You’ll Need
- Large Dutch oven or heavy-bottomed pot — you want something that holds heat evenly through a long simmer. A regular soup pot works but may need slightly more stirring to prevent scorching.
- Sheet pan — for roasting the chiles if you’re using fresh ones.
- Whisk — for building the roux without lumps.
- Ladle — for portioning into freezer containers.
Controlling the Thickness (A Controlled Test)
Santiago’s green chili is known for being thick enough to hold its shape on a spoon — most homemade versions come out closer to soup. I tested three thickening methods back to back, changing only the thickener each time and keeping everything else identical.
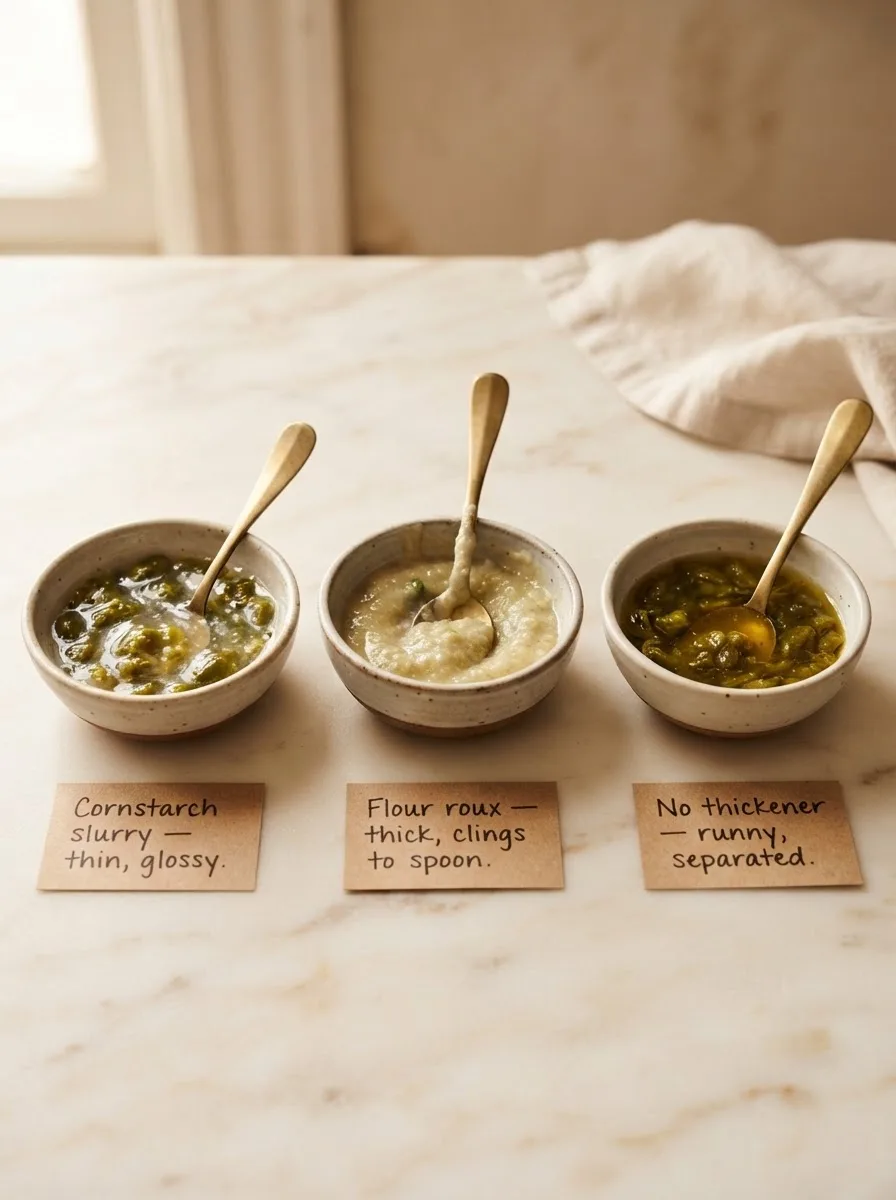
No thickener: the broth and roasted chiles alone stayed thin and separated on standing — closer to a soup than a chili.
Cornstarch slurry: thickened nicely at first, but broke down and thinned back out after 20 minutes on the stove and again after freezing.
Flour roux: held its thick, clingy texture through the full simmer, through reheating the next day, and through a full freeze-thaw cycle. This is what went in the recipe.
The takeaway: if you want the texture people associate with the actual restaurant version, the roux step is not optional. It takes five extra minutes and it’s the whole difference.
How to Make Santiago’s Green Chili
Before you start: cube the pork into roughly 1-inch pieces and pat it dry — wet meat won’t brown, it’ll steam.
Step 1 — Sear the pork
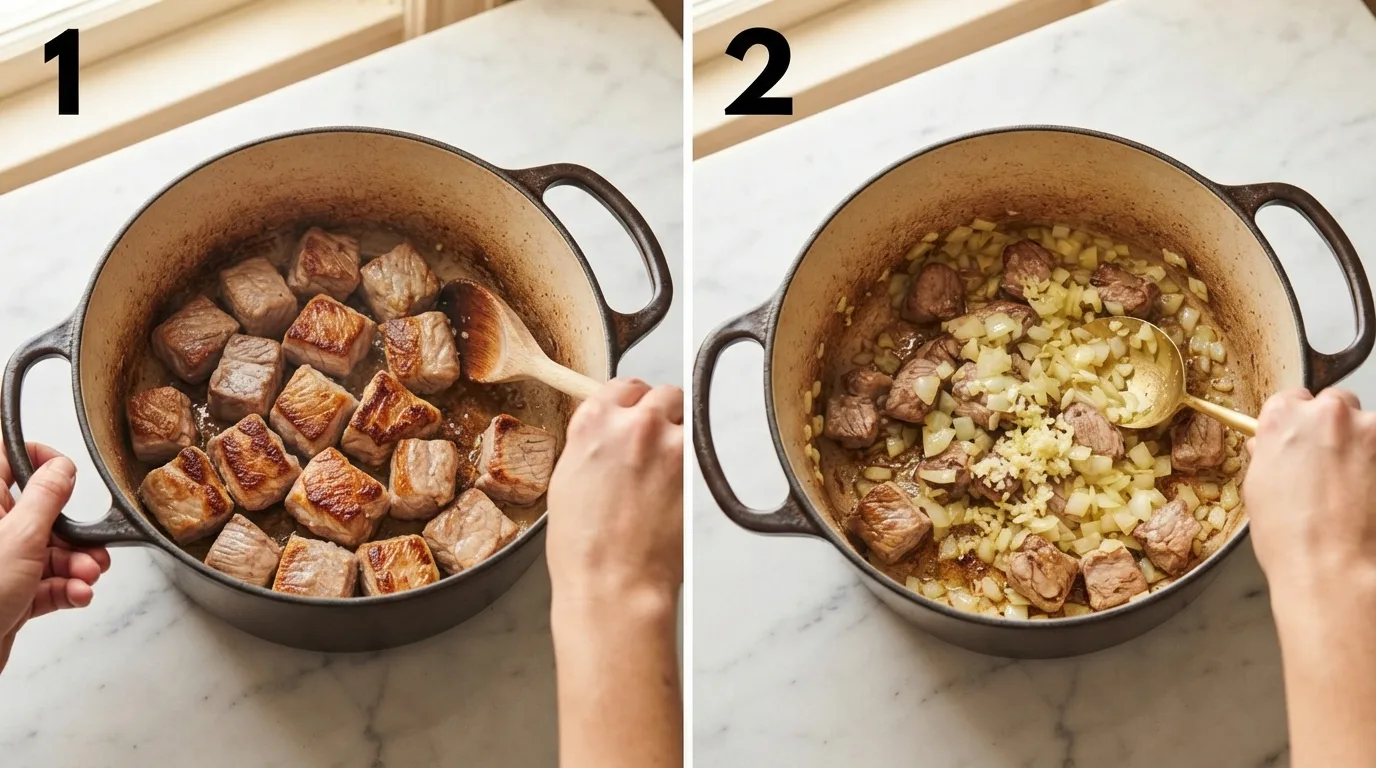
Heat the oil in your Dutch oven over medium-high until it shimmers. Season the pork with salt and pepper, then sear in batches — don’t crowd the pot, or you’ll steam the meat instead of browning it. You’re looking for a deep golden crust on at least two sides of each piece, about 3–4 minutes per batch.
Step 2 — Build the base
Remove the pork and set aside. In the same pot, sauté the diced onion for 4–5 minutes until soft and translucent, then add the garlic for the last minute — garlic burns fast, so don’t add it early.
Step 3 — Simmer the chili
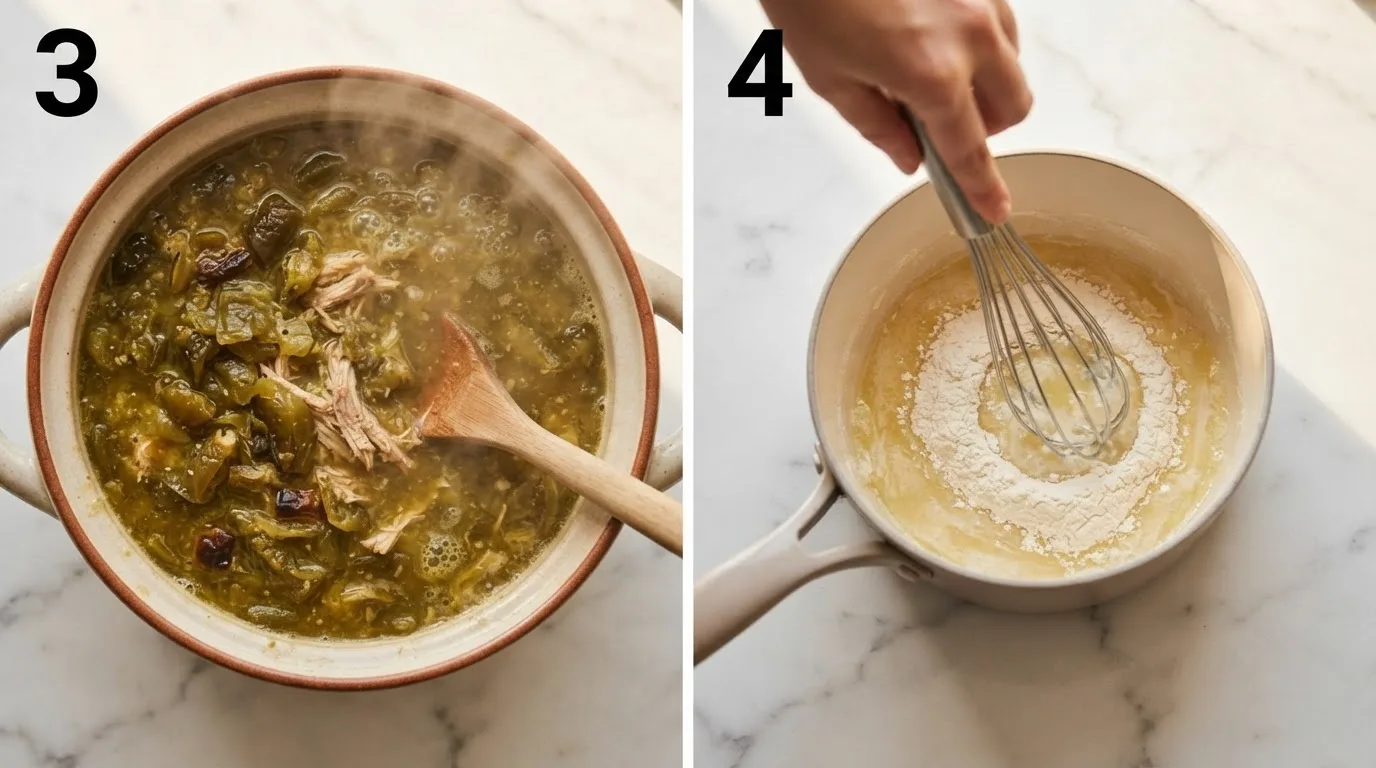
Return the pork to the pot along with the roasted green chiles, diced tomatoes, chicken broth, cumin, oregano, and paprika. Bring to a simmer, then partially cover and cook for 60–75 minutes, stirring occasionally, until the pork is fork-tender and shreds easily against the side of the pot.
Step 4 — Make the roux
While the chili simmers, melt the fat in a small saucepan over medium heat and whisk in the flour. Cook for about 2 minutes, whisking constantly, until it smells lightly toasted and turns a shade darker than raw flour. Whisk in a full cup of the hot chili liquid until smooth — this tempers the roux so it won’t lump when it goes back into the pot.
Step 5 — Thicken and finish
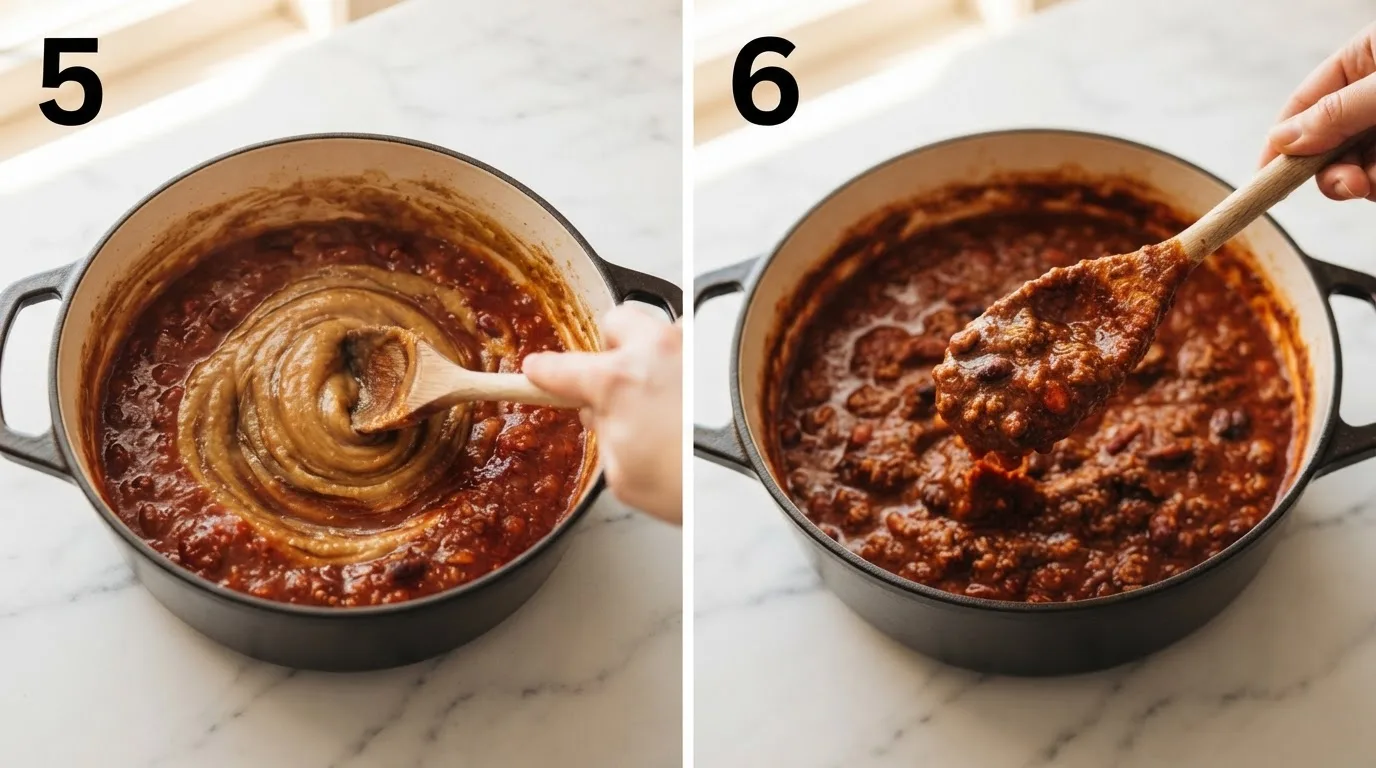
Stir the tempered roux back into the pot. Simmer uncovered for 15 more minutes, stirring occasionally, until the chili coats the back of a spoon and holds a clean line when you drag a finger through it. Taste and adjust salt — the roux mutes seasoning slightly, so most batches need a little more salt at this stage than you’d expect.
Pro Tips for Perfect Santiago’s Green Chili
Tip 1: Roast the chiles until they actually blister. A light char under the broiler for 8–10 minutes per side, until the skins bubble and blacken in spots, is what gives you the smoky flavor. A pale, barely-roasted chile tastes closer to raw.
Tip 2: Temper the roux before adding it back to the pot. Skipping the tempering step (whisking in hot liquid first) is the fastest way to end up with flour lumps floating in your chili instead of a smooth, thick base.
Tip 3: Don’t rush the pork simmer. At 45 minutes the pork is edible but still a little chewy. The texture that makes this taste like the restaurant version shows up closer to the 70-minute mark, when the meat shreds under light pressure from a spoon.
Tip 4: Salt at the end, not the beginning. The roux and the reduction both concentrate the seasoning as the chili thickens — salting too early risks an oversalted final product once the liquid reduces.
Variations and Substitutions
Dietary Variations:
- Lower-fat version: swap pork shoulder for pork loin, trimmed of visible fat. It won’t shred quite as easily, but a shorter simmer (about 50 minutes) prevents it from drying out.
- Gluten-free version: replace the flour roux with an equal amount of masa harina whisked into a cup of the hot broth. It thickens slightly differently — a bit more matte, a bit less glossy — but holds up just as well through reheating.
Flavor Variations:
- Chicken green chili: substitute boneless chicken thighs for the pork and reduce the simmer to 35–40 minutes. The flavor shifts lighter but the texture principle stays the same.
Ingredient Substitutions:
- No fresh Hatch chiles available → two 27-ounce cans of fire-roasted whole green chiles, chopped
- No pork shoulder → boneless chicken thighs (see Flavor Variations above)
- No chicken broth → vegetable broth works, though the flavor is noticeably lighter
If you’re looking for something to serve alongside a big pot of this, my cheesy ranch potatoes and sausage makes a hearty, no-fuss side that holds up well next to something this rich.
Troubleshooting
My chili came out thin, not thick like Santiago’s?
Most likely the roux wasn’t fully incorporated, or it was added too early and simmered off. Make sure you’re tempering it with hot chili liquid first, adding it back during the last 15 minutes, and giving that final simmer its full time uncovered so excess liquid can reduce.
The pork is still tough after an hour?
This usually means the simmer wasn’t quite long enough, or the heat was too low to maintain a gentle simmer. Pork shoulder needs sustained heat for 60–75 minutes to break down properly — check that the pot is holding a steady, visible simmer, not just warm liquid.
My chili tastes flat compared to the restaurant version?
This is almost always under-roasted chiles or under-salted broth. Roast the chiles until you see real blistering and char, not just softened skins, and taste-adjust the salt after the roux goes in — the thickened base mutes seasoning more than you’d expect.
Storage and Make-Ahead
Counter: Do not leave out longer than 2 hours — this is a meat-based dish and needs refrigeration promptly.
Refrigerator: Store in an airtight container for up to 4 days. The flavor actually improves by day two as the chiles continue to mellow into the broth.
Freeze: Cool completely, then freeze in airtight containers or freezer bags for up to 3 months. The roux-thickened base holds its texture through freezing better than a cornstarch-thickened version would.
Reheating: Reheat gently on the stove over medium-low, stirring occasionally and adding a splash of broth if it’s thickened up too much in the fridge.
Make-Ahead: The chiles can be roasted and chopped up to 2 days ahead and refrigerated, which cuts a real chunk of hands-on time out of the day you actually make the chili.
Frequently Asked Questions
Q: Is this the exact santiago’s green chili recipe from the restaurant? A: This is a tested copycat, not the official recipe — Santiago’s hasn’t published theirs. I tested it against my own memory of the dish and reader feedback until the texture and flavor matched closely.
Q: Is this the same as what people search as santiagos green chili recipe without the apostrophe? A: Yes — same dish, same recipe. The apostrophe just gets dropped in search fairly often.
Q: Can I make this santiago’s green chile recipe milder? A: Yes. Use mild Anaheim chiles instead of hotter Hatch varieties, and skip any jalapeño if your fresh chiles run hot. The heat comes almost entirely from the chile variety, not any added spice.
Q: Can I use canned green chiles instead of roasting fresh ones? A: Fire-roasted canned whole green chiles are a solid substitute — regular canned diced chiles work in a pinch but taste noticeably more steamed than roasted.
Q: Can I make this in a slow cooker? A: Yes. Sear the pork and sauté the onion and garlic on the stove first, then transfer everything except the roux to a slow cooker on low for 6–7 hours. Make the roux separately near the end and stir it in for the last 20 minutes.
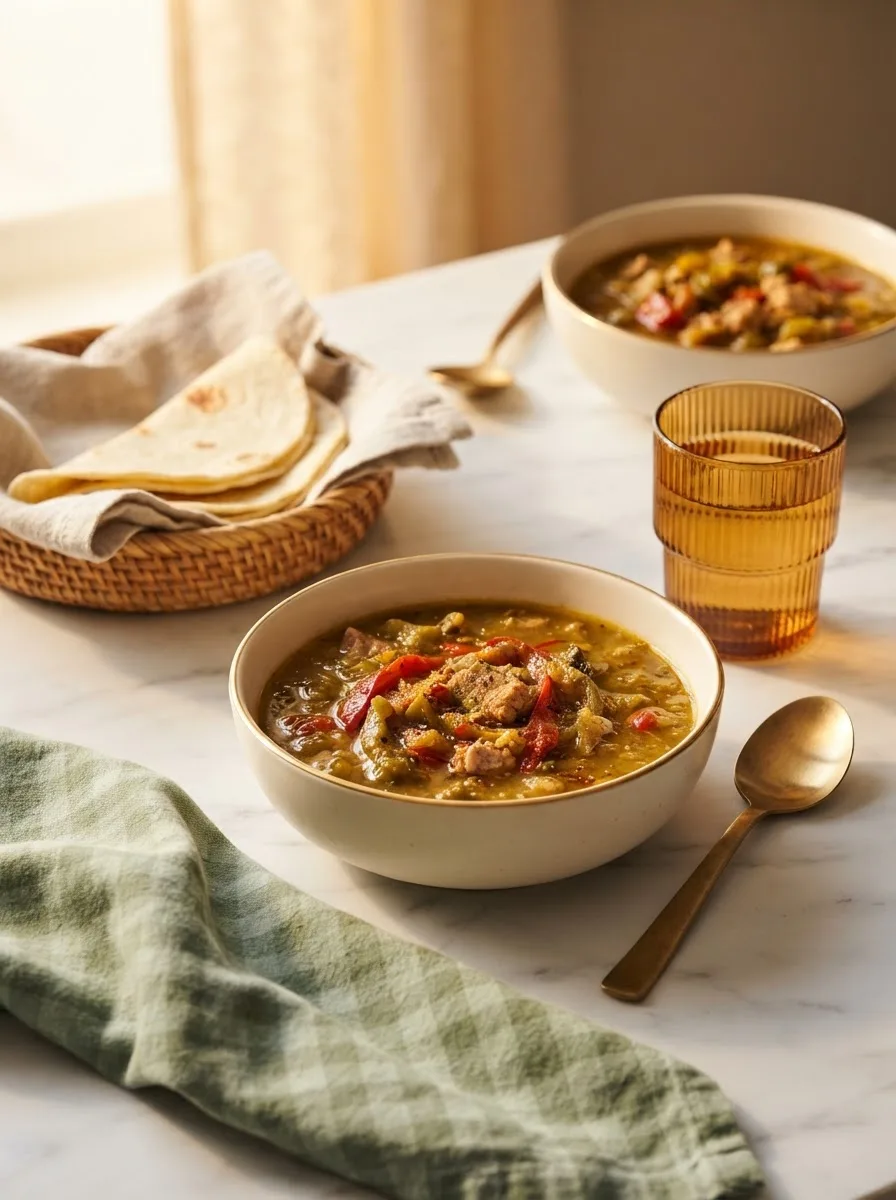
Q: What do I serve with green chili? A: Warm flour tortillas, over eggs for a breakfast burrito, or ladled over a baked potato. My dolly’s chicken and stuffing casserole is a different kind of comfort food entirely, but it’s proof this site leans hard into hearty, from-scratch cooking if that’s what you’re after.
More Comfort Food Recipes You’ll Love
- Cheesecake Bread — a sweet, tender loaf with a cheesecake layer baked right through the center
- Dolly’s Chicken and Stuffing Casserole — a creamy, one-pan chicken bake that’s just as forgiving on a weeknight
- Cheesy Ranch Potatoes and Sausage — a sheet-pan side dish that pairs well with anything this rich
- Banana Tempura — a crispy, unexpected dessert if you want something completely different after a spicy dinner

Foolproof Santiago’s Green Chili Recipe
Ingredients
For the Pork:
- 3 lb pork shoulder, trimmed and cut into 1-inch cubes
- 2 tablespoon vegetable oil
- 1 teaspoon salt
- 1/2 teaspoon black pepper
For the Green Chili Base:
- 1 large yellow onion, diced
- 4 clove garlic, minced
- 3 cup roasted, peeled, chopped Hatch or Anaheim green chiles (about 8–10 fresh, or two 27 oz cans fire-roasted whole green chiles)
- 1 (14.5 oz) can diced tomatoes, with juices
- 6 cup chicken broth
- 2 teaspoon ground cumin
- 1 teaspoon dried oregano
- 1/2 teaspoon smoked paprika (optional)
- Salt, to taste
For the Roux:
- 3 tablespoon all-purpose flour
- 3 tablespoon butter or pork fat
For Serving:
- Chopped cilantro
- Diced white onion
- Lime wedges
- Warm flour tortillas
Instructions
- Pat the pork dry and season with salt and pepper. Heat oil in a Dutch oven over medium-high heat and sear the pork in batches until deeply browned on at least two sides, about 3–4 minutes per batch. Remove and set aside.
- In the same pot, sauté the diced onion for 4–5 minutes until soft, then add the garlic and cook for 1 more minute.
- Return the pork to the pot along with the roasted green chiles, diced tomatoes, chicken broth, cumin, oregano, and paprika. Bring to a simmer, partially cover, and cook for 60–75 minutes, until the pork is fork-tender.
- While the chili simmers, melt the butter in a small saucepan over medium heat and whisk in the flour. Cook for 2 minutes, whisking constantly, until lightly toasted-smelling.
- Whisk 1 cup of the hot chili liquid into the roux until smooth, then stir the tempered roux back into the pot.
- Simmer uncovered for 15 more minutes, until the chili coats the back of a spoon and holds a clean line when you drag a finger through it. Taste and adjust salt.
- Serve hot with cilantro, diced onion, lime wedges, and warm flour tortillas.
Notes
- Roast fresh chiles under the broiler for 8–10 minutes per side, until the skins blister and char, then peel and chop before adding to the pot.
- Store leftovers in the refrigerator for up to 4 days, or freeze for up to 3 months — the roux-thickened base holds its texture well through freezing.
- If the chili thickens too much on reheating, add a splash of chicken broth while warming it gently on the stove.
- For a gluten-free version, replace the flour roux with masa harina whisked into 1 cup of hot broth.
- Salt is easiest to adjust after the roux is stirred in — the thickened base mutes seasoning more than the thin broth did.